How to set up Ubuntu Desktop VM on Amazon EC2
Last updated on September 26, 2020 by Dan Nanni
Amazon Web Services (AWS) EC2 is the most widely used pay-as-you-go type of elastic compute cloud. You can launch a VM instance in a matter of minutes by using one of those Amazon Machine Images (AMIs) offered by EC2.
If your use case of EC2 involves Ubuntu Desktop, you need to understand that it is less straightforward to launch a Ubuntu Desktop VM instance on EC2, due to its desktop environment which needs a screen attached to it.
In this guide, I will describe how to run Ubuntu Desktop on Amazon EC2.
In a nutshell, the approach is to launch a Ubuntu Server instance on EC2 first. Then install desktop environment on it, and access the headless server instance via VNC remote desktop.
Install Ubuntu Desktop on AWS EC2
I assume that you already set up a VM on EC2 by choosing Ubuntu Server AMI. Follow this tutorial to set one up if you haven't done so.
Go ahead and install Ubuntu Desktop on this server instance by running the following command.
$ sudo apt-get install ubuntu-desktop
Reboot the VM instance.
Next, install VNC server on the VM.
$ sudo apt-get install tightvncserver
After installation, launch VNC server (as a non-root user):
$ vncserver :1
The first time you run VNC server, it will ask you for VNC password. The VNC password should be at least 6 characters and up to 8 characters long. If the typed password is longer than that, only the first 8 characters will be used.
Once VNC server is launched successfully, it will create ~/.vnc directory and configuration files in it. A log file for VNC server will be located at ~/.vnc/*.log.
Modify ~/.vnc/xstartup as follows in order to launch GNOME session automatically upon VNC connection.
$ vi ~/.vnc/xstartup
#!/bin/sh
xrdb $HOME/.Xresources
xsetroot -solid grey
export XKL_XMODMAP_DISABLE=1
gnome-session --session=ubuntu-2d
After modifying xstartup file, restart VNC server:
$ vncserver -kill :1
$ vncserver :1
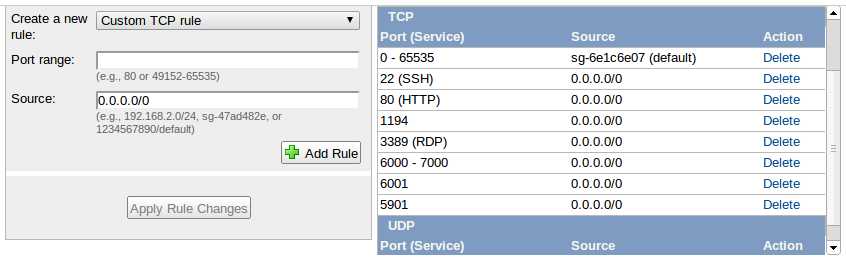
Last but not least, you must modify the security group associated with your EC2 instance, to allow inbound VNC traffic on the EC2 instance. Since VNC uses TCP/5901 port number, add a new inbound TCP rule for port 5901. Make sure to apply the rule change, which will then be activated right away. No need to reboot the VM instance.
This is the end of the procedure for setting up Ubuntu Desktop VM on EC2.
Connect to Ubuntu Desktop VM
On the local host side where you will be running VNC client, follow the rest of the steps below.
First, set up an SSH tunnel to the remote EC2 instance by running the command below. Using an SSH tunnel for VNC session is strongly required since your VNC session goes over the public Internet, and anyone can easily snoop on your VNC traffic.
$ ssh ubuntu@remote_ec2_host -L 5901/127.0.0.1/5901
If the remote EC2 instance is configured to require key authentication, you need to specify your private key with -i option in the above ssh command, as described here.
Once the SSH tunnel is successfully established, install and launch VNC client (gtkvncviewer in this example).
$ sudo apt-get install gtkvncviewer
$ gtkvncviewer
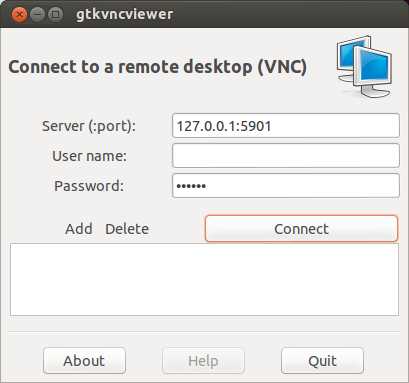
Type in the following VNC server info as follows, and connect. Note that VNC server end point should be 127.0.0.1:5901, not the remote VNC server, since your VNC traffic goes through an SSH tunnel.
- Server:
127.0.0.1:5901 - Password:
your_vnc_password
Once your VNC session is established, you will see the familiar looking Ubuntu Desktop running on EC2.

Support Xmodulo
This website is made possible by minimal ads and your gracious donation via PayPal or credit card
Please note that this article is published by Xmodulo.com under a Creative Commons Attribution-ShareAlike 3.0 Unported License. If you would like to use the whole or any part of this article, you need to cite this web page at Xmodulo.com as the original source.

Xmodulo © 2021 ‒ About ‒ Write for Us ‒ Feed ‒ Powered by DigitalOcean