How to browse the web anonymously with Google Chrome
Last updated on November 15, 2020 by Dan Nanni
Collecting your online activities is a lucrative business for someone else in today's Internet economy. As I speak, your VoIP traffic might be monitored by a secretive surveillance program in the name of national security. For whatever reason, you may want to conduct online business confidentially without being monitored by random eavesdroppers. To protect your online privacy from all these potential adversaries, what you want is online anonymity.
That's what Tor is about, which is a free software that enables you to completely hide your online communication via a large-scale anonymity network. Tor can be used for web browsers, VoIP, instant messaging, remote logins, etc.
In this tutorial, I will describe how to set up Tor so that you can browse the web anonymously inside Google Chrome.
First of all, don't get confused between anonymous browsing and incognito/private browsing natively supported by Google Chrome. The incognito browsing means that your browsing history (including cookies) is not recorded by web browser. Your online communication is still visible by external observers such as web servers and eavesdroppers.
Install Tor on Linux
Tor is available as packages in the native repositories of major Linux distros. However, it is not recommended to use those packages since they might not be patched with the latest stability and security fixes. Instead, use Tor's official package repository to install it.
For Debian, Ubuntu or Linux Mint:
To install Tor on Debian, Ubuntu or Linux Mint, use the following commands.
$ sudo add-apt-repository "deb http://deb.torproject.org/torproject.org $(lsb_release -sc) main"
$ gpg --keyserver keys.gnupg.net --recv 886DDD89
$ gpg --export A3C4F0F979CAA22CDBA8F512EE8CBC9E886DDD89 | sudo apt-key add -
$ sudo apt-get update
$ sudo apt-get install deb.torproject.org-keyring
$ sudo apt-get install tor
Once installed, Tor will be set to auto-start upon boot.
To start Tor for the first time:
$ sudo service tor start
For Fedora, CentOS or RHEL:
To install Tor on Fedora, CentOS or RHEL 6, first add the official yum repository information. In the repository configuration, replace DISTRIBUTION with el/6 (for CentOS/RHEL 6), fc/18 (for Fedora 18), or fc/19 (for Fedora 19), etc.
$ sudo vi /etc/yum.repos.d/tor.repo
[tor]
name=Tor experimental repo
enabled=1
baseurl=http://deb.torproject.org/torproject.org/rpm/DISTRIBUTION/$basearch/
gpgcheck=1
gpgkey=http://deb.torproject.org/torproject.org/rpm/RPM-GPG-KEY-torproject.org.asc

[tor-source]
name=Tor experimental source repo
enabled=1
autorefresh=0
baseurl=http://deb.torproject.org/torproject.org/rpm/DISTRIBUTION/SRPMS
gpgcheck=1
gpgkey=http://deb.torproject.org/torproject.org/rpm/RPM-GPG-KEY-torproject.org.asc
After that, run the following commands to install Tor, and launch it. Optionally, set it to auto-start upon boot.
$ sudo yum install tor
$ sudo service tor start
$ sudo chkconfig tor on
Check if Tor is Running on Linux
First, check the daemon status of Tor:
$ sudo service tor status
* tor is running
Then check the default port number of Tor, and verify that Tor daemon is listening on that port.
$ cat /etc/tor/tor-tsocks.conf
server = 127.0.0.1
server_port = 9050
$ sudo netstat -nap | grep 9050
tcp 0 0 127.0.0.1:9050 0.0.0.0:* LISTEN 12389/tor
Install and Configure Chrome Extension
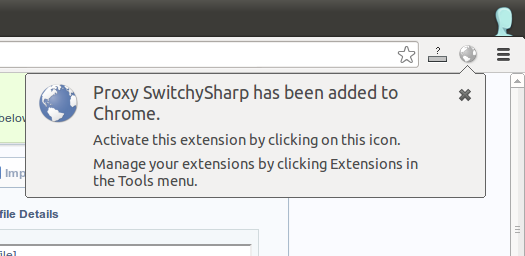
To create Tor on/off button in Google Chrome, install Proxy SwitchySharp extension in Google Chrome.

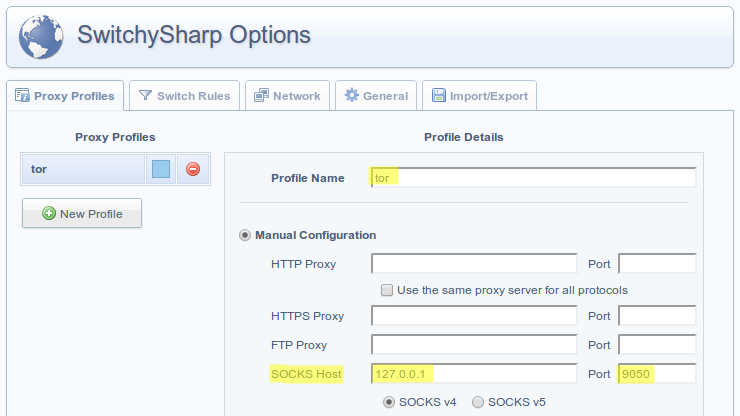
Next, open up Options of Proxy SwitchySharp. Under Proxy Profiles tab, create a new profile called tor, and add the following manual configuration.
- SOCKS Host: 127.0.0.1
- Port: 9050 (which is the Tor port number that you found earlier)

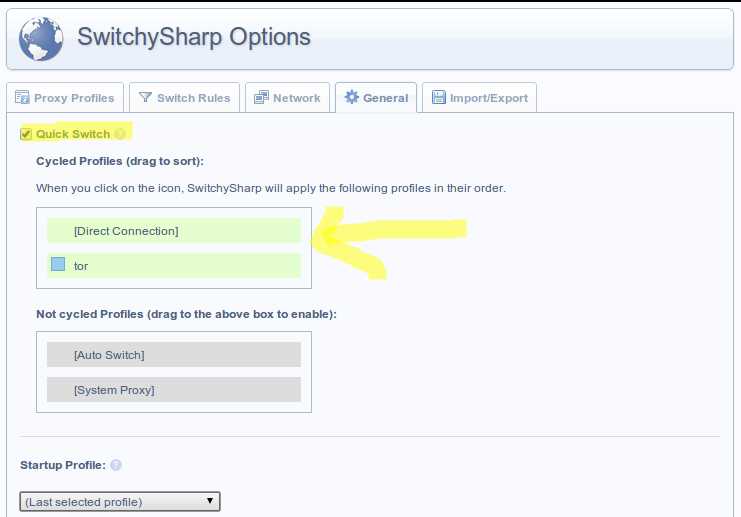
Under General tab, click on Quick Switch checkbox, and populate Cycled Profiles area with Direct Connection and tor options. That way, if you click on SwitchySharp icon multiple times, each of those two settings will be enabled in a rotated fashion. Don't forget to save the change.

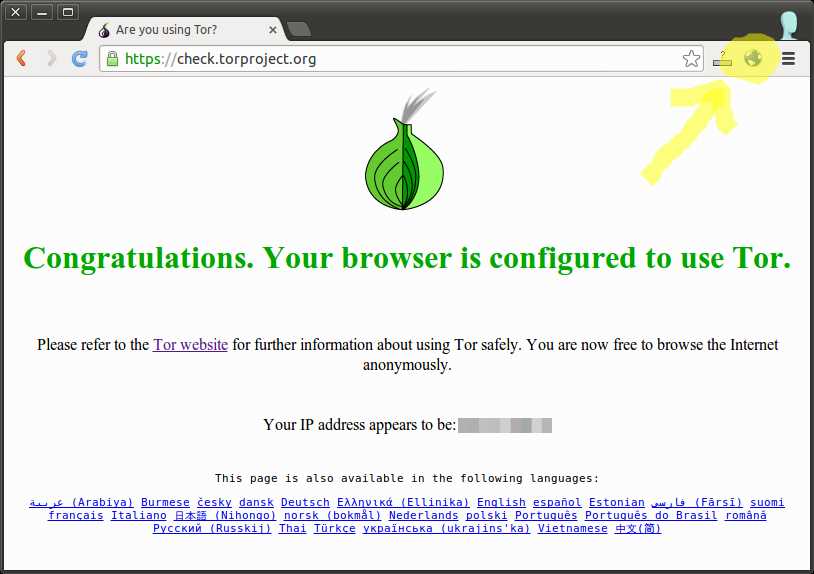
When you click on SwitchySharp icon on the top right corner of Google Chrome, and the icon stays highlighted, this implies that you are using Tor.
To verify that you are indeed connected to the Tor network, go to https://check.torproject.org. You will see the following screen if you are on the Tor network. To switch off Tor, simply click on SwitchySharp icon again to make it grayed out.

Support Xmodulo
This website is made possible by minimal ads and your gracious donation via PayPal or credit card
Please note that this article is published by Xmodulo.com under a Creative Commons Attribution-ShareAlike 3.0 Unported License. If you would like to use the whole or any part of this article, you need to cite this web page at Xmodulo.com as the original source.
Xmodulo © 2021 ‒ About ‒ Write for Us ‒ Feed ‒ Powered by DigitalOcean

