How to configure Raspberry Pi for the first time
Last updated on September 12, 2020 by Kristophorus Hadiono
You have flashed an SD card with Raspberry Pi image, and plugged the SD card into Raspberry Pi. Then what next? The first thing to do after booting Raspberry Pi is to configure your Raspberry Pi. Each Raspberry Pi system comes with its own software configuration tool. For example, use raspi-config for Raspbian, firstboot for Pidora, etc.
In this tutorial, I will explain how to perform initial configurations on Raspbian-powered Raspberry Pi by using raspi-config tool. The first time Raspberry Pi setup includes expanding local file system into the entire SD card space, changing host name, activating SSH service, enabling booting to desktop, etc.
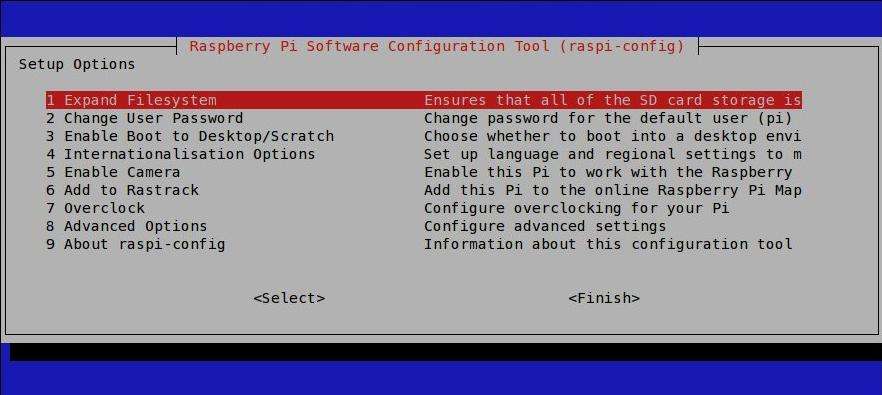
After the Raspbian system is installed on an SD card, put the SD card into the Raspberry card reader. Make sure that everything (e.g., external HDMI monitor/TV, keyboard and mouse) is connected properly. Upon the first time booting, you will see the following setup options appear in the screen. This is a Raspberry Pi configuration tool called raspi-config. You can skip this part, and run the tool later if you know what are you doing. However, it is wise to go through the options for the first time setup.
Expanding the File System
If you wrote Raspbian image to an SD card with dd command, it normally takes around 3GB of your SD card space. This means that if you have 4GB or more in your SD card, the default Raspbian system will not recognize all available SD card space. Then how can you use the remaining space, or in other words, how can you expand the Raspbian file system, so that it recognizes the entire SD card space?
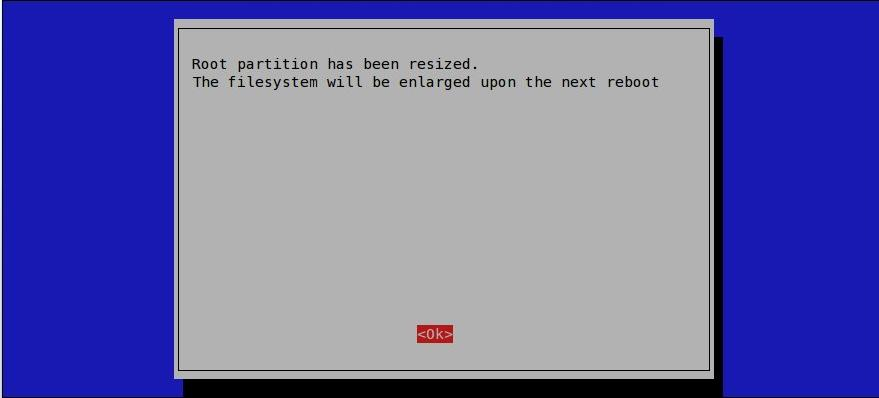
This is when Expand Filesystem menu option can help. Click the option, which will then guide you to expand a root partition with fdisk as shown below.

The resulting partition layout change will take effect after rebooting Raspberry Pi.
Another way to expand the file system into the remaining space is by using Gparted partition editor. If you want to expand the filesystem with Gparted, the following steps should be followed on a separate Linux computer before you boot your Raspberry Pi.
1. Insert your SD card into the SD card reader of you laptop or PC. Do not mount it at this point. If your system automatically mounts the SD card, you have to unmount it, as explained below.
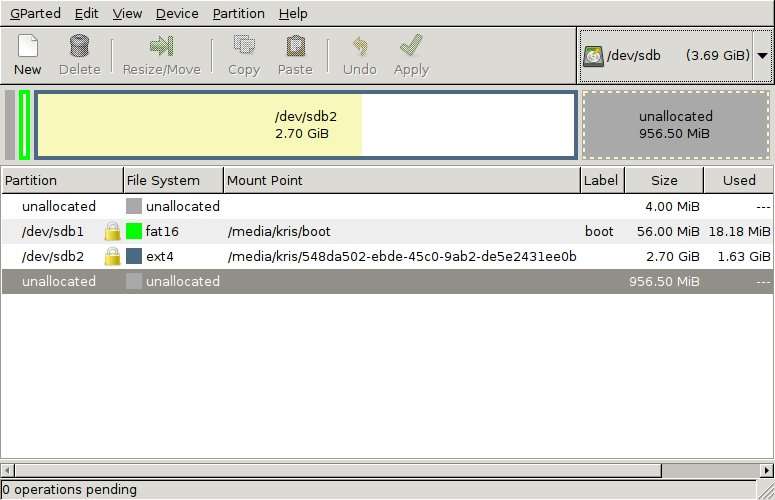
2. Launch Gparted application with root privilege. In my computer, my SD card is detected as /dev/sdb, and automatically mounted by the system (it can be seen by the appearance of yellow padlock icon in the partition column). The remaining space (956.5 MB) was stated unallocated, and we will use this free space for expanding the file system in /dev/sdb2.
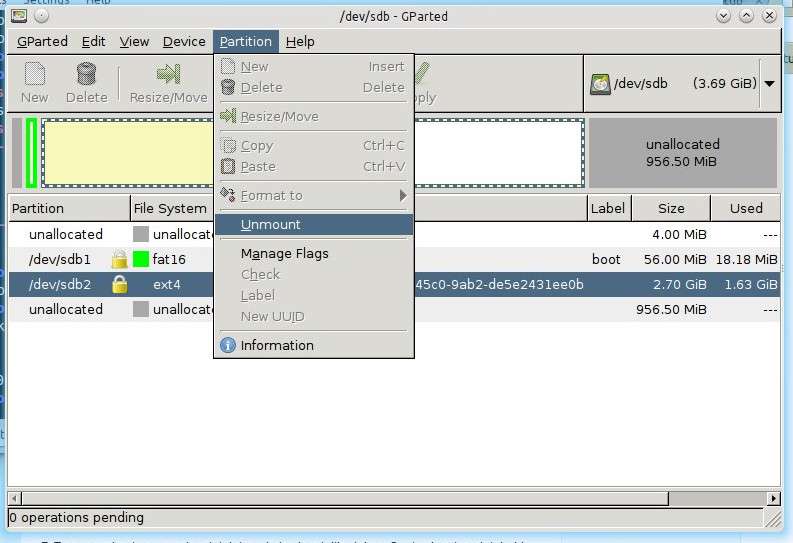
3. Unmount the second partition (/dev/sdb2) by highlighting the /dev/sdb2 partition, and choosing Unmount option under Partition menu.
4. The next step is resizing the partition. Click on Resize/Move icon to launch the resize/move window. Click and drag the right arrow to the right (see the figure below) until the unallocated block completely disappears. Then click on the Resize/Move button at the bottom.
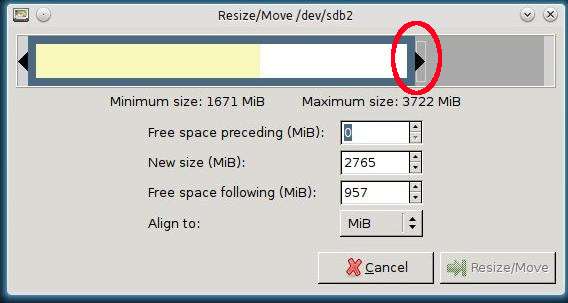
5. After the Resize/Move window disappears, click on Apply icon to make it permanent on the SD card. After the repartitioning process is finished, the final result will look like the following.
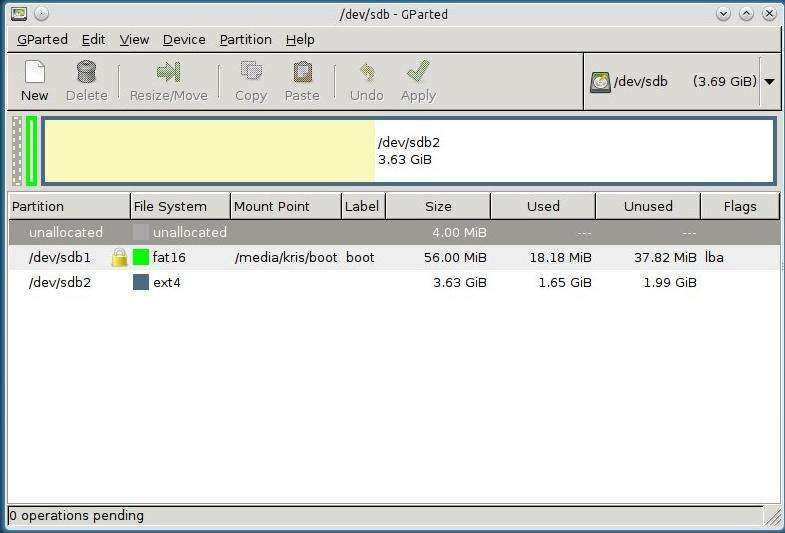
Eject your SD card from your computer. Plug it in into the Raspberry Pi board, and power it on. Now you have the Raspbian file system filling the whole SD card.
Enable Boot to Desktop / Scratch
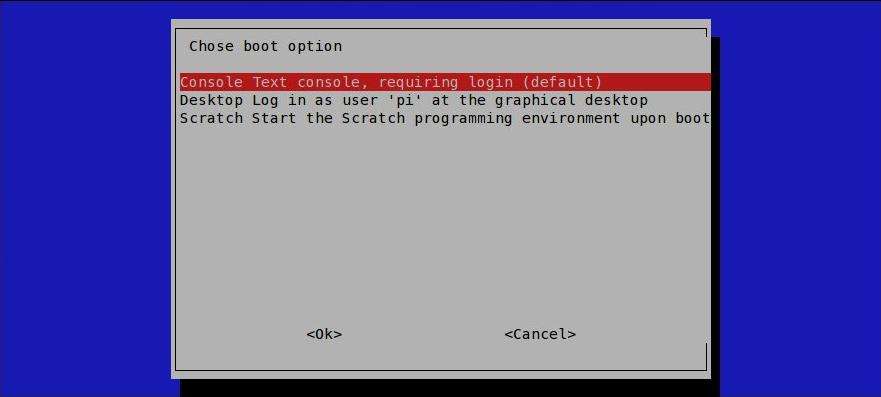
The menu option called Enable Boot to Desktop in raspi-config allows you to automatically launch and log in to the GUI desktop of Raspbian upon booting. You can also enable the Scratch programming environment. By default, Raspbian is set to boot into a text-based console log in. Depending on your use case, enable booting to desktop.
Advanced Options
In the Advanced Options menu, you can manage several important options for Raspberry Pi. Under this menu, you will see several advanced options like below. The Overscan option is useful when you set up an external HDMI monitor or TV properly. The default value is enabled, but to make sure, choose Enable button again inside the Overscan menu.
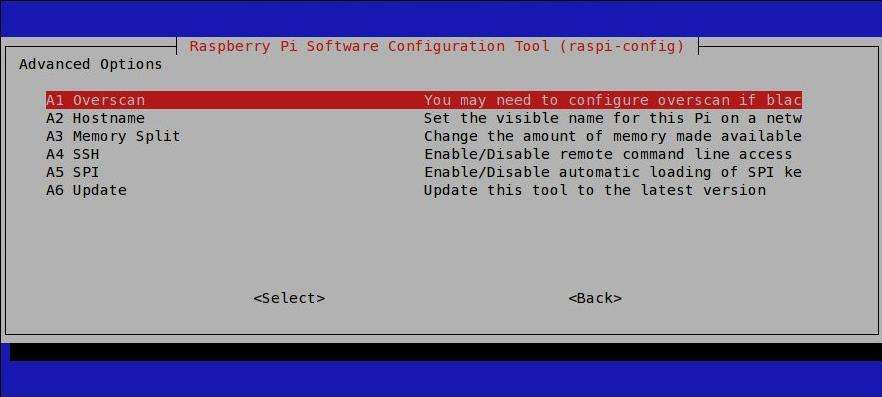
If you want to change the host name of your Raspberry Pi, choose Hostname option, and then type the name that you will use as host name. The default value of host name is raspberry.
Finally, do not forget to activate SSH service in Raspberry Pi by choosing the SSH menu and entering Enable button. The SSH service is needed when you want to run Raspberry Pi headless.
Once you are done with configuration, finish raspi-config, and reboot Raspberry Pi.
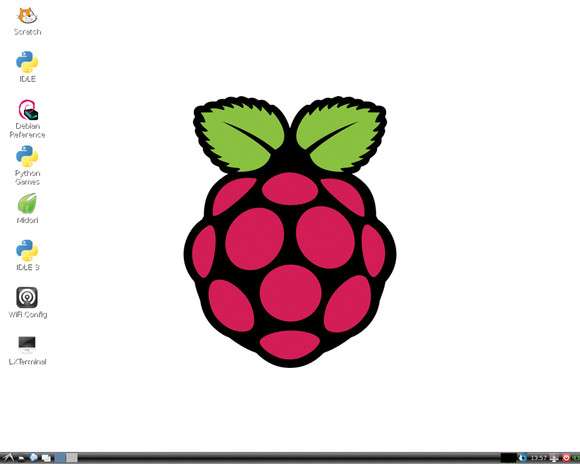
The following screenshot shows the Raspbian GUI desktop with default login (user name: pi, and password: raspberry).
Support Xmodulo
This website is made possible by minimal ads and your gracious donation via PayPal or credit card
Please note that this article is published by Xmodulo.com under a Creative Commons Attribution-ShareAlike 3.0 Unported License. If you would like to use the whole or any part of this article, you need to cite this web page at Xmodulo.com as the original source.
Xmodulo © 2021 ‒ About ‒ Write for Us ‒ Feed ‒ Powered by DigitalOcean

