How to compile and install Nginx web server from source on Linux
Last updated on September 15, 2020 by Dan Nanni
As of today, Nginx is reportedly the most popular web server that powers the top-1000 websites on the Internet, and that is for a good reason. Built under the event-driven architecture, Nginx was designed with scalability in mind from day one. With its ability to sustain 10K concurrent connections with limited hardware, it's no wonder Nginx is being trusted for any mission-critical web server deployment.
In this tutorial, I am going to describe how to compile and install Nginx web server from source. While Nginx is available as a standard package on major Linux distros, you need to build it from source if you want to enable a custom third-party module (e.g., PageSpeed). Note that Nginx does not support loadable modules like Apache web server. You need to choose and include third-party module(s) to use at compile-time.
In this tutorial, I am going to enable the following extra Nginx modules during compile time.
- SSL module: enable HTTPS/SSL support.
- SPDY module: enable experimental support for SPDY.
- Real IP module: change the client's IP address based on HTTP request header.
- Addition module: add text before and after a HTTP response.
- XSLT module: convert an XML response with the help of XSLT templates.
- Image filter module: transform JPG/GIF/PNG images with
libgd. - GeoIP module: geolocate a client' IP address, using MaxMind databases.
- Substitution module: replace a specified string by another in HTTP responses.
- DAV module: enable support for the WebDAV protocol.
- FLV module: enable support for Flash Video (FLV) streaming videos.
- MP4 module: enable support for H.264/AAC streaming videos.
- Gunzip module: decompresses
gzip-compressed responses when necessary. - Gzip static module: send responses with
gzip-precompressed content. - Random index module: serve a randomly chosen index file in a directory.
- Secure link module: check authenticity of requested links.
- Stub status module: get some status from Nginx.
- Perl module: allow Perl in Nginx config files.
- Mail SSL module: enable support for SSL/TLS protocol for mail proxy server.
- Google Perftools module: enable Google performance tools profiling.
Install Prerequisites
First, install necessary packages to build Nginx as well as extra Nginx modules.
On Debian, Ubuntu or Linux Mint:
$ sudo apt-get install build-essential zlib1g-dev libpcre3-dev libssl-dev libxslt1-dev libxml2-dev libgd2-xpm-dev libgeoip-dev libgoogle-perftools-dev libperl-dev
On Fedora, CentOS or RHEL:
$ sudo yum install gcc-c++ pcre-devel zlib-devel make wget openssl-devel libxml2-devel libxslt-devel gd-devel perl-ExtUtils-Embed GeoIP-devel gperftools-devel
Nginx Compilation
Download the latest stable version of Nginx from the official site.
$ wget http://nginx.org/download/nginx-1.4.4.tar.gz
Extract the content. Then run configure with appropriate options, and install it as follows.
$ tar xvfvz nginx-1.4.4.tar.gz
$ cd nginx-1.4.4
$ ./configure --prefix=/usr/local/nginx --sbin-path=/usr/local/sbin/nginx --conf-path=/etc/nginx/nginx.conf --error-log-path=/var/log/nginx/error.log --http-log-path=/var/log/nginx/access.log --pid-path=/run/nginx.pid --lock-path=/run/lock/subsys/nginx --user=nginx --group=nginx --with-file-aio --with-ipv6 --with-http_ssl_module --with-http_spdy_module --with-http_realip_module --with-http_addition_module --with-http_xslt_module --with-http_image_filter_module --with-http_geoip_module --with-http_sub_module --with-http_dav_module --with-http_flv_module --with-http_mp4_module --with-http_gunzip_module --with-http_gzip_static_module --with-http_random_index_module --with-http_secure_link_module --with-http_degradation_module --with-http_stub_status_module --with-http_perl_module --with-mail --with-mail_ssl_module --with-pcre --with-google_perftools_module --with-debug
$ make
$ sudo make install
Post Installation Steps
Create a system user/group nginx which Nginx will run as.
$ sudo useradd -r nginx
Create an init script which will start/stop Nginx. You can download init scripts for different Linux environments from the official site.
At this point, you should be able to start Nginx as follows.
$ sudo systemctl start nginx
Or:
$ sudo service nginx start
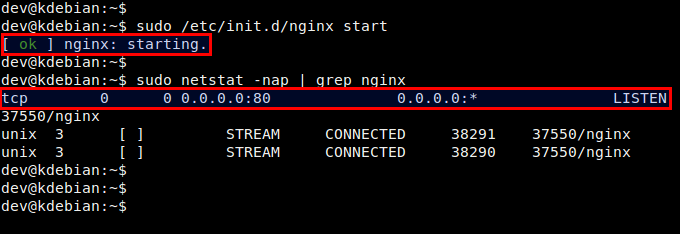
Verify that Nginx is running okay.
$ sudo netstat -nap | grep nginx

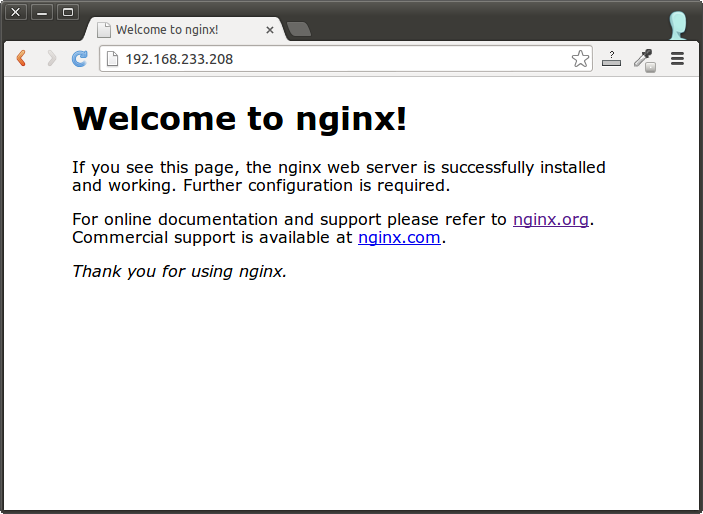
After verifying this, point your web browser to the IP address of the host where Nginx is running. You will see the following Nginx welcome page.

After installation, the configuration directory of Nginx is found at /etc/nginx, and the document root directory at /usr/local/nginx/html.
Support Xmodulo
This website is made possible by minimal ads and your gracious donation via PayPal or credit card
Please note that this article is published by Xmodulo.com under a Creative Commons Attribution-ShareAlike 3.0 Unported License. If you would like to use the whole or any part of this article, you need to cite this web page at Xmodulo.com as the original source.
Xmodulo © 2021 ‒ About ‒ Write for Us ‒ Feed ‒ Powered by DigitalOcean

