How to speed up Nginx web server with PageSpeed
Last updated on September 8, 2020 by Dan Nanni
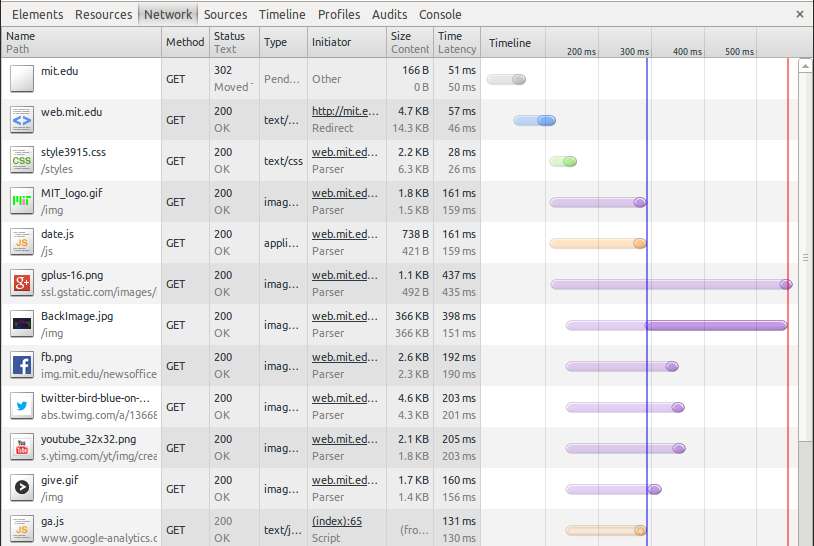
It is no secret that faster loading web sites lead to higher visitor engagement, retention and conversion rates. Every 100 msec of latency costs Amazon 1% drop in its sales, while 500 msec extra delay means 20% less traffic and revenue for Google. If there is a way to speed up your web server without upgrading to a more powerful server, there is no reason not to try it.

In this tutorial, I am going to describe how to optimize Nginx web server to speed up its performance. While Nginx web server itself emerged as one of the fastest and most scalable web servers, there are still various ways to tune the performance of its stock installation.
For one, there is a web server module developed by Google, which is called PageSpeed module. PageSpeed attempts to improve web page loading time and reduce bandwidth usage of web servers. Since then, an Nginx version of PageSpeed module (ngx_pagespeed) was released. As a possible way to speed up Nginx web server, I am going to demonstrate how to enable and configure ngx_pagespeed module in Nginx.
PageSpeed Features
The PageSpeed module automatically applies various optimizations (e.g., reduce document size, the number of HTTP requests, the number of HTTP round trips, DNS resolution time) by using a number of rewriting filters, and each filter can be turned on/off selectively.
The following are some of the filters supported by ngx_pagespeed. Refer to the official document for a complete list.
- Collapse Whitespace: reduce bandwidth usage by replacing multiple contiguous whitespace in HTML pages with a single whitespace.
- Canonicalize JavaScript Libraries: reduce bandwidth usage by automatically replacing popular JavaScript libraries with ones hosted for free (e.g., by Google).
- Combine CSS: reduce the number of HTTP requests by combining multiple CSS files into one.
- Combine JavaScript: reduce the number of HTTP requests by combining multiple JavaSript files into one.
- Elide Attributes: reduce document size by removing tags specified with default attributes.
- Extend Cache: reduce bandwidth usage by optimizing cacheability of web pages' resources.
- Flatten CSS Imports: reduce the number of HTTP request round-trips by removing @import in CSS files.
- Lazyload Images: delay the loading of images which are not visible on the client' browser.
- Minify JavaScript: reduce bandwidth usage by minifying JavaScript.
- Optimize Images: optimize image delivery by introducing more inline images, compressing images, or converting GIF to PNG.
- Pre-Resolve DNS: reduce DNS resolution time by pre-resolve DNS.
- Prioritize Critical CSS: rewrite CSS files to load page-rendering CSS rules first.
Unlike Apache web server, Nginx modules cannot be loaded dynamically at run-time, but must be incorporated during compile-time. As of this writing, ngx_pagespeed module is not included in the Nginx package distributed with major Linux distros (e.g., Fedora 19). Thus, to use PageSpeed in Nginx, you need to build Nginx from source.
Build and Install Nginx with ngx_pagespeed
Install prerequisites for building nginx and ngx_pagespeed.
On Debian, Ubuntu or Linux Mint:
$ sudo apt-get install build-essential zlib1g-dev libpcre3-dev uuid-dev
On Fedora, CentOS or RHEL:
$ sudo yum install gcc-c++ pcre-devel zlib-devel make wget libuuid-devel
Download and install ngx_pagespeed source code as follows. ngx_pagespeed will be extracted into /usr/local/nginx/modules
$ sudo mkdir -p /usr/local/nginx/modules
$ wget https://github.com/apache/incubator-pagespeed-ngx/archive/v1.13.35.2-stable.tar.gz
$ sudo tar -xf v1.13.35.2-stable.tar.gz -C /usr/local/nginx/modules --no-same-owner
Download pre-built PSOL (PageSpeed Optimization Libraries), and install it under ngx_pagespeed module directory that was just installed:
$ wget https://dl.google.com/dl/page-speed/psol/1.13.35.2-x64.tar.gz
$ sudo tar -xf 1.13.35.2-x64.tar.gz -C /usr/local/nginx/modules/incubator-pagespeed-ngx-1.13.35.2-stable --no-same-owner
Now, download the latest stable version of Nginx (1.18.0 in this tutorial) from the official source:
$ wget http://nginx.org/download/nginx-1.18.0.tar.gz
Finally, compile Nginx with ngx_pagespeed module enabled, and install it as follows.
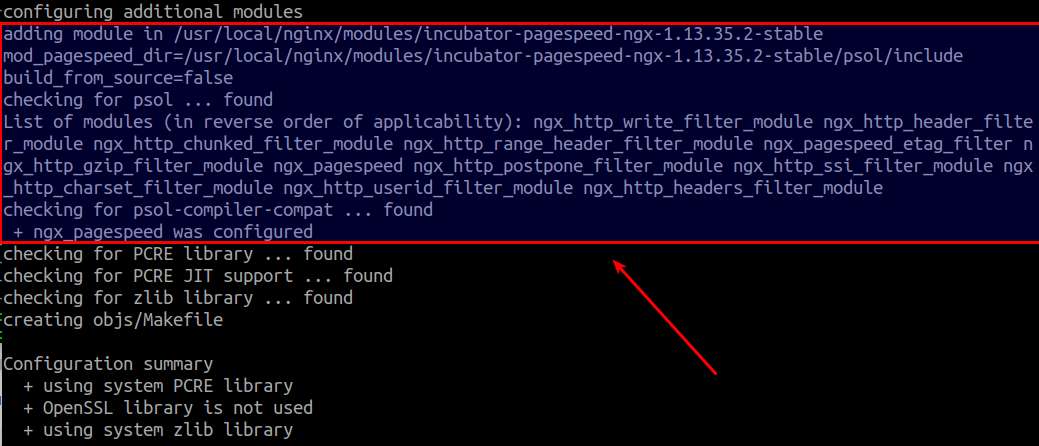
First use --add-module option in the configure script to add the ngx_pagespeed module to the build configuration. Verify that the output of configure includes ngx_pagespeed module.
$ tar -xf nginx-1.18.0.tar.gz
$ cd nginx-1.18.0
$ ./configure --add-module=/usr/local/nginx/modules/incubator-pagespeed-ngx-1.13.35.2-stable --prefix=/usr/local/nginx --sbin-path=/usr/local/sbin/nginx --conf-path=/etc/nginx/nginx.conf --error-log-path=/var/log/nginx/error.log --http-log-path=/var/log/nginx/access.log --pid-path=/run/nginx.pid --lock-path=/run/lock/subsys/nginx --user=nginx --group=nginx

Go ahead and build nginx with make:
$ make
$ sudo make install
You can verify that ngx_pagespeed module has been successfully added to Nginx installation as follows.
$ /usr/local/sbin/nginx -V

Configure ngx_pagespeed Module in Nginx
To enable and configure ngx_pagespeed, edit server section of Nginx configuration. The following example of nginx.conf indicates where to specify PageSpeed filter(s).
$ sudo vi /etc/nginx/nginx.conf
    server {
        # port to listen on
        listen 80;

        # server name
        server_name xmodulo.com www.xmodulo.com;

        # document root directory
        root /usr/local/nginx/html;

        # access log
        access_log /var/log/nginx/access.log main;

        # enable ngx_pagespeed
        pagespeed on;

        # put individual pagespeed filter(s) here.
    }
When it comes to specifying PageSpeed filters, there are two different levels you can choose from: CoreFilters and PassThrough. Unless specified, CoreFilters is used by default.
For Newbies: Use CoreFilters
The CoreFilters contains a set of PageSpeed filters which are considered safe by Google for most websites. By enabling CoreFilters, you are enabling a set of safe rules automatically. So this method is recommended for newbies. If you want, you can disable particular filter(s) from CoreFilters, or enable additional filters selectively. Here is an example of ngx_pagespeed configuration with CoreFilters.
    server {
        # port to listen on
        listen 80;

        # server name
        server_name xmodulo.com www.xmodulo.com;

        # document root directory
        root /usr/local/nginx/html;

        # access log
        access_log /var/log/nginx/access.log main;

        # enable ngx_pagespeed
        pagespeed on;

        pagespeed FileCachePath /var/ngx_pagespeed_cache;

        # enable CoreFilters
        pagespeed RewriteLevel CoreFilters;

        # disable particular filter(s) in CoreFilters
        pagespeed DisableFilters rewrite_images;

        # enable additional filter(s) selectively
        pagespeed EnableFilters collapse_whitespace;
        pagespeed EnableFilters lazyload_images;
        pagespeed EnableFilters insert_dns_prefetch;
    }
See the official document for a complete list of filters in CoreFilters.
For Advanced Users: Use PassThrough
For advanced users, you can use PageThrough level, where you enable individual filters manually.
    server {
        # port to listen on
        listen 80;

        # server name
        server_name xmodulo.com www.xmodulo.com;

        # document root directory
        root /usr/local/nginx/html;

        # access log
        access_log /var/log/nginx/access.log main;

        # enable ngx_pagespeed
        pagespeed on;

        pagespeed FileCachePath /var/ngx_pagespeed_cache;

        # disable CoreFilters
        pagespeed RewriteLevel PassThrough;

        # enable collapse whitespace filter
        pagespeed EnableFilters collapse_whitespace;

        # enable JavaScript library offload
        pagespeed EnableFilters canonicalize_javascript_libraries;

        # combine multiple CSS files into one
        pagespeed EnableFilters combine_css;

        # combine multiple JavaScript files into one
        pagespeed EnableFilters combine_javascript;

        # remove tags with default attributes
        pagespeed EnableFilters elide_attributes;

        # improve resource cacheability
        pagespeed EnableFilters extend_cache;

        # flatten CSS files by replacing @import with the imported file
        pagespeed EnableFilters flatten_css_imports;
        pagespeed CssFlattenMaxBytes 5120;

        # defer the loading of images which are not visible to the client
        pagespeed EnableFilters lazyload_images;

        # enable JavaScript minification
        pagespeed EnableFilters rewrite_javascript;

        # enable image optimization
        pagespeed EnableFilters rewrite_images;

        # pre-solve DNS lookup
        pagespeed EnableFilters insert_dns_prefetch;

        # rewrite CSS to load page-rendering CSS rules first.
        pagespeed EnableFilters prioritize_critical_css;
    }
Additional Configuration Steps
Create a file cache directory which will be written by Nginx.
$ sudo mkdir /var/ngx_pagespeed_cache
$ sudo chown nginx:nginx /var/ngx_pagespeed_cache
For convenience, create an init script for Nginx.
$ git clone https://github.com/Fleshgrinder/nginx-sysvinit-script.git
$ cp nginx-sysvinit-script/nginx /etc/init.d/nginx
$ chmod 0755 /etc/init.d/nginx
$ chown root:root /etc/init.d/nginx
Finally, start Nginx.
$ sudo service nginx start
Note: Depending on requirements, you may want to define additional Nginx modules (e.g., HTTPS/SSL support, etc) besides ngx_pagespeed. In that case, you need to add them during Nginx compilation step. See this tutorial for enabling additional Nginx modules.
Support Xmodulo
This website is made possible by minimal ads and your gracious donation via PayPal or credit card
Please note that this article is published by Xmodulo.com under a Creative Commons Attribution-ShareAlike 3.0 Unported License. If you would like to use the whole or any part of this article, you need to cite this web page at Xmodulo.com as the original source.
Xmodulo © 2021 ‒ About ‒ Write for Us ‒ Feed ‒ Powered by DigitalOcean

