How to install Raspberry Pi camera board
Last updated on November 29, 2020 by Kristophorus Hadiono
The Raspberry Pi camera (Pi Cam) board was first released for sale in May 2013. This first release is equipped with a 5 Megapixel sensor, and connects through a ribbon cable to the CSI connector on the Raspberry Pi. The second release of Raspberry Pi camera board, which is called Pi NoIR, has the same sensor, but without the IR filter. It has capability to see near IR wavelengths (700 - 1000 nm) like a security camera, and of course it is sacrificing the color rendition.
In this article, we will show you how to install a Raspberry Pi camera board on Raspberry Pi. We will be using the first release of Pi camera board. Once the board is installed, you will use three applications to access the board: raspistill, raspiyuv, and raspivid. The first two apps are used for capturing images, while the third app is for capturing video. The raspistill tool produces standard image files such as JPG images, but raspiyuv gives us unprocessed raw image files from the camera.
Installing the Raspberry Pi Camera Board
To connect the Raspberry Pi camera board to Raspberry Pi, follow these instructions:
1. Locate the CSI connector (the CSI connector is located near the Ethernet Port), and take off the brown tape.
2. Pull up the pinch of the CSI port.
3. Take your Pi Cam module, and remove the plastic protector from the lens. Make sure that the yellow part of the PCB which has sunny word is installed perfectly (just press gently that yellow part to make sure that it's installed perfectly).
4. Put in the ribbon cable into the CSI port. Remember, the ribbon cable which has blue tape should be facing towards the Ethernet port. Also, make sure that the ribbon is inserted properly, then pull down the pinch.
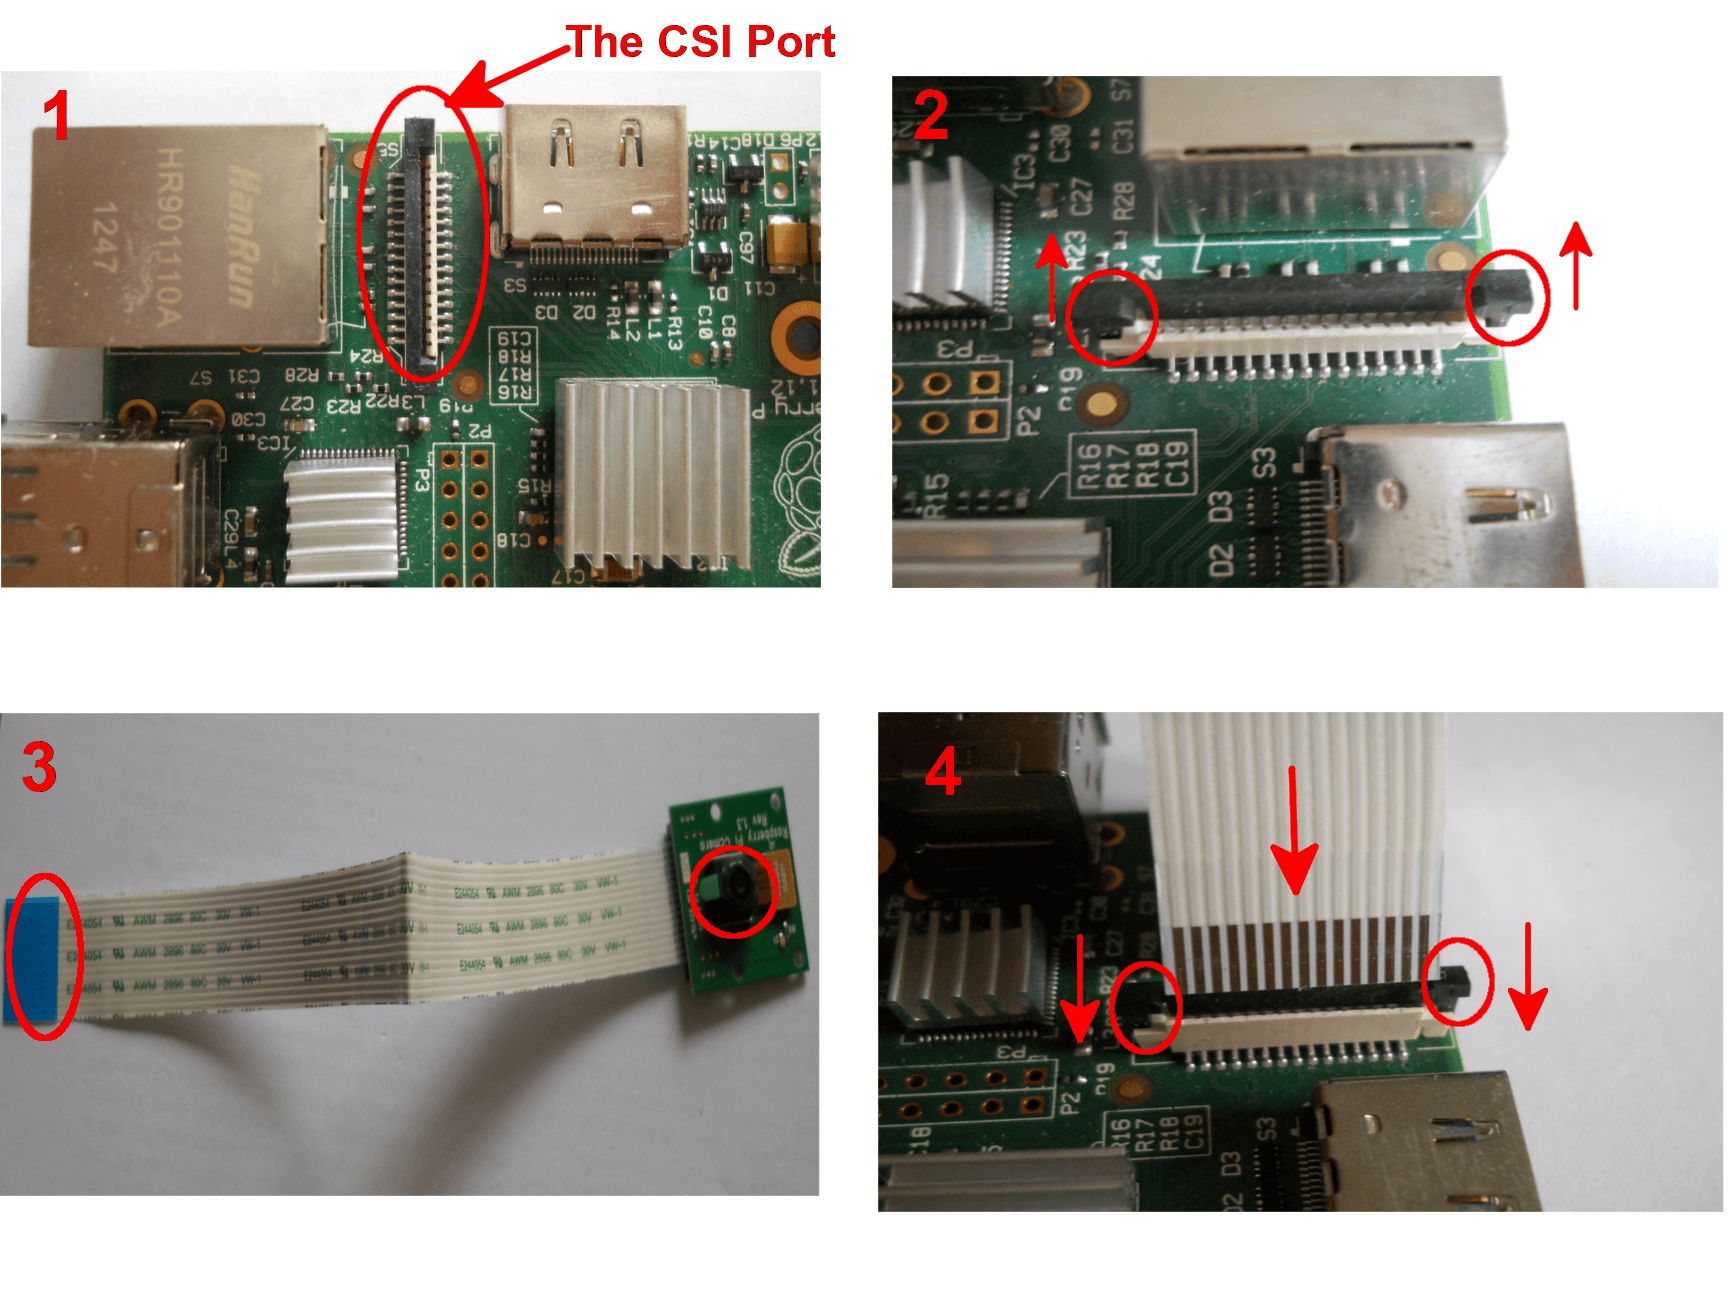
Now your Pi Cam is ready to take a picture or a video.
Enabling Camera on Raspbian
After installing the Pi Cam module, make sure to update your Raspberry Pi system to get the latest firmware. To do so:
$ sudo apt-get update
$ sudo apt-get upgrade
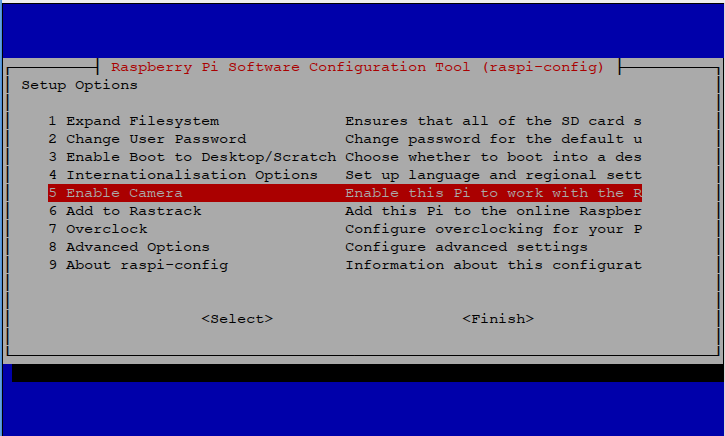
To activate the Pi Cam module, run the Raspberry Pi configuration tool.
$ sudo raspi-config
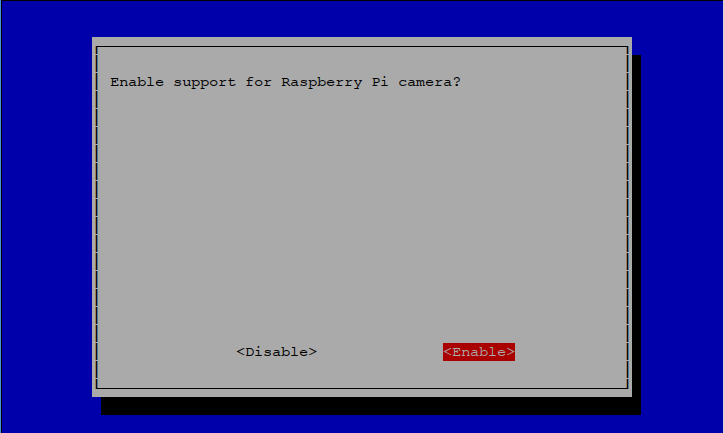
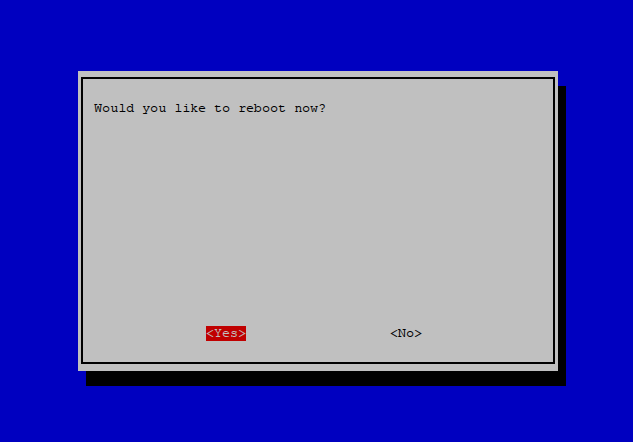
Navigate to Enable Camera in the menu, and make it enabled. Reboot Raspberry Pi if you are done.
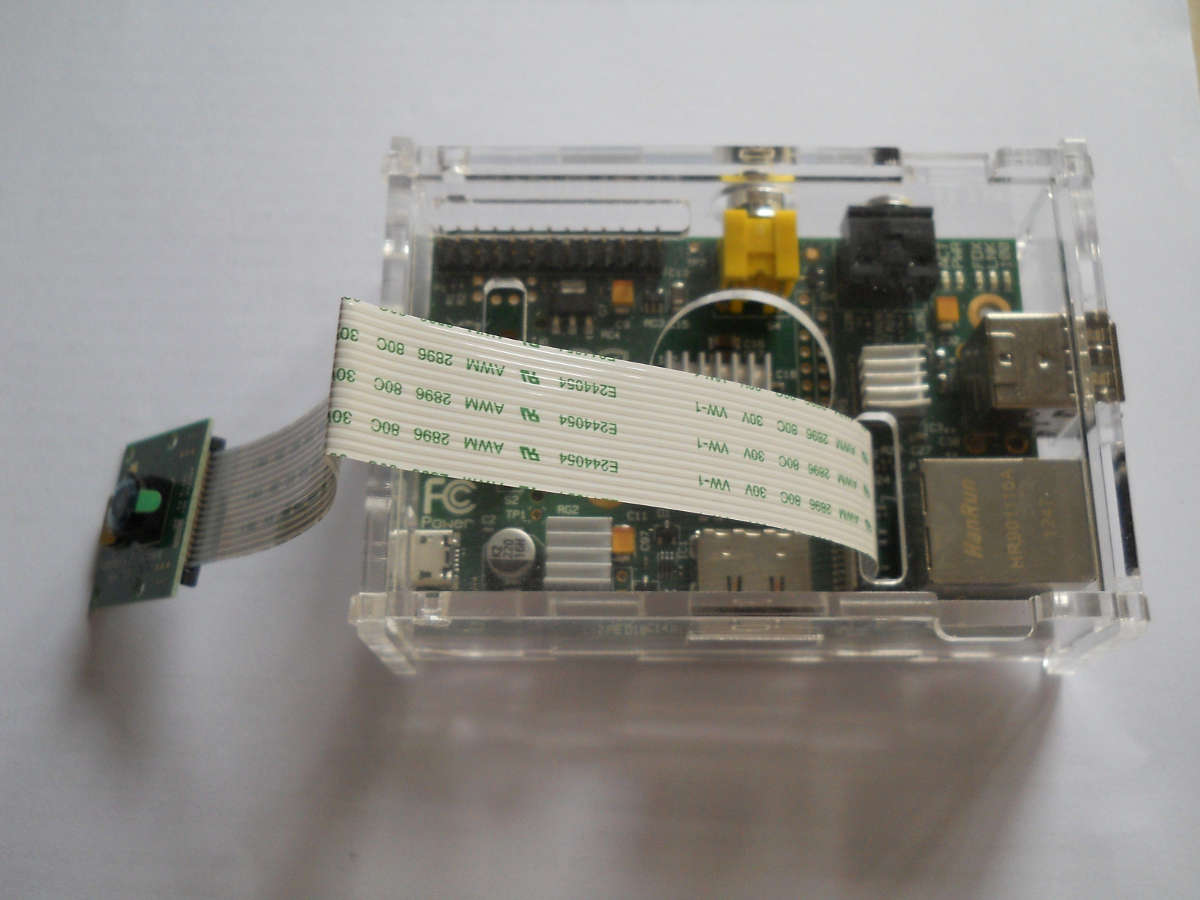
Here is the final picture of Raspberry Pi with Pi Cam module attached.
Taking a Picture with Pi Camera
We are ready to use Pi Cam after rebooting Raspberry Pi. To take a picture with Pi Cam, run raspistill from the command line.
$ raspistill -o keychain.jpg -t 2000
This command will take a picture in 2000ms, and save it to keychain.jpg. The following is a picture of my small figurehead key chain, taken by Pi Cam.

The raspiyuv tool works similarly, but the result is a unprocessed raw image from the camera.
Taking a Video with Pi Camera
To take a video with Pi camera module, run raspivid tool from command line. The following command will take a video with default options which are 5 seconds length and 1920x1080 resolution with 17Mbps bitrate.
$ raspivid -o mykeychain.h264
If you want to change the duration, just set the desired length (in milliseconds) with -t option.
$ raspivid -o mykeychain.h264 -t 10000
To drop the resolution to 1280x720, use -w and -h options.
$ raspivid -o mykeychain.h264 -t 10000 -w 1280 -h 720
The output of raspivid is a raw H.264 video stream, and doesn't have sound with it. To be able to play with a common video player, the raw H.264 video needs to be converted. Use MP4Box application that comes with gpac package.
To install gpac on Raspbian, use this command:
$ sudo apt-get install -y gpac
Then to convert the raw H.264 video stream into MP4 format with 30 frames per second:
$ MP4Box -fps 30 -add keychain.h264 keychain.mp4
The video length is 10 seconds, and has default resolutions and bitrate. Here is an example video captured by Pi Camera.
To get the complete command-line options of raspistill, raspiyuv, and raspivid, run the commands without any option.
Summary
In this tutorial, I showed how to take pictures and record videos using Raspberry Pi camera board. Another way to turn Raspberry Pi into a camera is to use a USB webcam. The caveat is that you must use a Raspberry Pi compatible USB webcam. Refer to this guideline to use a USB webcam on Raspberry Pi.
Support Xmodulo
This website is made possible by minimal ads and your gracious donation via PayPal or credit card
Please note that this article is published by Xmodulo.com under a Creative Commons Attribution-ShareAlike 3.0 Unported License. If you would like to use the whole or any part of this article, you need to cite this web page at Xmodulo.com as the original source.
Xmodulo © 2021 ‒ About ‒ Write for Us ‒ Feed ‒ Powered by DigitalOcean

