How to configure a network printer and scanner on Ubuntu desktop
Last updated on October 1, 2020 by Gabriel Cánepa
In the previous article, we discussed how to install several kinds of printers (and also a network scanner) in a Linux server. Today we will deal with the other end of the line: how to access the network printer/scanner devices from a desktop client.
Network Environment
For this setup, our server's (Debian Wheezy 7.2) IP address is 192.168.0.10, and our client's (Ubuntu 12.04) IP address is 192.168.0.105. Note that both boxes are on the same network (192.168.0.0/24). If we want to allow printing from other networks, we need to modify the following section in the cupsd.conf file on the sever:
<Location />
  Order allow,deny
  Allow localhost
  Allow from XXX.YYY.ZZZ.*
</Location>
(in the above example, we grant access to the printer from localhost and from any system whose IPv4 address starts with XXX.YYY.ZZZ)
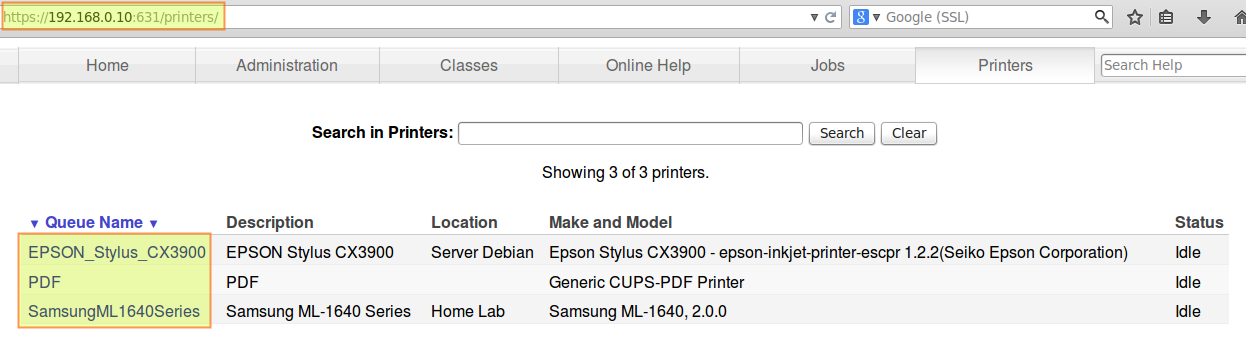
To verify which printers are available on our server, we can either use lpstat command on the server, or browse to the https://192.168.0.10:631/printers page.
root@debian:~# lpstat -a
EPSON_Stylus_CX3900 accepting requests since Mon 18 Aug 2014 10:49:33 AM WARST
PDF accepting requests since Mon 06 May 2013 04:46:11 PM WARST
SamsungML1640Series accepting requests since Wed 13 Aug 2014 10:13:47 PM WARST
Installing Network Printers in Ubuntu Desktop
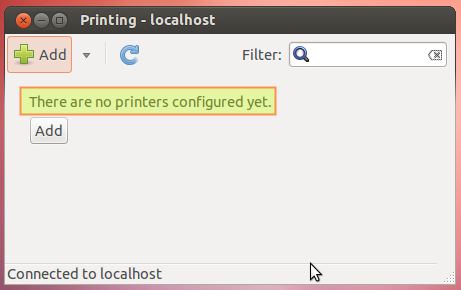
In our Ubuntu 12.04 client, we will open the Printing menu (Dash → Printing). Note that in other distributions the name may differ a little (such as Printers or Print & Fax, for example):

No printers have been added to our Ubuntu client yet:
Here are the steps to install a network printer on Ubuntu desktop client.
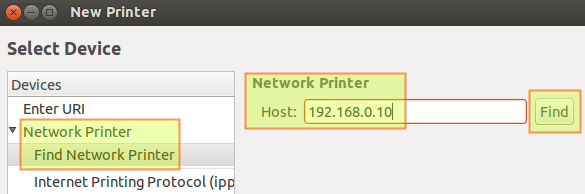
1) The Add button will fire up the New Printer menu. We will choose Network printer → Find Network Printer and enter the IP address of our server, then click Find:
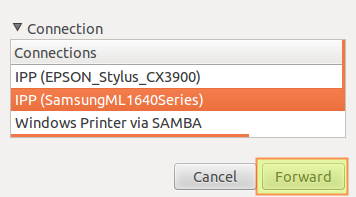
2) At the bottom we will see the names of the available printers. Let's choose the Samsung printer and press Forward:
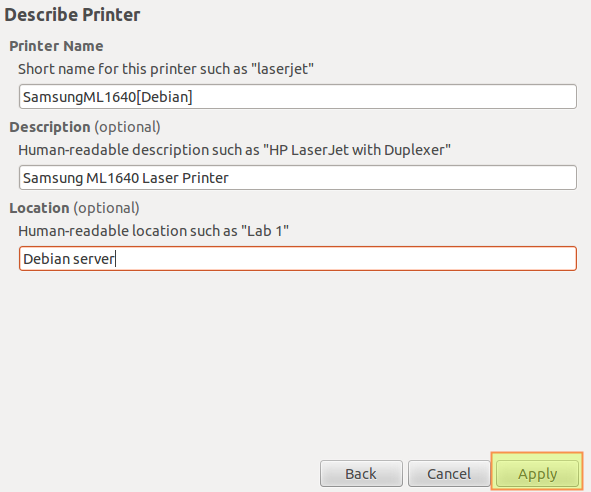
3) We will be asked to fill in some information about our printer. When we're done, we'll click on Apply:
4) We will then be asked whether we want to print a test page. Let’s click on Print test page:

The print job was created with local id 2:

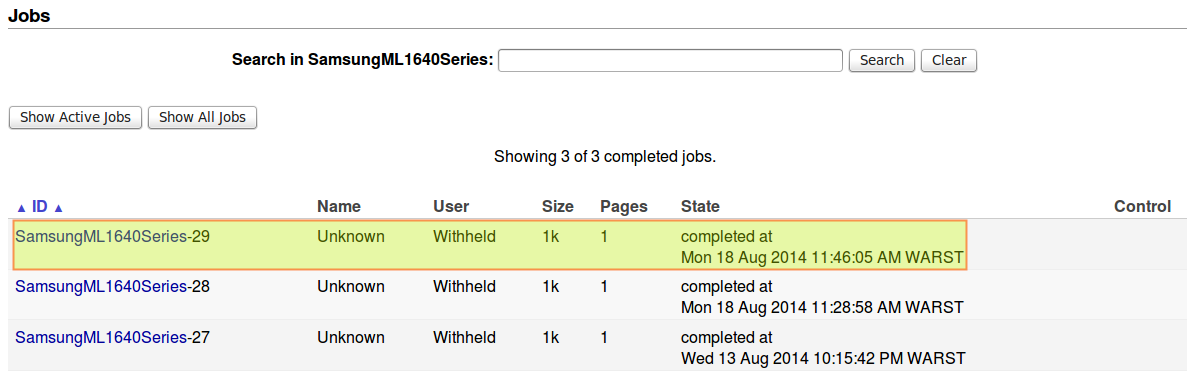
5) Using our server's CUPS web interface, we can observe that the print job has been submitted successfully (Printers → SamsungML1640Series → Show completed jobs):
We can also display this same information by running the following command on the printer server:
root@debian:~# cat /var/log/cups/page_log | grep -i samsung
SamsungML1640Series root 27 [13/Aug/2014:22:15:34 -0300] 1 1 - localhost Test Page - -
SamsungML1640Series gacanepa 28 [18/Aug/2014:11:28:50 -0300] 1 1 - 192.168.0.105 Test Page - -
SamsungML1640Series gacanepa 29 [18/Aug/2014:11:45:57 -0300] 1 1 - 192.168.0.105 Test Page - -
The page_log log file shows every page that has been printed, along with the user who sent the print job, the date & time, and the client's IPv4 address.
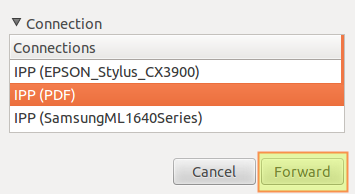
To install the Epson inkjet and PDF printers, we need to repeat steps 1 through 5, and choose the right print queue each time. For example, in the image below we are selecting the PDF printer:
However, please note that according to the CUPS-PDF documentation, by default:
PDF files will be placed in subdirectories named after the owner of the print job. In case the owner cannot be identified (i.e. does not exist on the server) the output is placed in the directory for anonymous operation (if not disabled in cups-pdf.conf - defaults to /var/spool/cups-pdf/ANONYMOUS/).
These default directories can be modified by changing the value of the Out and AnonDirName variables in the /etc/cups/cups-pdf.conf file. Here, ${HOME} is expanded to the user's home directory:
Out ${HOME}/PDF
AnonDirName /var/spool/cups-pdf/ANONYMOUS
Network Printing Examples
Example #1
Printing from Ubuntu 12.04, logged on locally as gacanepa (an account with the same name exists on the printer server).

After printing to the PDF printer, let's check the contents of the /home/gacanepa/PDF directory on the printer server:
root@debian:~# ls -l /home/gacanepa/PDF
total 368
-rw------- 1 gacanepa gacanepa 279176 Aug 18 13:49 Test_Page.pdf
-rw------- 1 gacanepa gacanepa   7994 Aug 18 13:50 Untitled1.pdf
-rw------- 1 gacanepa gacanepa  74911 Aug 18 14:36 Welcome_to_Conference_-_Thomas_S__Monson.pdf
The PDF files are created with permissions set to 600 (-rw-------), which means that only the owner (gacanepa in this case) can have access to them. We can change this behavior by editing the value of the UserUMask variable in the /etc/cups/cups-pdf.conf file. For example, a umask of 0033 will cause the PDF printer to create files with all permissions for the owner, but read-only privileges to all others.
root@debian:~# grep -i UserUMask /etc/cups/cups-pdf.conf
### Key: UserUMask
UserUMask 0033
For those unfamiliar with umask (aka user file-creation mode mask), it acts as a set of permissions that can be used to control the default file permissions that are set for new files when they are created. Given a certain umask, the final file permissions are calculated by performing a bitwise boolean AND operation between the file base permissions (0666) and the unary bitwise complement of the umask. Thus, for a umask set to 0033, the default permissions for new files will be NOT (0033) AND 0666 = 644 (read / write / execute privileges for the owner, read-only for all others.
Example #2
Printing from Ubuntu 12.04, logged on locally as jdoe (an account with the same name doesn't exist on the server).

root@debian:~# ls -l /var/spool/cups-pdf/ANONYMOUS
total 5428
-rw-rw-rw- 1 nobody nogroup 5543070 Aug 18 15:57 Linux_-_Wikipedia__the_free_encyclopedia.pdf
The PDF files are created with permissions set to 666 (-rw-rw-rw-), which means that everyone has access to them. We can change this behavior by editing the value of the AnonUMask variable in the /etc/cups/cups-pdf.conf file.
At this point, you may be wondering about this: Why bother to install a network PDF printer when most (if not all) current Linux desktop distributions come with a built-in "Print to file" utility that allows users to create PDF files on-the-fly?
There are a couple of benefits of using a network PDF printer:
- A network printer (of whatever kind) lets you print directly from the command line without having to open the file first.
- In a network with other operating system installed on the clients, a PDF network printer spares the system administrator from having to install a PDF creator utility on each individual machine (and also the danger of allowing end-users to install such tools).
- The network PDF printer allows to print directly to a network share with configurable permissions, as we have seen.
Installing a Network Scanner in Ubuntu Desktop
Here are the steps to installing and accessing a network scanner from Ubuntu desktop client. It is assumed that the network scanner server is already up and running as described here.
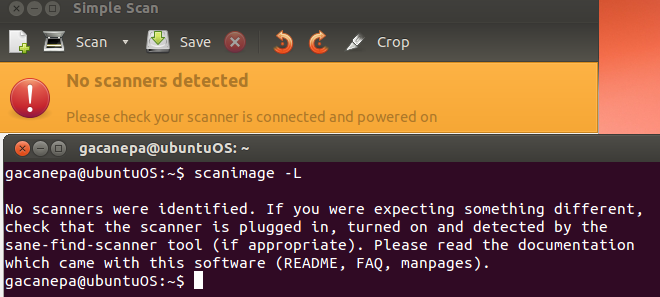
1) Let us first check whether there is a scanner available on our Ubuntu client host. Without any prior setup, you will see the message saying that "No scanners were identified."
$ scanimage -L
2) Now we need to enable saned daemon which comes pre-installed on Ubuntu desktop. To enable it, we need to edit the /etc/default/saned file, and set the RUN variable to yes:
$ sudo vim /etc/default/saned
# Set to yes to start saned
RUN=yes
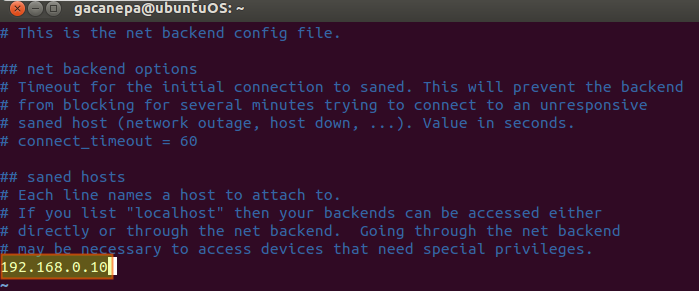
3) Let's edit the /etc/sane.d/net.conf file, and add the IP address of the server where the scanner is installed:
4) Restart saned:
$ sudo service saned restart
5) Let's see if the scanner is available now:

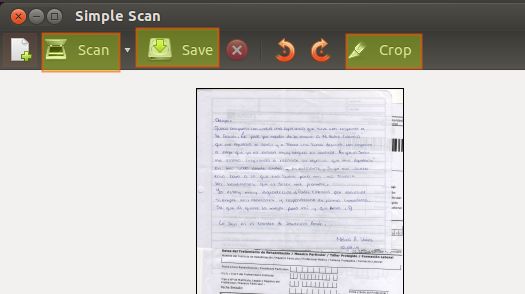
Now we can open Simple Scan (or other scanning utility) and start scanning documents. We can rotate, crop, and save the resulting image:
Summary
Having one or more network printers and scanner is a nice convenience in any office or home network, and offers several advantages at the same time. To name a few:
- Multiple users (connecting from different platforms / places) are able to send print jobs to the printer's queue.
- Cost and maintenance savings can be achieved due to hardware sharing.
I hope this article helps you make use of those advantages.
Support Xmodulo
This website is made possible by minimal ads and your gracious donation via PayPal or credit card
Please note that this article is published by Xmodulo.com under a Creative Commons Attribution-ShareAlike 3.0 Unported License. If you would like to use the whole or any part of this article, you need to cite this web page at Xmodulo.com as the original source.

Xmodulo © 2021 ‒ About ‒ Write for Us ‒ Feed ‒ Powered by DigitalOcean