How to set up Apt caching server on Ubuntu or Debian
Last updated on October 2, 2020 by Dan Nanni
If you often create guest VMs or containers on your Linux computer, you will go through package installation many times across different VMs/containers. In that case, your time may be better spent on something more productive than just waiting to finish installing packages. While server provisioning tools like Puppet, Chef or Ansible can automate the whole machine provisioning process, they are an overkill for virtualization on a single laptop or desktop computer. Also parallel downloads have a limited effect when the network is slow.
A more practical approach to saving time on installing packages on disposable VMs/containers on your computer is to set up a local Apt/Yum repository mirror, so that packages can be pulled locally instead of over the Internet. However, mirroring an entire repository takes a toll on disk space and bandwidth, and is not worth the effort as the number of packages required is typically not very large.
An alternative to repository mirroring is to set up a local caching server for Apt/Yum repositories. In this case any downloaded packages are cached on the caching server, so any subsequent installation of the same packages can be done quickly. In many cases you end up installing similar packages any way. So caching works really well.
In Debian-based system, there are several software that allow you to set up a caching server/proxy for Apt repositories. For example, apt-proxy is the oldest design, and later apt-cacher was created to address speed and reliability issues of its predecessor. Then there is apt-cacher-ng which adds multi-threading and HTTP pipeline support to apt-cacher.
In this tutorial, I am going to show how to to set up an Apt caching server using apt-cacher-ng.
Install and Configure apt-cacher-ng on Debian or Ubuntu
It is straightforward to set up apt-cacher-ng on Debian-based system.
$ sudo apt-get install apt-cacher-ng
Once you install it, apt-cacher-ng will be set to auto-start on your system. The default configuration file for apt-cacher-ng is found at /etc/apt-cacher-ng/acng.conf. It is heavily commented, so be sure to check out. But for most cases, the default configuration will do.
Any time you modify the configuration, restart apt-cacher-ng.
$ sudo service apt-cacher-ng restart
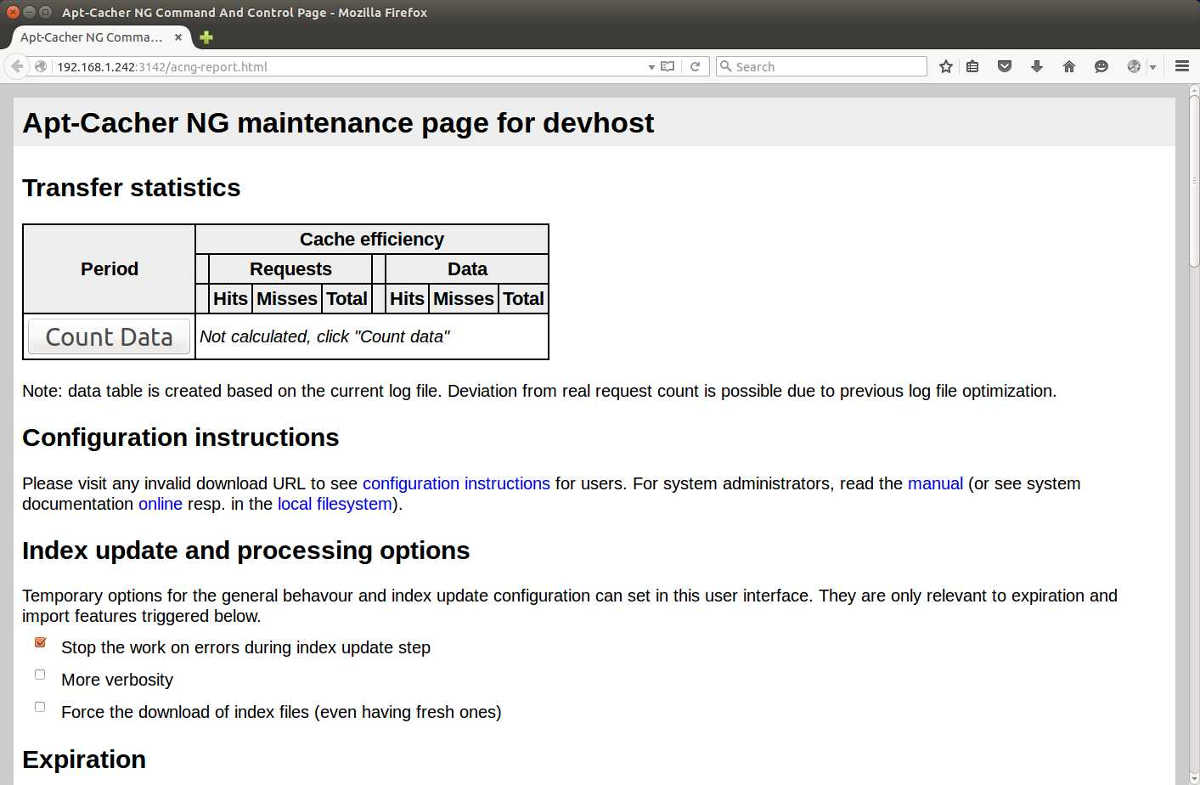
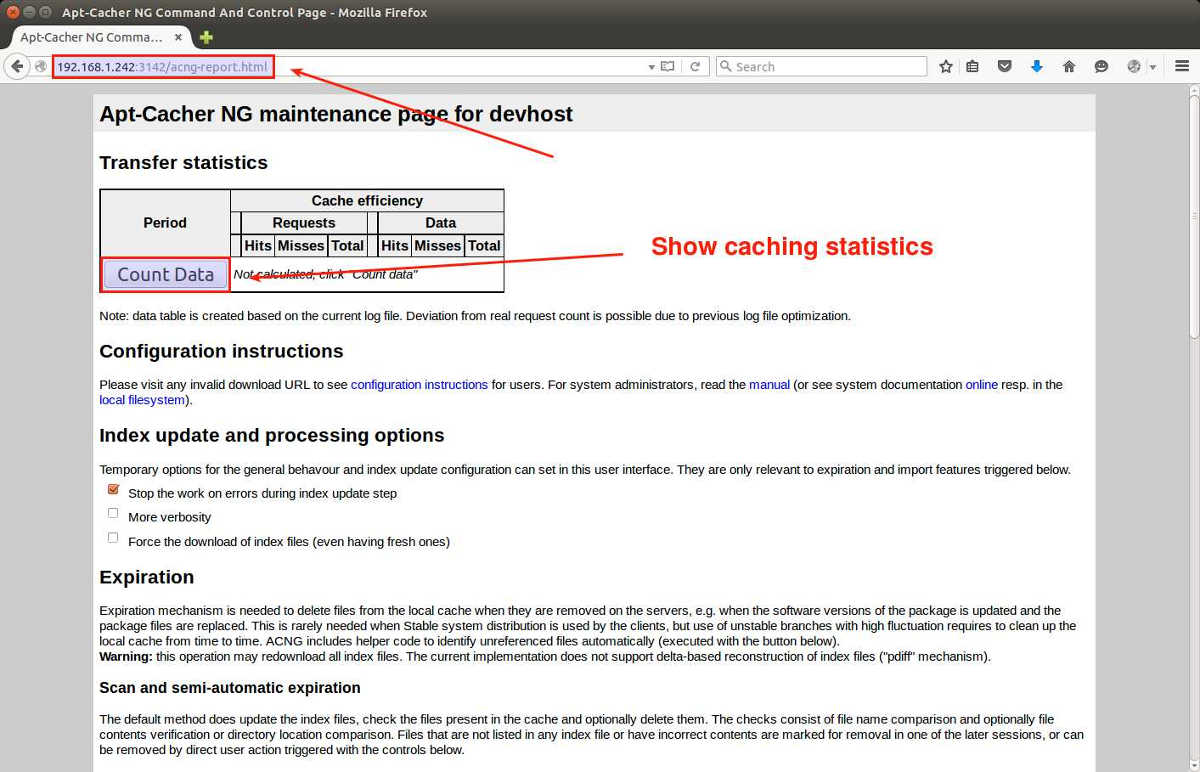
apt-cacher-ng comes with a built-in web server to be able to proxy HTTP-based apt-get downloads. The integrated web server can also be accessible for web-based administration and reporting purposes. To verify that apt-cacher-ng works, point your web browser to http://<your-ip-address>:3142/acng-report.html. The administration page of apt-cacher-ng looks like the following.

In this example, the IP address of the apt-cacher server is 192.168.1.243.
Once the apt-cacher server is ready, you need to configure other client machines, VMs or containers so that they can install packages through the caching server. On every client machine, create the proxy configuration in /etc/apt/apt.conf.d, pointing to the caching server as follows.
$ sudo vi /etc/apt/apt.conf.d/00aptproxy
Acquire::http::Proxy "http://192.168.1.242:3142";
As the client machines install packages, the caching server will start caching downloaded packages in /var/cache/apt-cacher-ng.
To check caching statistics, click on Count Data button inside traffic statistics table.

Note that disk cache is organized for different distributions (e.g., Debian, Ubuntu, Linu Mint).

Useful Tips When using apt-cacher-ng
Here are some useful tips for apt-cacher-ng.
1. Access Control
Sometimes it is useful to restrict the access to apt-cacher-ng server for security purposes. apt-cacher-ng comes with built-in ACL (access-control-list) support using TCP wrappers. So if you want to set up a whitelist or blacklist for incoming connections to the server, you can use /etc/hosts.allow or /etc/hosts.deny.
For example, if you want to block particular IP addresses (192.168.1.242, 192.168.1.100), you can specify the following.
In /etc/hosts.deny:
apt-cacher-ng : 192.168.1.242 192.168.1.100
If you want to block all local traffic (192.168.1.0/24) except for 192.168.1.160, do the following.
In /etc/hosts.allow:
apt-cacher-ng : 192.168.1.160
In /etc/hosts.deny:
apt-cacher-ng : 192.168.1.0/24
There is no need to restart apt-cacher-ng when setting up ACLs.
2. Local Cache Cleanup
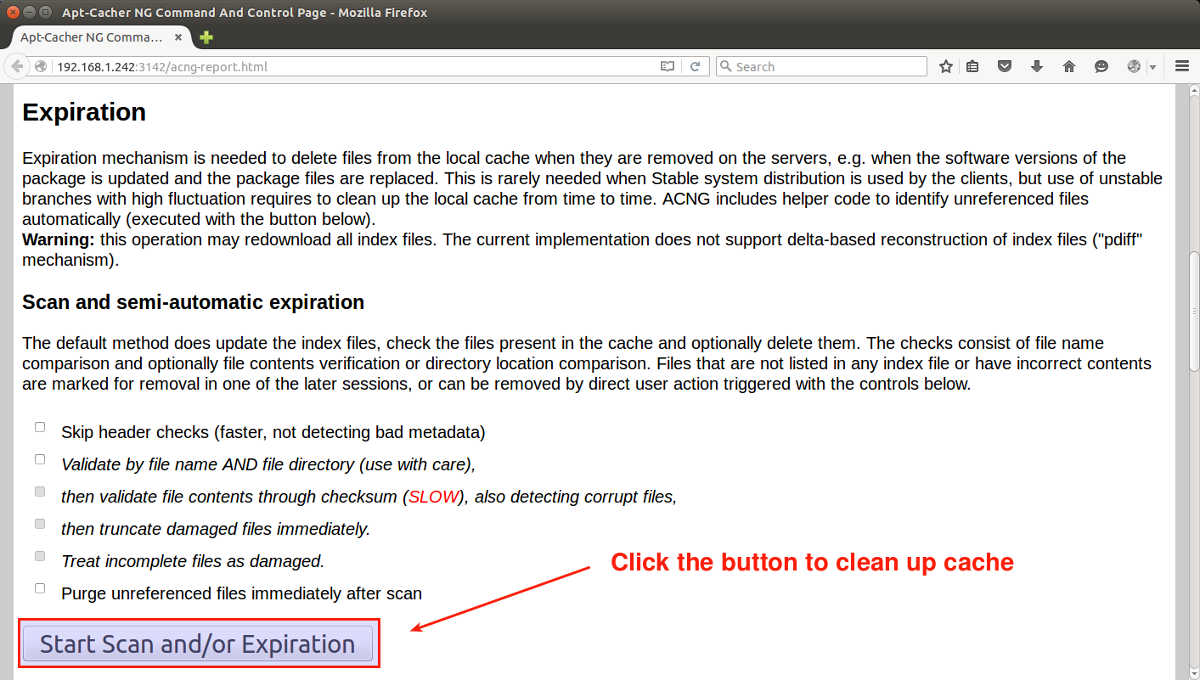
As apt-cacher-ng server starts to cache downloaded packages, the disk on the server will start to fill up over time. Thus you need to clean up its disk space regularly.
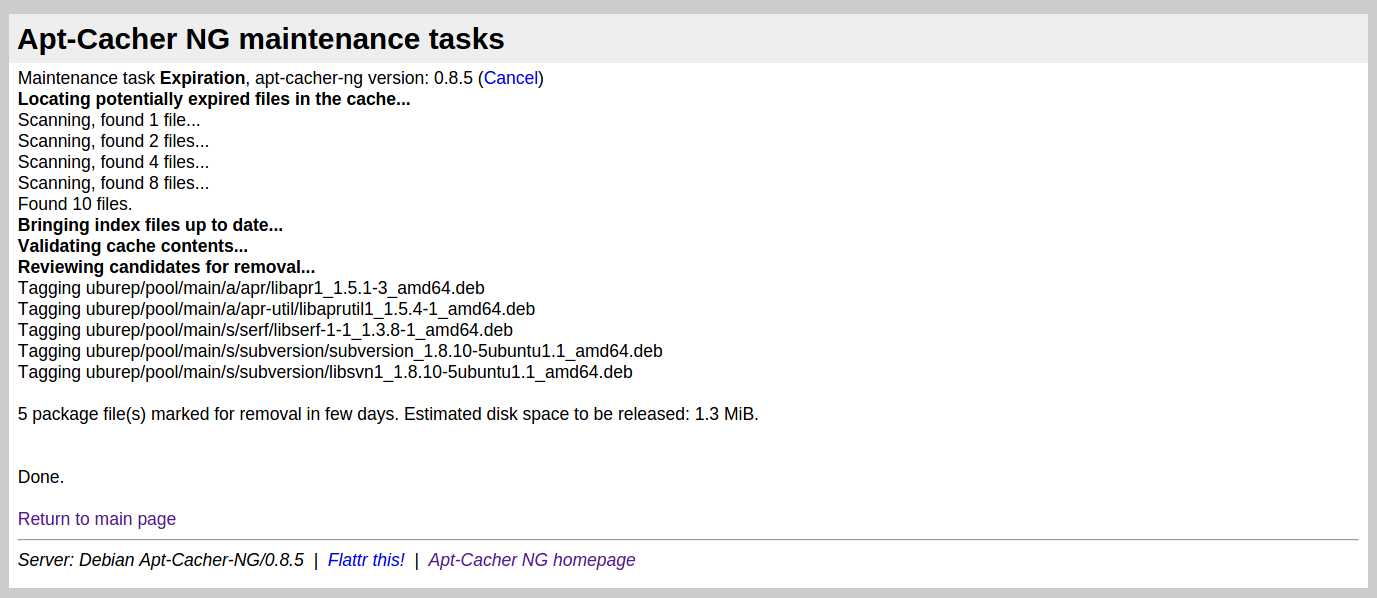
Its web-based management interface can help with that. Simply click on Start Scan button, and it will scan cache content and schedule any unnecessary packages to be removed from the disk.


Alternatively, you can manually (or via cron job) clean up the whole cache as follows.
$ sudo service apt-cacher-ng stop
$ sudo rm -rf /var/cache/apt-cacher-ng/
$ sudo service apt-cacher-ng start
As a final bonus, here is how to set up apt-cacher-ng server with a single Docker command (assuming that you already installed Docker). Spin off an apt-cacher-ng container whenever you need it, and throw it away when done. No need to mess up the host system.
$ docker run --name apt-cacher-ng -d --restart=always --publish 3142:3142 --volume /srv/docker/apt-cacher-ng:/var/cache/apt-cacher-ng sameersbn/apt-cacher-ng:latest
Support Xmodulo
This website is made possible by minimal ads and your gracious donation via PayPal or credit card
Please note that this article is published by Xmodulo.com under a Creative Commons Attribution-ShareAlike 3.0 Unported License. If you would like to use the whole or any part of this article, you need to cite this web page at Xmodulo.com as the original source.
Xmodulo © 2021 ‒ About ‒ Write for Us ‒ Feed ‒ Powered by DigitalOcean

