How to configure an IP address on Raspberry Pi
Last updated on October 7, 2020 by Kristophorus Hadiono
The default Raspbian system for Raspberry Pi is set up to get an IP address automatically from the network via DHCP, whether for wired Ethernet or wireless WiFi (via a USB wireless dongle). Raspbian can support both IPv4 and IPv6. IPv4 is ready for use by default, while IPv6 must be enabled manually.
If you want to set up an IP address for wired or wireless networks on a Raspbian system, there are several ways to do it, either in the text (manual) mode or via GUI tools.
In this tutorial, I will explain several ways to configure an IP address on Raspbian-powered Raspberry Pi. IPv4 will be used in this tutorial.
Wifi-Config: Configure an Automatic DHCP Ip Address on WiFi Network
If you want to connect Raspberry Pi to a WiFi access point, you can use a USB wireless network dongle. If you plan to buy one, it is recommended to check which wireless chipset will work with Raspberry Pi before you buy. Otherwise, you may be frustrated trying to figure out how to install a necessary driver on Raspberry Pi. Refer to this page for a list of RPi-compatible USB Wi-Fi adapters.
To get an IP address for a USB WiFi dongle, follow the instructions below. Here I use Ralink USB WiFi dongle with RT5370 chipset. This chipset is recognized by Raspbian automatically.
After plugging in your USB WiFi dongle, power up Raspberry Pi.
Log in to Raspberry Pi, and launch GUI desktop by typing:
$ startx
Double-click on WiFi Config icon on the desktop.

This will give you a wpa_gui window (see picture below).
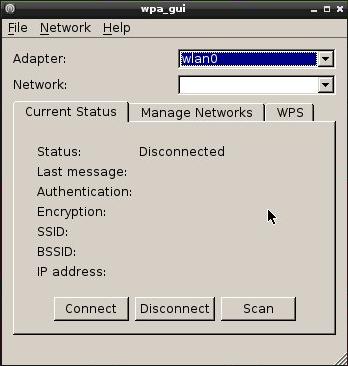
Click on Scan button to open the following scan result window.

Click on Scan button on this window to get a list of available WiFi access points.
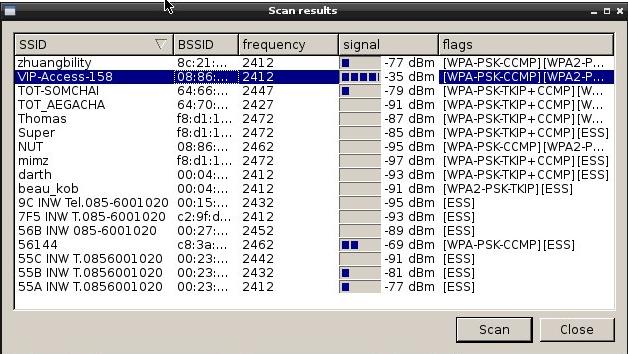
Double-click on the SSID of the access point to connect to, and then type in access password (if required).
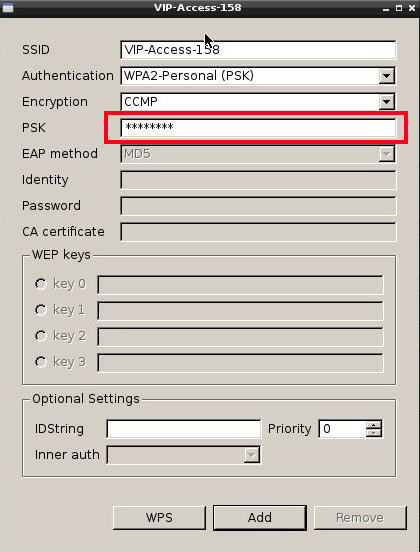
Click on Add button to permanently add the configured access point to Manage Networks tab.

When done, click on Current Status tab, and then click on Connect button to connect the access point. It will take a couple of seconds until you get an IP address from DHCP negotiation.

After you get an IP address, you can close the wpa_gui window. You can still check the current status of wireless connection from desktop tray icon as shown below.

Text Mode: Configure a Static IP Address for Wired Ethernet
To configure Raspbian with a static IP address manually for the Ethernet, follow the instructions below.
Make sure that you plug in everything right (keyboard, HDMI monitor/TV, SD card, power cable adapter), and then turn on the power.
Wait until you are prompted to log in, and type pi for username and raspberry for password (which are default Raspbian login credentials).
A Raspbian's network configuration file is located at /etc/network/interfaces. A default configuration looks like the following, where DHCP is used for wired Ethernet.
auto lo
iface lo inet loopback
iface eth0 inet dhcp
allow-hotplug wlan0
iface wlan0 inet manual
wpa-roam /etc/wpa_supplicant/wpa_supplicant.conf
iface default inet dhcp
Edit this config file with any text editor as follows. The bold font texts are newly updated configuration.
$ sudo nano /etc/network/interfaces
auto lo
iface lo inet loopback
# iface eth0 inet dhcp
auto eth0
iface eth0 inet static
address 192.168.2.6
netmask 255.255.255.0
gateway 192.168.2.1
allow-hotplug wlan0
iface wlan0 inet manual
wpa-roam /etc/wpa_supplicant/wpa_supplicant.conf
iface default inet dhcp
In the updated config file, the line containing dhcp is commented out, and static IP configuration (with IP address, netmask and gateway) is added. Adjust the settings according to your network condition.
Restart the networking services to activate the change without reboot.
$ sudo service networking restart
To check whether an IP address is set or not, type ip command.

Wicd Tool: Configure a Static IP Address for Wired Ethernet and WiFi
Another way to set up a static IP address on Raspberry Pi is using Wicd tool, which is an open-source network manager for wired and wireless networks. Wicd tool is not installed on Raspbian by default, so you need to install it first.
Follow instructions below to install Wicd and set up a static IP address with Wicd.
$ sudo apt-get update
$ sudo apt-get install wicd-curses
To launch Wicd, run:
$ sudo wicd-curses
You will see an ncurses-based interface for listing available wired and wireless networks.
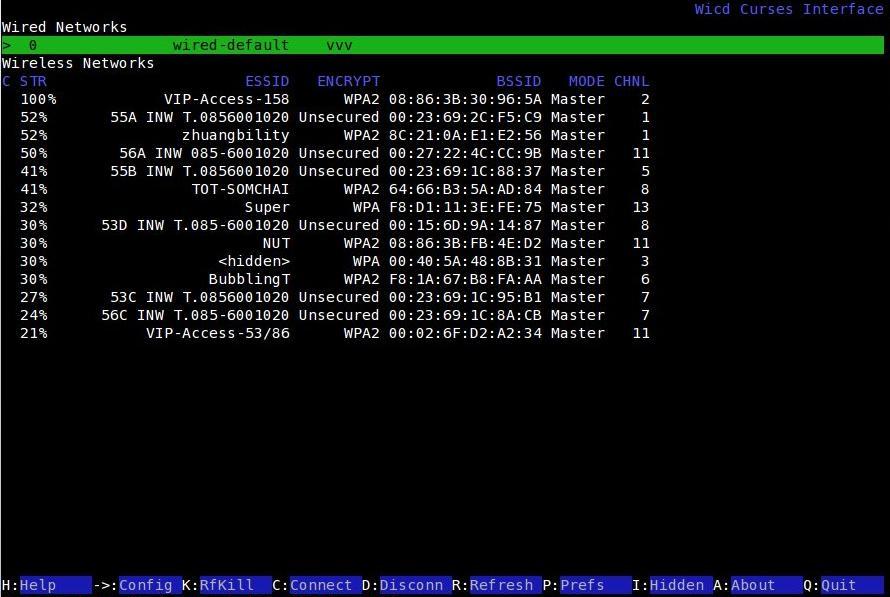
The instruction for setting up a static IP address on Wicd is the same for both wired Ethernet or WiFi networks (accessible via a USB WiFi dongle).
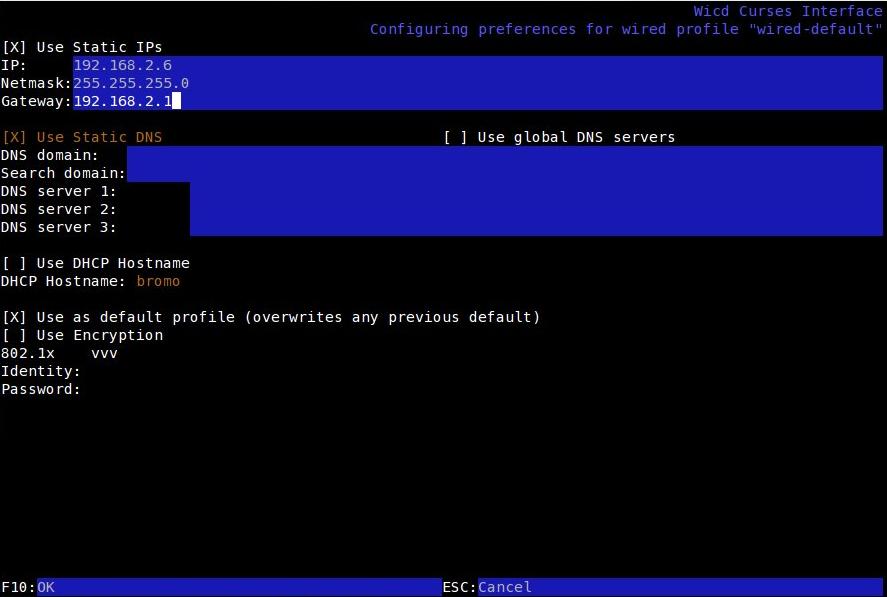
First, you need to highlight a network to configure (e.g., an Ethernet-based wired network, or a particular WiFi access point), and press right arrow button. This will open a setup window (see picture below).
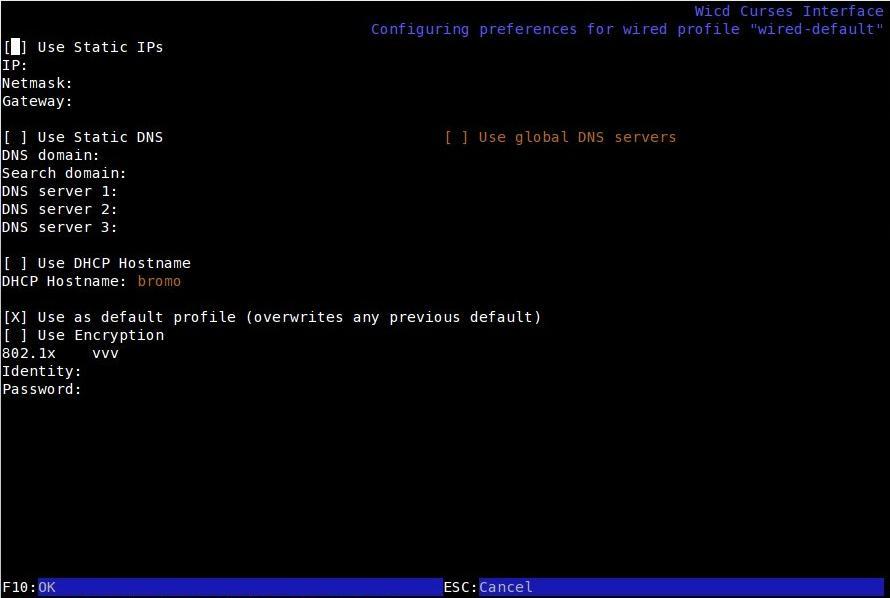
Press space button to turn on Use Static IPs, and then fill out IP address, netmask and gateway.
In case of WiFi configuration, besides above information, you will also need to fill out an access point password in the Key field.

Press F10 button to save the entered information, which will then bring you back to the list of available networks.
Note: Wicd is also available as a full GUI version (i.e., wicd-gtk). This version comes with wicd-tray, which will be automatically loaded when you log in to your desktop, as configured in /etc/xdg/autostart/wicd-tray.desktop. To install wicd-gtk, simply run:
$ sudo apt-get install wicd-gtk
Here are screenshots of wicd-gtk and its desktop tray icon.


Support Xmodulo
This website is made possible by minimal ads and your gracious donation via PayPal or credit card
Please note that this article is published by Xmodulo.com under a Creative Commons Attribution-ShareAlike 3.0 Unported License. If you would like to use the whole or any part of this article, you need to cite this web page at Xmodulo.com as the original source.

Xmodulo © 2021 ‒ About ‒ Write for Us ‒ Feed ‒ Powered by DigitalOcean