How to create a time lapse video with Raspberry Pi
Last updated on August 7, 2014 by Kristophorus Hadiono
After installing a Pi camera module and capturing pictures and videos with raspistill and raspivid commands, I wanted to create a time lapse video of the nice scenery that I have in the back of my apartment.
For those who don't know what it is, time-lapse video (or often-called time-lapse photography) is a shooting technique where contiguous photo frames of a changing scene are captured for an extended period of time in a much lower rate than a typical video frame rate. When the collected frames are played back in a faster frame rate, it creates a so-called "time-lapsing" effect. You might already have seen stunning looking night-to-day time-lapses or fast moving clouds on TV.
In this project, I use the following items to create a case for Raspberry Pi and Picam module before capturing time lapse sequences with them.
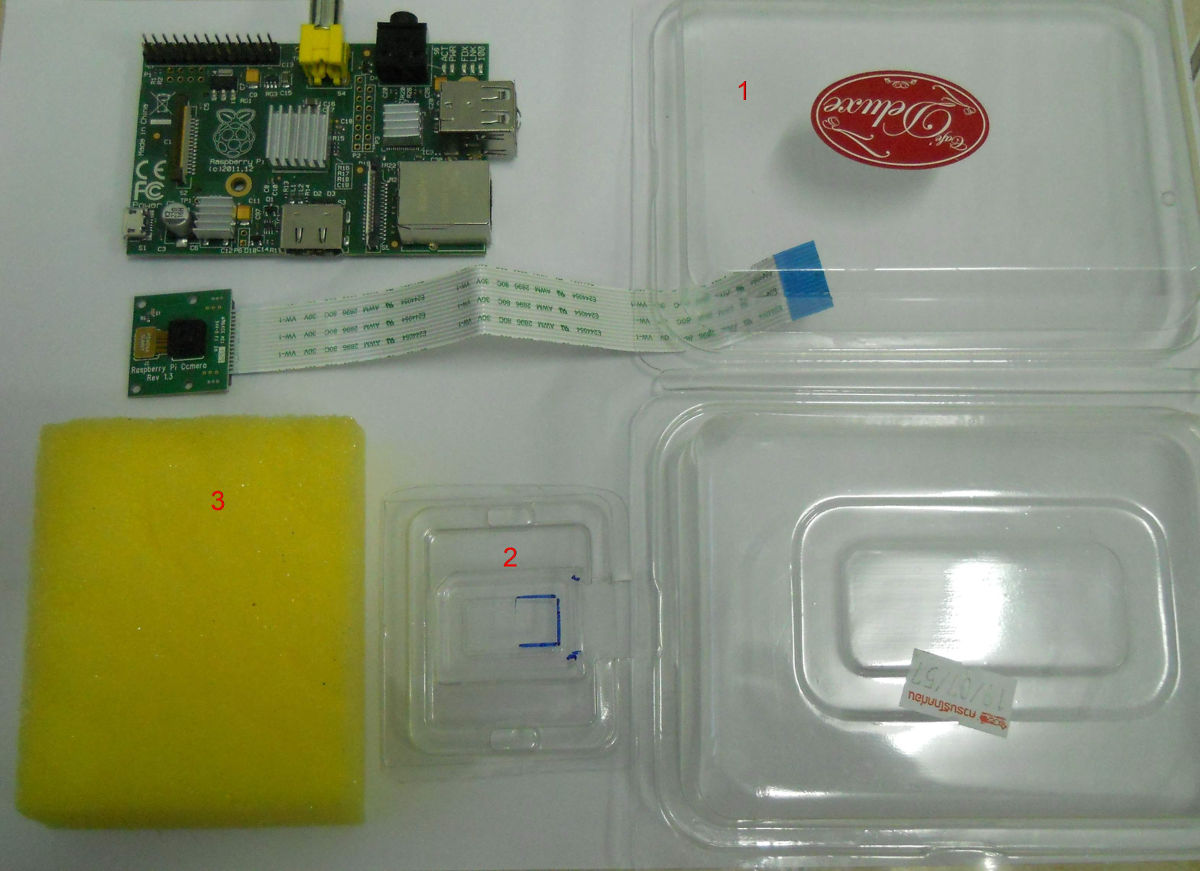
- One used plastic snack container
- One used SD card plastic wrap
- Dish washing sponge (remove the green scratchy side and use only the yellow soft side).
In the above list, the sponge is used only for supporting the Raspberry Pi board. If you have a better material, you can used it.
Building a Case for Raspberry Pi with Picam Module
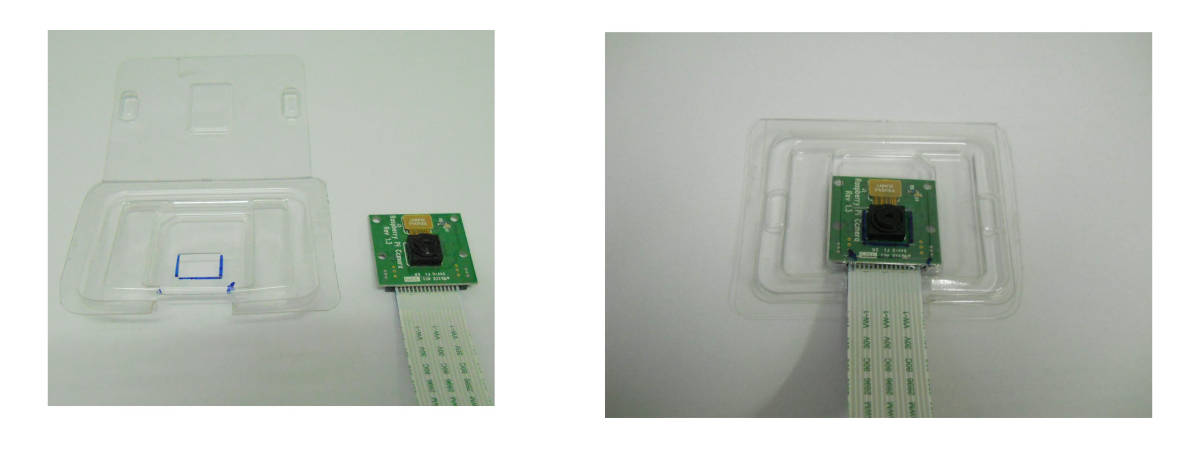
To make a case for my Pi-cam module, I use the plastic wrap of an SD card. I first make a square hole in the middle of the SD card plastic, and cut the edge for the Pi-cam ribbon cable, so I can freely put or organize my Pi-cam module without damaging it accidentally. Here is how it is done.
The next thing is modifying the plastic snack container so that the Picam module can be attached to the container, and the power cable for the Pi can be entered into. I make a small square hole at the top middle of the plastic container, and put double tape in the left and right side, so the Picam module can be attached to this part (see the left picture below). Then create one more square hole in the other side of the container for the power cable. The hole is for USB cable power path (the right picture below).

Assemble all things into one part like this picture below.

Don't forget to put the SD card inside before you close the plastic container. If everything is okay, close the plastic container, and your Raspberry Pi is ready to use for capturing time lapse images.
Shooting Time Lapse Images with Raspberry Pi
Follow these steps to take time lapse images using raspistill command.
1. Make a directory for keeping the images.
# mkdir img-lapse
2. Execute the command below to take a picture every 20 seconds (20,000 milliseconds) during 3 hours (10,800,000 milliseconds).
# raspistill -o /home/pi/img-lapse/img%03d.jpg -tl 20000 -t 10800000
The -tl option allows you to take a picture every 20 seconds. The captured image file will be named in the following format:
img001.jpg
img002.jpg
...
If you want to execute the command automatically, create a bash script file that contains the command, and make it executed at boot time. Alternatively, put your script into .bashrc file in pi home directory, and make your Raspberry Pi automatically login after the boot process is completed.
Combining All Images into a Time Lapse Video
After the capture process is done, the next step is to combine all the images into a time-lapse video file. We have two choices for creating a video from those images. The first method is to run avconv utility on Raspberry Pi itself. Using avconv, you can convert a series of images into a MP4 file. The second method is to transfer all the images to a more powerful secondary computer, and do the conversion there. I recommend the second method because the conversion will take hours on Raspberry Pi. I tried with 120 images using avconv utility, and the process took 2 to 2.5 hours on my Raspberry Pi.
On a secondary Linux computer, I use Openshot to create a time lapse video as described below.
1. Open the Openshot application.
2. Click File and choose "Import Image Sequence" or press CTRL+I. This will pop up a small window.
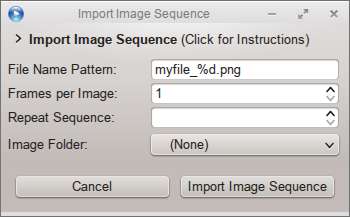
3. Change "File Name Pattern" into img%03d.jpg and point the "Image Folder" to the directory where the images are stored.
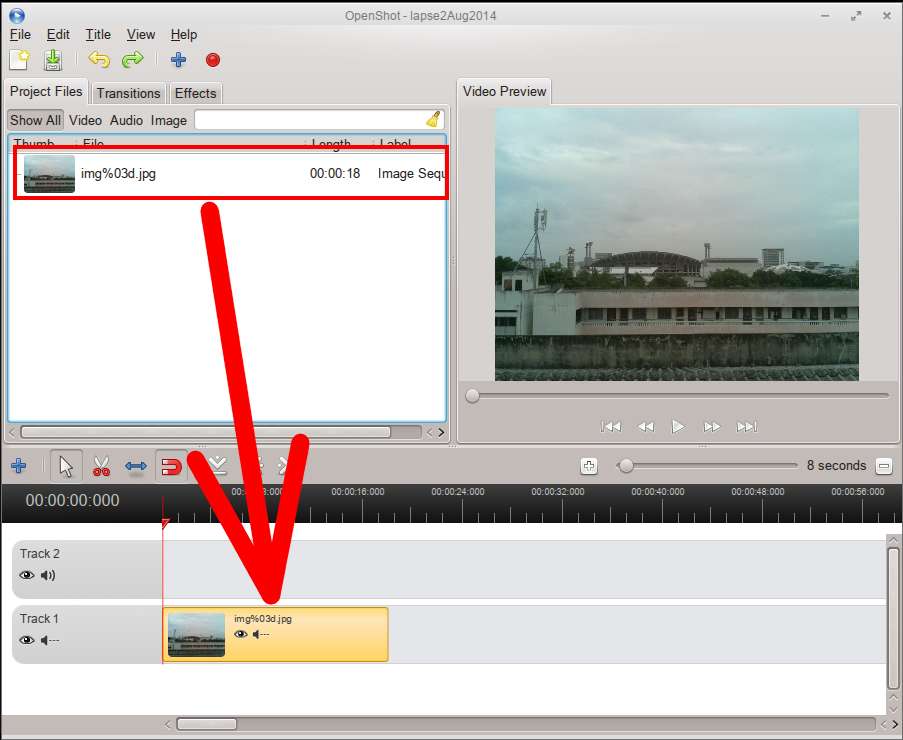
4. Click on "Import Image Sequence" button and wait for a while until import is finished. Then drag and drop the item in the "Project Files" tab into the track 1 in the timeline below (see the picture).
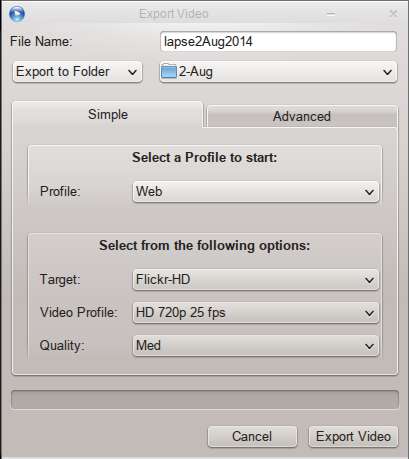
5. Click File and choose "Export Video" or press CTRL+E. Set the "Export to Folder" to the directory where you want the result to be saved. Change the Profile options according to your need. If you want the video uploaded into YouTube or Internet, choose the web profile, and all options will be selected automatically. If you know what you are doing, open the Advanced tab and further customize option values.
6. Click on "Export Video" button and wait for a while until conversion process is finished.
Here is the final result of my time lapse footage created with Openshot.
Support Xmodulo
This website is made possible by minimal ads and your gracious donation via PayPal or credit card
Please note that this article is published by Xmodulo.com under a Creative Commons Attribution-ShareAlike 3.0 Unported License. If you would like to use the whole or any part of this article, you need to cite this web page at Xmodulo.com as the original source.

Xmodulo © 2021 ‒ About ‒ Write for Us ‒ Feed ‒ Powered by DigitalOcean