How to enable Software Collections (SCL) on CentOS
Last updated on September 23, 2020 by Dan Nanni
Red Hat Enterprise Linux (RHEL) and its community fork, CentOS, offer 10-year life cycle, meaning that each version of RHEL/CentOS is updated with security patches for up to 10 years. While such long life cycle guarantees much needed system compatibility and reliability for enterprise users, a downside is that core applications and run-time environments grow antiquated as the underlying RHEL/CentOS version becomes close to end-of-life (EOF). For example, CentOS 6.5, whose EOL is dated to November 30th 2020, comes with python 2.6.6 and MySQL 5.1.73, which are already pretty old by today's standard.
On the other hand, attempting to manually upgrade development toolchains and run-time environments on RHEL/CentOS may potentially break your system unless all dependencies are resolved correctly. Under normal circumstances, manual upgrade is not recommended unless you know what you are doing.
The Software Collections (SCL) repository came into being to help with RHEL/CentOS users in this situation. The SCL is created to provide RHEL/CentOS users with a means to easily and safely install and use multiple (and potentially more recent) versions of applications and run-time environments without messing up the existing system. This is in contrast to other third party repositories which could cause conflicts among installed packages.
The latest SCL offers:
- Python 3.3 and 2.7
- PHP 5.4
- Node.js 0.10
- Ruby 1.9.3
- Perl 5.16.3
- MariaDB and MySQL 5.5
- Apache httpd 2.4.6
In the rest of the tutorial, let me show you how to set up the SCL repository and how to install and enable the packages from the SCL.
Set up the Software Collections (SCL) Repository
The SCL is available on CentOS 6.5 and later. To set up the SCL, simply run:
On CentOS 7 and later:
$ sudo yum install centos-release-scl
On CentOS 6.X:
$ sudo yum install centos-release-SCL
To enable and run applications from the SCL, you also need to install the following package.
$ sudo yum install scl-utils-build
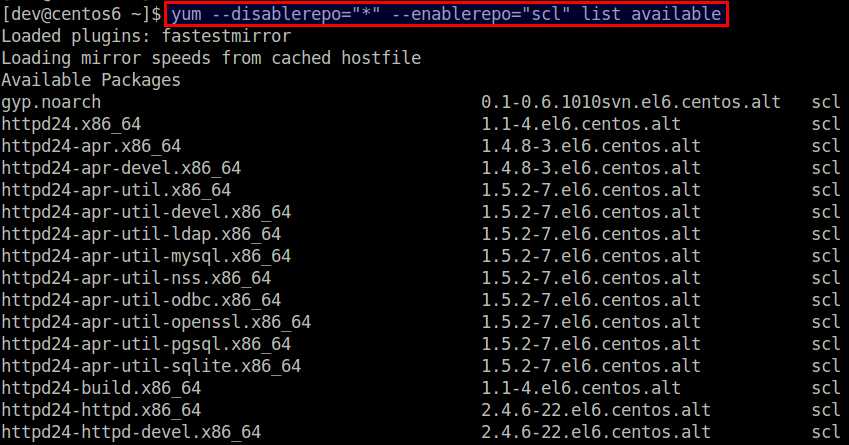
You can browse a complete list of packages available from the SCL repository by running:
$ yum --disablerepo="*" --enablerepo="scl" list available

Install and Enable a Package from the SCL
Now that you have set up the SCL, you can go ahead and install any package from the SCL.
You can search for SCL packages with:
$ yum --disablerepo="*" --enablerepo="scl" search <keyword>
Let's say you want to install Python 3.3.
Go ahead and install it as usual with yum:
$ sudo yum install python33
At any time you can check the list of packages you installed from the SCL by running:
$ scl --list
python33
A nice thing about the SCL is that installing a package from the SCL does NOT overwrite any system files, and is guaranteed to not cause any conflicts with other system libraries and applications.
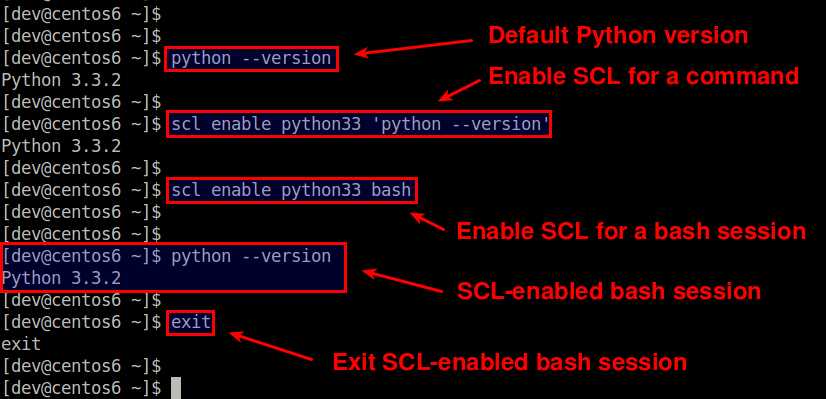
For example, if you check the default python version after installing python33, you will see that the default version is still the same:
$ python --version
Python 2.6.6
If you want to try an installed SCL package, you need to explicitly enable it on a per-command basis using scl:
$ scl enable <scl-package-name> <command>
For example, to enable python33 package for python command:
$ scl enable python33 'python --version'
Python 3.3.2
If you want to run multiple commands while enabling python33 package, you can actually create an SCL-enabled bash session as follows.
$ scl enable python33 bash
Within this bash session, the default python will be switched to 3.3 until you type exit and kill the session.

In short, the SCL is somewhat similar to the virtualenv of Python, but is more general in that you can enable/disable SCL sessions for a far greater number of applications than just Python.
For more detailed instructions on the SCL, refer to the official quick start guide.
Support Xmodulo
This website is made possible by minimal ads and your gracious donation via PayPal or credit card
Please note that this article is published by Xmodulo.com under a Creative Commons Attribution-ShareAlike 3.0 Unported License. If you would like to use the whole or any part of this article, you need to cite this web page at Xmodulo.com as the original source.
Xmodulo © 2021 ‒ About ‒ Write for Us ‒ Feed ‒ Powered by DigitalOcean

