How to access Gmail from the command line on Linux with Alpine
Last updated on September 10, 2020 by Gabriel Cánepa
If you are a command-line lover, I am sure that you welcome with open arms any tool that allows you to perform at least one of your daily tasks using that powerful work environment, e.g., from scheduling appointments and managing finances to accessing Facebook and Twitter.
In this post I will show you yet another pretty neat use case of Linux command-line: accessing Google's Gmail service. To do so, we are going to use alpine, a versatile ncurses-based, command-line email client (not to be confused with Alpine Linux). We will configure Gmail's IMAP and SMTP settings in alpine to receive and send email messages via Google mail servers in a terminal environment. At the end of this tutorial, you will realize that it will only take a few minimum steps to use any other mail servers in alpine.
Granted there are already outstanding GUI-based email clients such as Thunderbird, Evolution or even web interface. So why would anyone be interested in using a command-line email client to access Gmail? The answer is simple. You need to get something done quickly and want to avoid using system resources unnecessarily. Or you are accessing a minimal headless server that does not have the X server installed. Or the X server on your desktop crashed, and you need to send emails urgently before fixing it. In all these situations alpine can come in handy and get you going in no time.
Beyond simple editing, sending and receiving of text-based email messages, alpine is able to encrypt, decrypt, and digitally sign email messages, and integrate seamlessly with TLS.
Installing alpine on Linux
In Red Hat-based distributions, install alpine as follows. Note that on RHEL/CentOS, you need to enable EPEL repository first.
# yum install alpine
In Debian, Ubuntu or their derivatives, you will do:
# aptitude install alpine
After the installation is complete, you can launch the email client by running:
# alpine
The first time you run alpine, it will create a mail directory for the current user inside his/her home directory (~/mail), and bring up the main interface, as shown in the following screencast.
The user interface has the following sections:
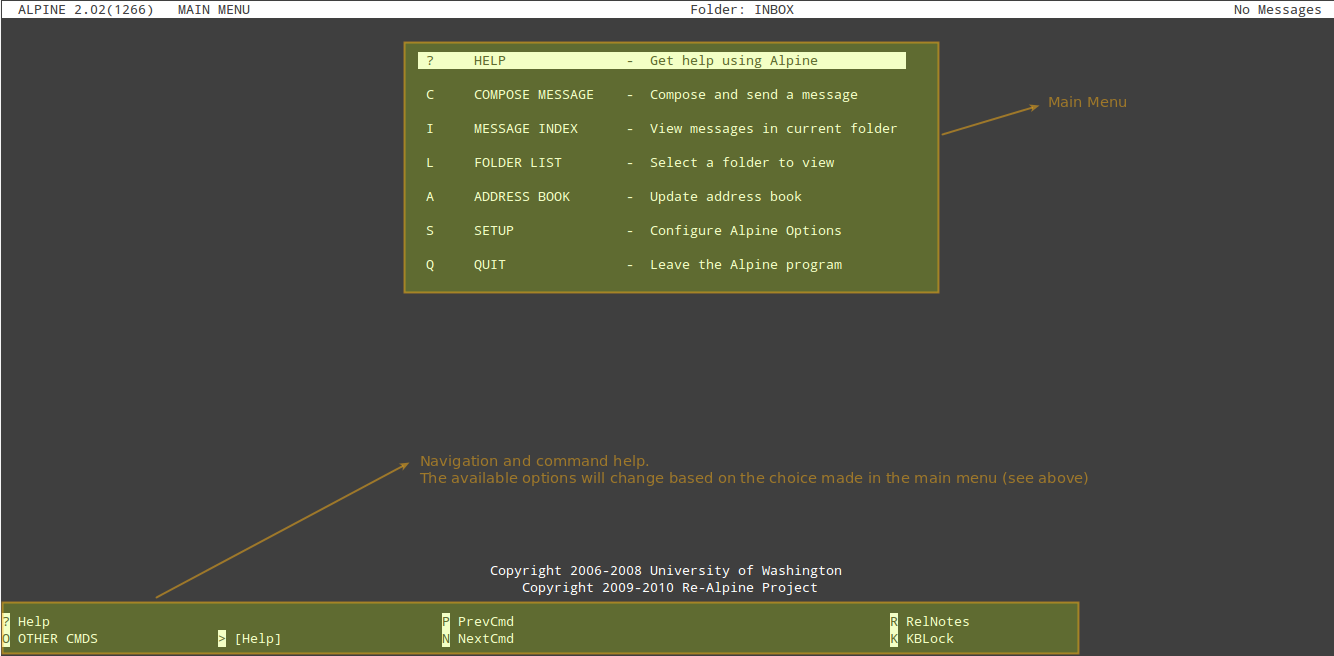
Feel free to browse around a bit in order to become acquainted with alpine. You can always return to the command prompt by hitting the Q key any time. Note that all screens have context-related help available at the bottom of the screen.
Before proceeding further, we will create a default configuration file for alpine. In order to do so, quit alpine, and execute the following command from the command line:
# alpine -conf > /etc/pine.conf
Configuring a Gmail Account for External Email Access
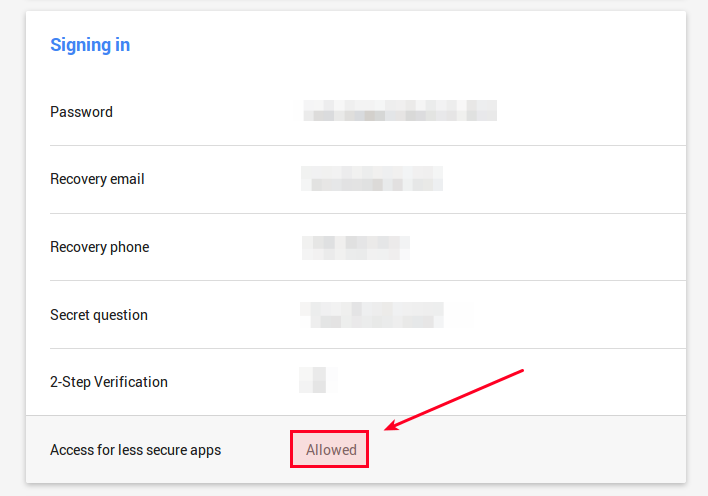
Once you have installed alpine and spent at least a few minutes to feel comfortable with its interface and menus, it's time to actually configure alpine to use an existing Gmail account. Before configuring alpine, you need to enable IMAP in your Gmail settings from the webmail interface as follows.

You also need to enable access for less secure apps in your Google account settings.
Configuring alpine to Use a Gmail Account
Once IMAP access is enabled in your Gmail account, proceed to the following steps to enable reading Gmail messages on alpine.
First, launch alpine.
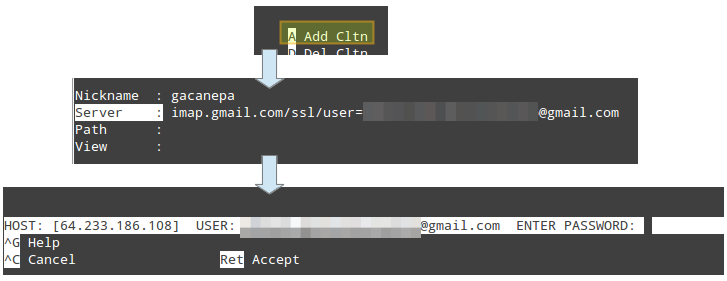
Press S for Setup, and then L for collection lists to define groups of folders to help you better organize your mail:

Add a new folder by pressing A and fill the required information:
- Nickname: whatever name of your choice.
- Server:
imap.gmail.com/ssl/[email protected]
You may leave Path and View blank.
Then press Ctrl+X and enter your password when prompted:
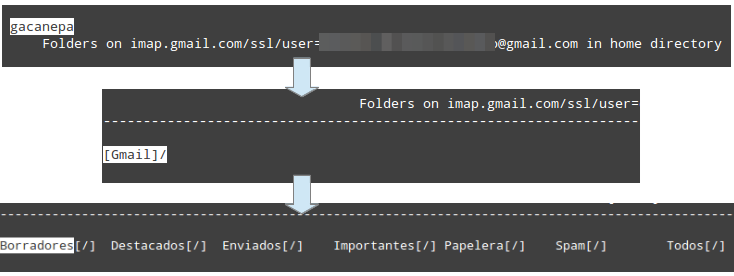
If everything goes as expected, there should be a new folder named after the nickname that you chose earlier. You should find your Gmail mailboxes there:
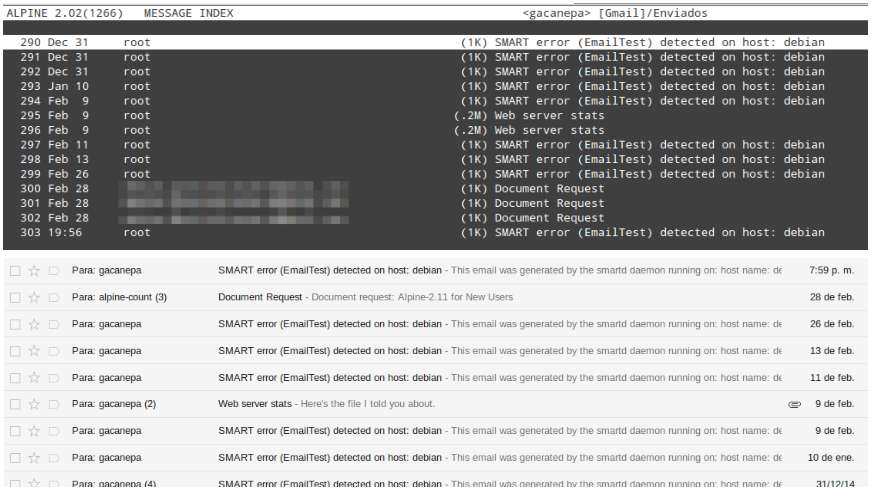
For verification, you can compare the contents of your alpine's Gmail Sent mailbox with those of the web client:
By default new mail checking/notification occurs automatically every 150 seconds. You can change this value, along with many others, in the /etc/pine.conf file. This configuration file is heavily commented for clarity. To set the desired mail check interval to 10 seconds, for example, you will need to do:
# The approximate number of seconds between checks for new mail
mail-check-interval=10
Finally, we need to configure an SMTP server to send email messages via alpine. Go back to the alpine's setup screen as explained earlier, and press C to set the address of a Google's SMTP server. You will need to edit the value of the SMTP Server (for sending) line as follows:
smtp.gmail.com:587/tls/[email protected]
You will be prompted to save changes when you press E to exit setup. Once you save the changes, you are on your way to sending emails through alpine! To do that, just go to Compose in the main menu, and start enjoying your Gmail account from the command line.
Conclusion
In this post we have discussed how to access Gmail in a terminal environment via a lightweight and powerful command-line email client called alpine. alpine is free software released under the Apache Software License 2.0, which is a software license compatible with the GPL. alpine takes pride in being friendly for new users, yet powerful for seasoned system administrators at the same time. I hope that after reading this article you have come to realize how true that last statement is.
Feel free to leave your comments or questions using the form below. I look forward to hearing from you!
Support Xmodulo
This website is made possible by minimal ads and your gracious donation via PayPal or credit card
Please note that this article is published by Xmodulo.com under a Creative Commons Attribution-ShareAlike 3.0 Unported License. If you would like to use the whole or any part of this article, you need to cite this web page at Xmodulo.com as the original source.

Xmodulo © 2021 ‒ About ‒ Write for Us ‒ Feed ‒ Powered by DigitalOcean