How to build a network attached storage (NAS) server with Openfiler
Last updated on July 19, 2020 by Dan Nanni
Network-attached storage (NAS) is a dedicated disk storage appliance that is typically connected to a local network, in order to provide file-based or block-based data storage services to other client computers over the network.
Openfiler is a GPLv2-licensed open-source storage management appliance. Openfiler offers a convenient web-based management interface for various network storage services, supporting NFS, CIFS, HTTP/Dav, RSync, iSCSI, etc. In this tutorial, I will explain how to build a network attached storage (NAS) server with Openfiler.
Since Openfiler is an operating system distribution, you need to prepare a bare-metal hardware to install Openfiler. In this tutorial, I use the following hardware specification to set up Openfiler storage appliance.
- x86_64 processor architecture
- 1GB RAM
- Two hard drives with 3GB (boot/root partitions) and 8GB storages (storage partitions)
- One network interface card
Openfiler Installation Guide
First, download an ISO image (507MB) of Openfiler version 2.99 from their website, and burn it into a CD.
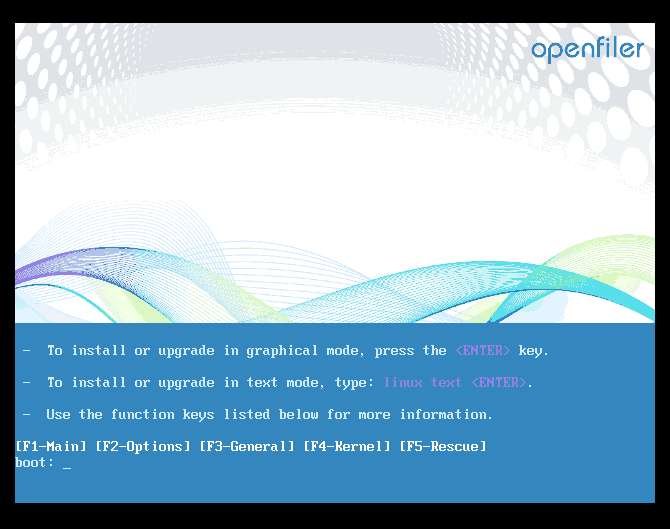
Go ahead and boot your hardware from the CD. When you see the following screen, press ENTER to proceed to install in graphical mode.
Choose your keyboard, and then go to disk partition menu. Here, choose "Create custom layout" option.
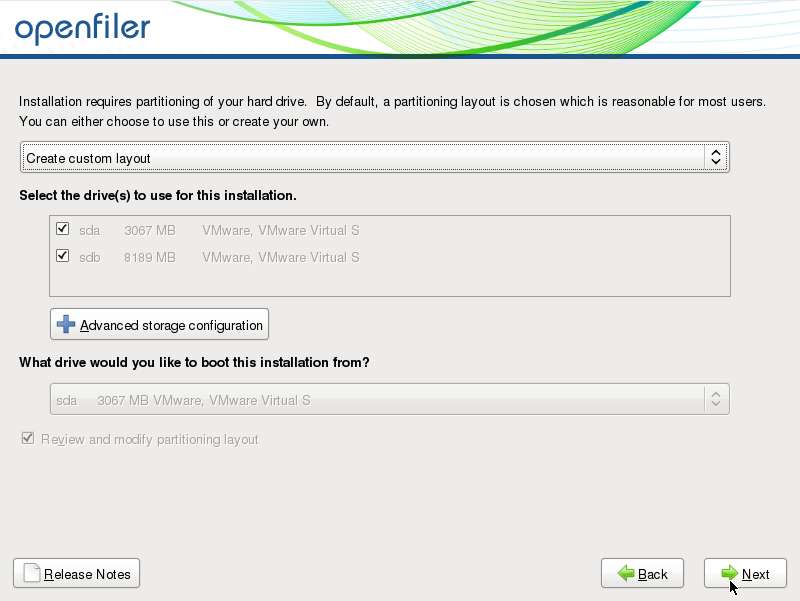
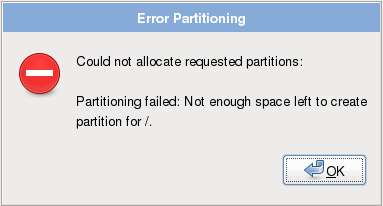
Make sure to not choose any other option. Otherwise, you will get a partition error as follows. This is because Openfiler does not support automatic partitioning.
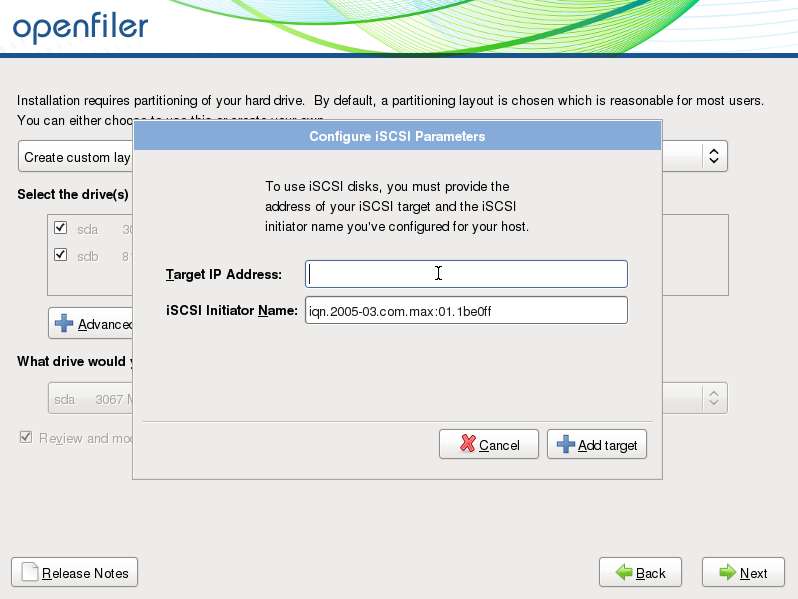
Optionally, you can also use iSCSI disks at Openfiler server. For that, click on "Advanced storage configuration" button, and add iSCSI targets.
Now proceed with custom partitioning.
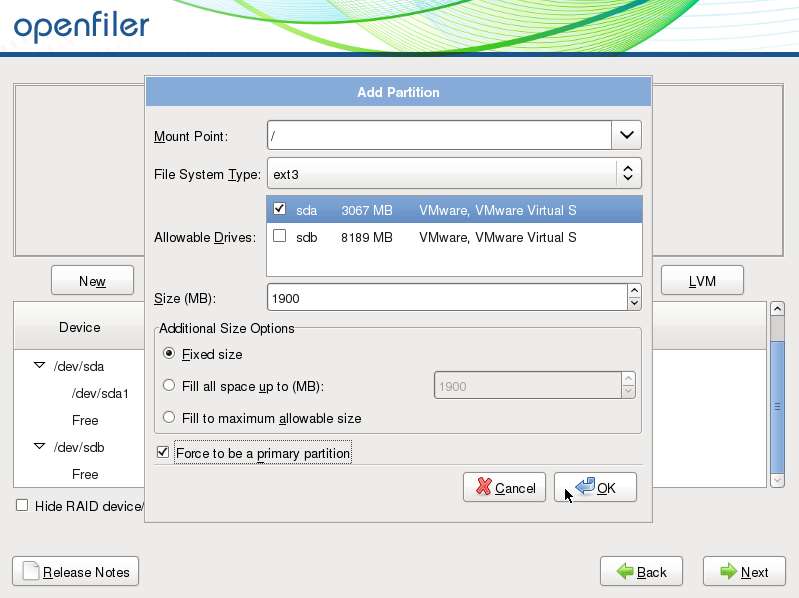
Create a boot partition with the following info:
- Mount point:
/boot - File system type:
ext3 - Drive:
sda - Size: 100 MB
- Fixed size option
- "
Force to be a primary partition" checked

Create a root partition with the same info as above, except that you set mount point to /, and size to 1900 MB.
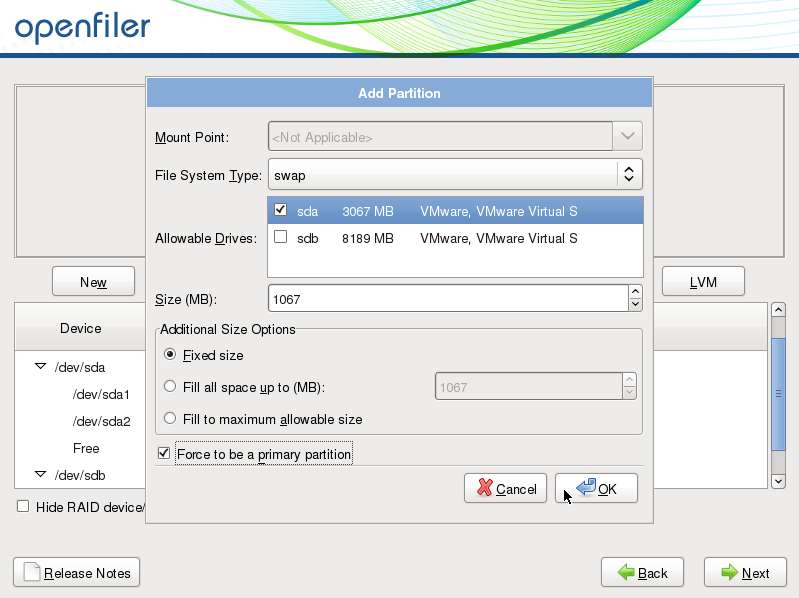
Create a swap partition with swap file system type, sda drive, and remaining free space (i.e., 1067 MB).
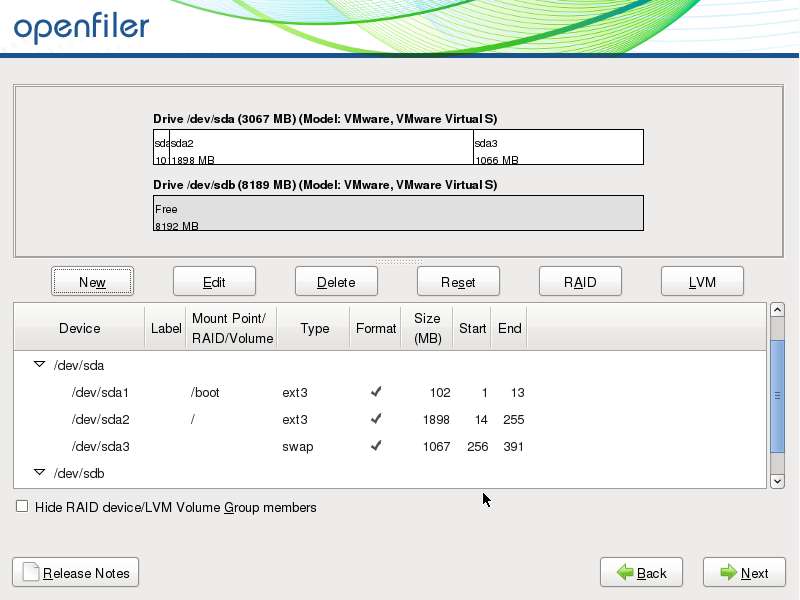
The final disk layout looks like the following. For now, leave the second hard drive (i.e., sdb) un-partitioned. Once Openfiler is up and running, you can manage the second hard drive via web-based interface. Click on Next to confirm the layout.
Configure GRUB boot loader.

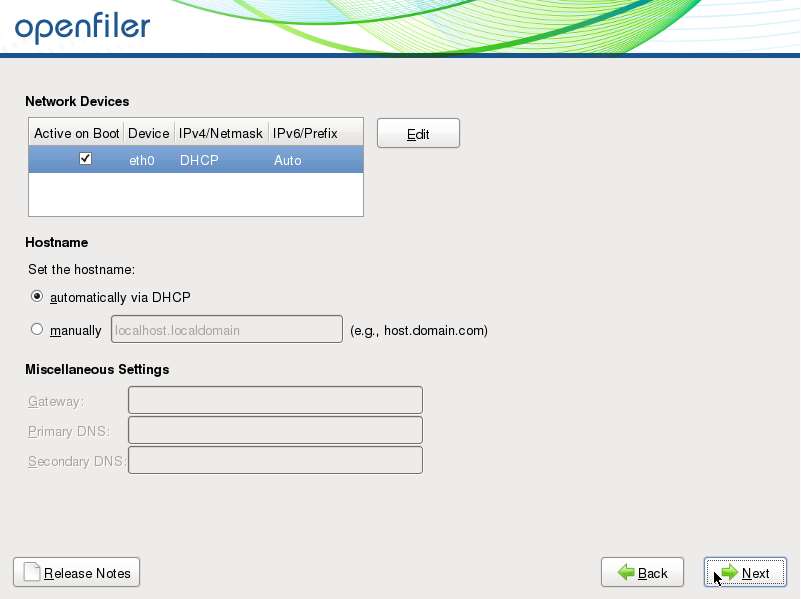
Configure a network device.
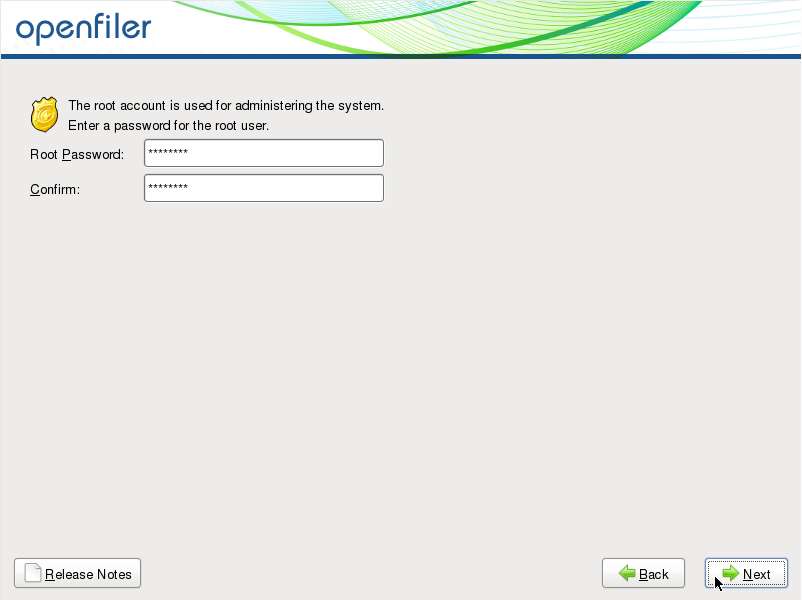
Set root password. The root account is used to perform various internal administrative tasks via console.
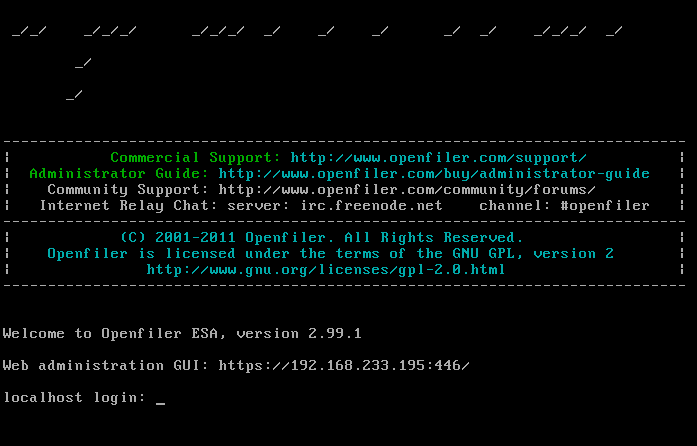
Finalize Openfiler installation and reboot the server. Upon boot-up, you will see Openfiler console screen as shown.
Openfiler Administration Guide
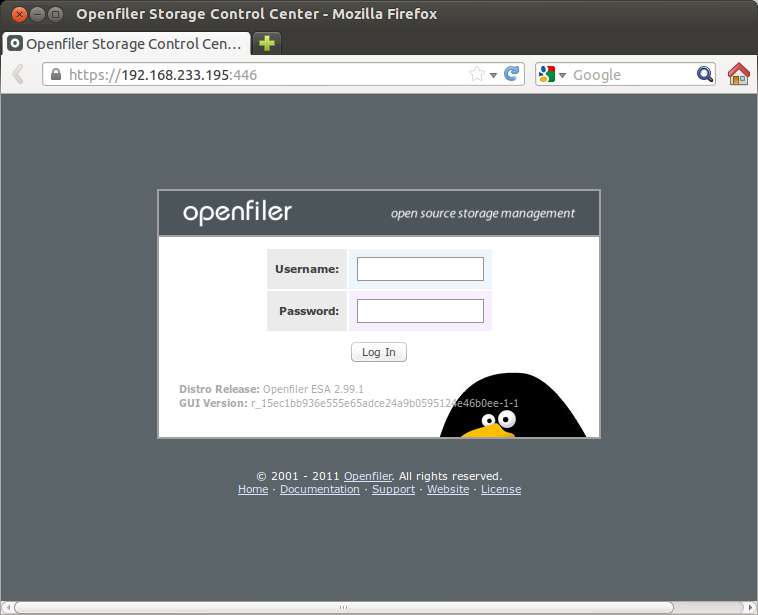
To access web-based management interface of Openfiler, go to https://<ip-address-of-openfiler-server>:446. Log in with the default username/password: openfiler/password.
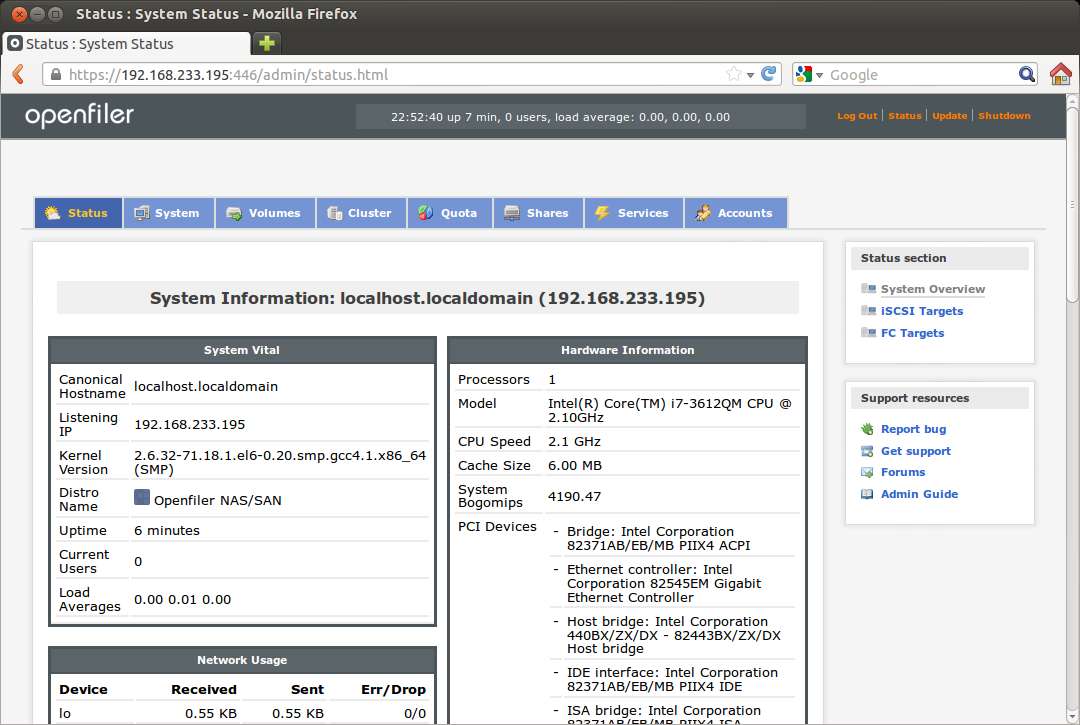
Once logged in, you will see basic system summary information of Openfiler server as follows.
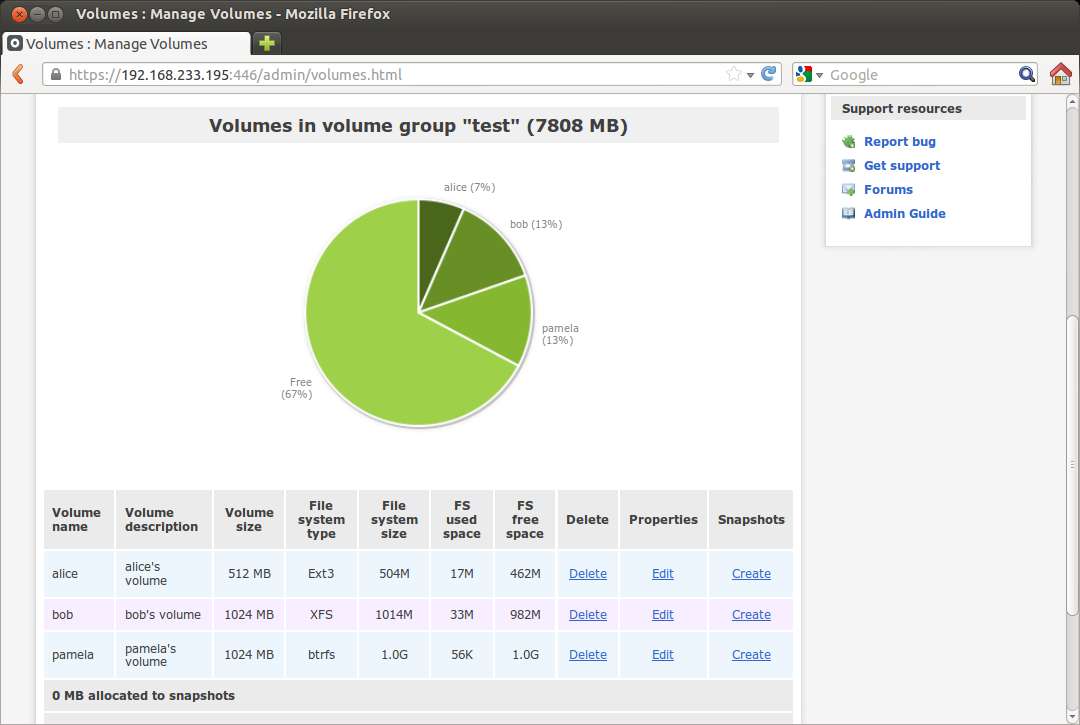
To access storage volume management interface, click on Volumes tab. Here, you can manage per-user storage volumes, block devices, iSCSI disks and software RAID. For example, you can create a physical volume on sdb hard drive, and provision per-user logical volumes in it, as shown below.
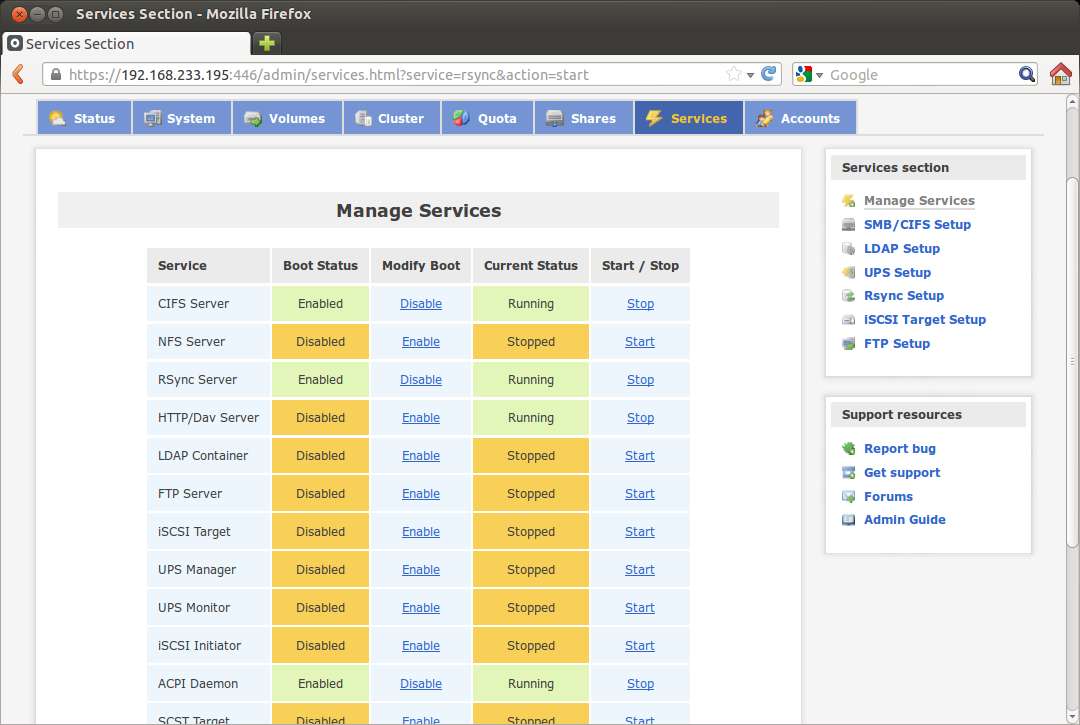
Openfiler offers various network storage services. To manage these services in a single unified interface, click on Services tab. Here, you can enable/disable and start/stop a service on demand.
You can browse and manage remote network shares of existing users by clicking on Shares tab.

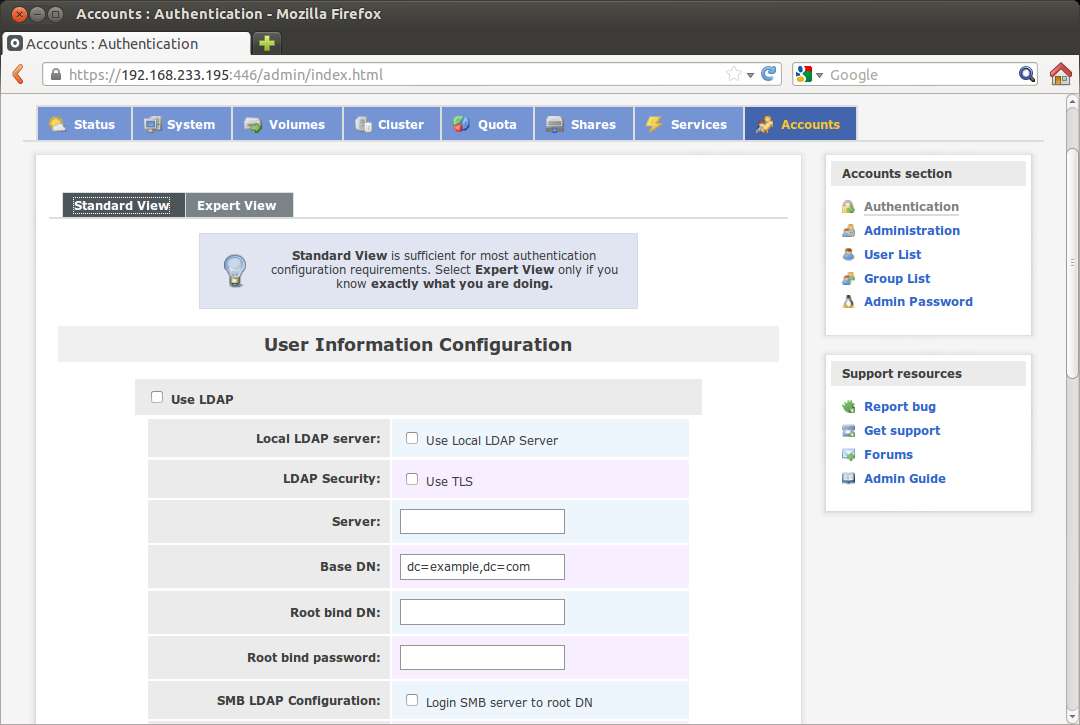
You can also configure user authentication via Openfiler's web interface. For example, you can manage user's credentials via LDAP server or Windows domain controller/authentication.
Support Xmodulo
This website is made possible by minimal ads and your gracious donation via PayPal or credit card
Please note that this article is published by Xmodulo.com under a Creative Commons Attribution-ShareAlike 3.0 Unported License. If you would like to use the whole or any part of this article, you need to cite this web page at Xmodulo.com as the original source.

Xmodulo © 2021 ‒ About ‒ Write for Us ‒ Feed ‒ Powered by DigitalOcean