How to install LEMP stack (Nginx, MariaDB/MySQL and PHP) on CentOS
Last updated on August 24, 2020 by Dan Nanni
The LEMP stack is an increasingly popular web service stack, powering mission-critical web services in many production environments. As the name implies, the LEMP stack is composed of Linux, Nginx, MariaDB/MySQL and PHP. Nginx is a high performance and lightweight replacement of slow and hard-to-scale Apache HTTP server used in the traditional LAMP stack. MariaDB is a community-driven fork of MySQL, with more features and better performance. PHP, a server-side language for generating dynamic content, is processed by PHP-FPM, an enhanced implementation of PHP FastCGI.
In this tutorial, I demonstrate how to set up the LEMP stack on CentOS platforms. I target both CentOS 6 and CentOS 7 platforms, and point out differences where necessary.
Step One: Nginx
As the first step, let's install Nginx on CentOS, and do basic configuration for Nginx., such as enabling auto-start and customizing the firewall.
Let's install a pre-built stable version of nginx package from its official RPM source.
Install Nginx on CentOS 7:
$ sudo rpm --import http://nginx.org/keys/nginx_signing.key
$ sudo rpm -ivh http://nginx.org/packages/centos/7/noarch/RPMS/nginx-release-centos-7-0.el7.ngx.noarch.rpm
$ sudo yum install nginx
Install Nginx on CentOS 6:
$ sudo rpm --import http://nginx.org/keys/nginx_signing.key
$ sudo rpm -ivh http://nginx.org/packages/centos/6/noarch/RPMS/nginx-release-centos-6-0.el6.ngx.noarch.rpm
$ sudo yum install nginx
Note that if you do not import the official Nginx GPG key before installing nginx RPM, you will get this warning:
warning: /var/tmp/rpm-tmp.KttVHD: Header V4 RSA/SHA1 Signature, key ID 7bd9bf62: NOKEY
Start Nginx
After installation, Nginx does not start automatically. Let's start Nginx right now, and configure it to auto-start upon boot. Also, we need to open TCP/80 port in the firewall so that you can access Nginx webserver remotely. All of these are achieved by entering the following commands.
On CentOS 7:
$ sudo systemctl start nginx
$ sudo systemctl enable nginx
$ sudo firewall-cmd --zone=public --add-port=80/tcp --permanent
$ sudo firewall-cmd --reload
On CentOS 6:
$ sudo service nginx start
$ sudo chkconfig nginx on
$ sudo iptables -I INPUT -p tcp -m tcp --dport 80 -j ACCEPT
$ sudo service iptables save
Test Nginx
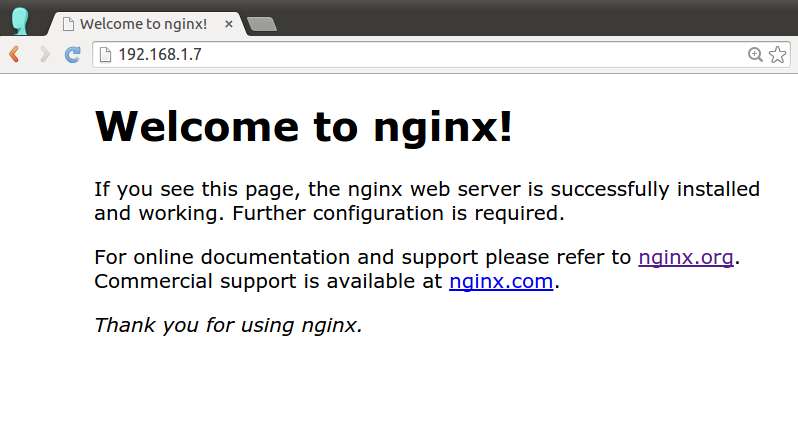
The default document root directory of Nginx is /usr/share/nginx/html. A default index.html file must be already placed in this directory. Let's check if you can access this test web page by going to http://<nginx-ip-address>/

If you see the above page, Nginx must be set up correctly. Proceed to the next.
Step Two: MariaDB/MySQL
The next step is to install a database component of the LEMP stack. While CentOS/RHEL 6 or earlier provides MySQL server/client packages, CentOS/RHEL 7 has adopted MariaDB as the default implementation of MySQL. As a drop-in replacement of MySQL, MariaDB ensures maximum compatibility with MySQL in terms of APIs and command-line usages. Here is how to install and configure MariaDB/MySQL on CentOS.
Install MariaDB on CentOS 7:
Install MariaDB server/client package and start MariaDB server as follows.
$ sudo yum install mariadb-server
$ sudo systemctl start mariadb
$ sudo systemctl enable mariadb
Install MySQL on CentOS 6:
Install MySQL server/client package, and start MySQL server as follows.
$ sudo yum install mysql-server
$ sudo service mysqld start
$ sudo chkconfig mysqld on
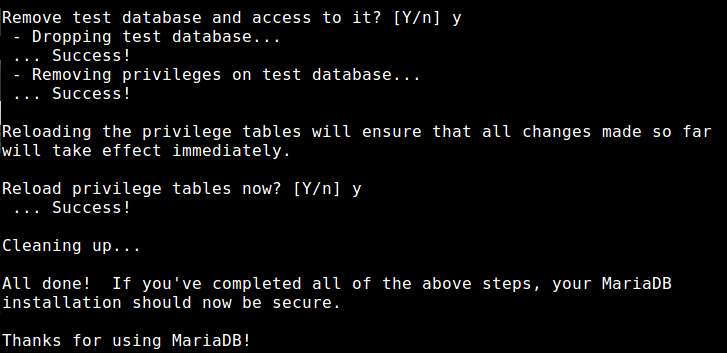
After launching MariaDB/MySQL server successfully, execute the following add-on script that comes with MariaDB/MySQL server package. This one-time run conducts several security hardening steps for the database server, such as setting the (non-empty) root password, removing anonymous user, and locking down remote access.
$ sudo mysql_secure_installation

That's it for the database setup. Now move to the next step.
Step Three: PHP
PHP is an important component of the LEMP stack, which is responsible for generating dynamic content from data stored in a MariaDB/MySQL server. For the LEMP stack, you need, at a minimum, to install PHP-FPM and PHP-MySQL. PHP-FPM (FastCGI Process Manager) implements an interface between Nginx and PHP applications which generate dynamic content. The PHP-MySQL module allows PHP programs to access MariaDB/MySQL.
Install PHP Modules on CentOS 7:
$ sudo yum php php-fpm php-mysql
Install PHP Modules on CentOS 6::
First you need to install REMI repository (refer to this guide), and install the packages from the repository.
$ sudo yum --enablerepo=remi install php php-fpm php-mysql

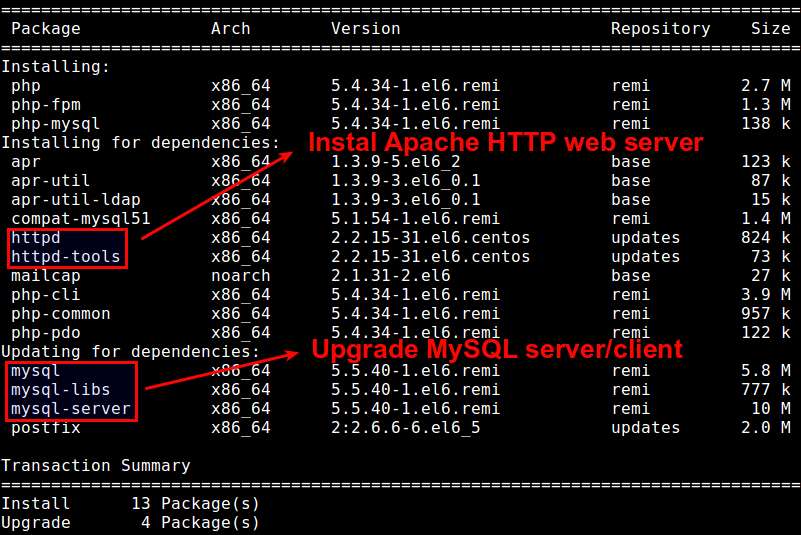
Two observations worth noting while installing PHP:
On CentOS 6, MySQL server and client packages will automatically be upgraded as part of dependencies of the latest php-mysql in REMI.
On both CentOS 6 and 7, installing the php package will also install Apache web server (i.e., httpd) as part of its dependencies. This can cause conflicts with Nginx web server. We will take care of this problem in the next section.
Depending on your use cases, you may want to install any of the following additional PHP module packages with yum command to customize your PHP engine.
php-cli: command-line interface for PHP. Useful for testing PHP from the command line.php-gd: image processing support for PHP.php-bcmath: arbitrary mathematics support for PHP.php-mcrypt: encryption algorithm support for PHP (e.g., DES, Blowfish, CBC, CFB, ECB ciphers).php-xml: XML parsing and manipulation support for PHP.php-dba: database abstraction layer support for PHP.php-pecl-apc: PHP accelerator/caching support.
To see a complete list of available PHP modules to install, run:
$ sudo yum search php- (CentOS 7)
$ sudo yum --enablerepo=remi search php- (CentOS 6)
Start PHP-FPM
You will need to start PHP-FPM, and add it to auto-start list.
On CentOS 7:
$ sudo systemctl start php-fpm
$ sudo systemctl enable php-fpm
On CentOS 6:
$ sudo chkconfig php-fpm on
$ sudo service php-fpm start
Step Four: Configure the LEMP Stack
The final step of the tutorial is tuning the LEMP stack configuration.
Disable httpd
Let's first disable httpd which was installed along with the PHP package earlier.
On CentOS 7:
$ sudo systemctl disable httpd
On CentOS 6:
$ sudo chkconfig httpd off
Configure Nginx
Next, let's configure Nginx virtual hosts, so that Nginx can process PHP via PHP-FPM. For that, open /etc/nginx/conf.d/default.conf with a text editor, and change it to the following.
$ sudo vi /etc/nginx/conf.d/default.conf
server {
    listen       80;
    server_name  www.server_domain.com;
    root   /usr/share/nginx/html;
    index  index.php index.html index.htm;

    location / {
    }

    # redirect server error pages to the static page /50x.html
    error_page   500 502 503 504  /50x.html;
    location = /50x.html {
    }

    # nginx passes PHP scripts to FastCGI server via a TCP/9000 socket
    # this setting much be consistent with /etc/php-fpm.d/www.conf
    # try_files prevents nginx from passing bad scripts to FastCGI server
    location ~ .php$ {
        try_files $uri =404;
        fastcgi_pass 127.0.0.1:9000;
        fastcgi_index index.php;
        fastcgi_param SCRIPT_FILENAME $document_root$fastcgi_script_name;
        include fastcgi_params;
    }
}
Also, let's adjust the number of Nginx worker threads (specified in /etc/nginx/nginx.conf), which is set to one by default. Typically, we create as many worker threads as the number of CPU cores you have. To check how many CPU core you have, run this command:
$ grep processor /proc/cpuinfo | wc -l
If you have 4 cores, change /etc/nginx/nginx.conf as follows.
$ sudo vi /etc/nginx/nginx.conf
worker_processes 4;
Configure PHP
Next, let's customize PHP configuration in /etc/php.ini file. More specifically, add the following lines in /etc/php.ini.
cgi.fix_pathinfo=0
date.timezone = "America/New_York"
As a security precaution, we want the PHP interpreter to process only an exact file path, instead of guessing any non-existing file. The first line above achieves this goal.
The second line specifies the default timezone used by date/time related PHP functions. Use tzselect command to find out your timezone, and set the value of date.timezone accordingly.
Test PHP
Finally, let's check if Nginx can process a PHP page. Before testing, make sure to restart Nginx and PHP-FPM.
On CentOS 7:
$ sudo systemctl restart nginx
$ sudo systemctl restart php-fpm
On CentOS 6:
$ sudo service nginx restart
$ sudo service php-fpm restart
Create a PHP file named test.php with the following content, and place it in /usr/share/nginx/html directory.
<?php phpinfo(); ?>
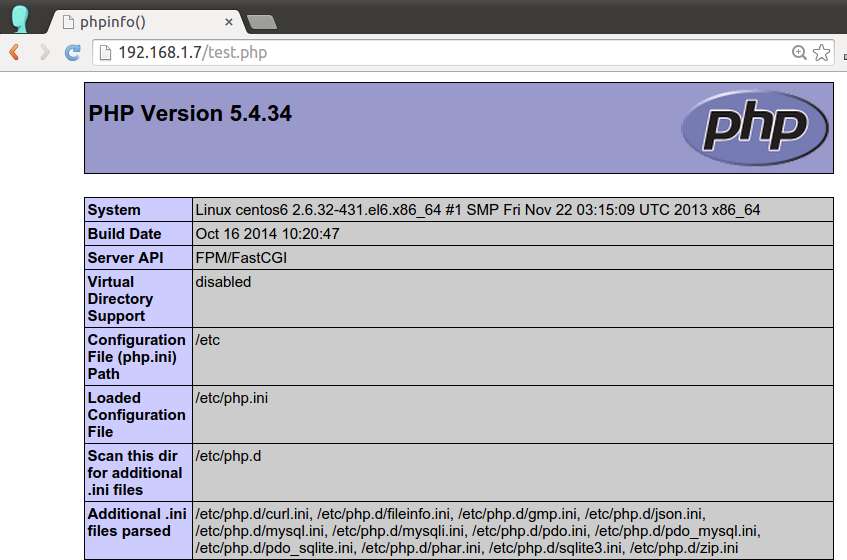
Open a web browser, and go to http://<nginx-ip-address>/test.php.

If you see the above page, you are all set with the LEMP stack!
Support Xmodulo
This website is made possible by minimal ads and your gracious donation via PayPal or credit card
Please note that this article is published by Xmodulo.com under a Creative Commons Attribution-ShareAlike 3.0 Unported License. If you would like to use the whole or any part of this article, you need to cite this web page at Xmodulo.com as the original source.
Xmodulo © 2021 ‒ About ‒ Write for Us ‒ Feed ‒ Powered by DigitalOcean

