How to set up a lightweight web server on Raspberry Pi
Last updated on April 18, 2014 by Kristophorus Hadiono
There are a variety of web server software available for Linux-based platforms including Raspbian. Using one of those available web server software, we can turn Raspberry Pi into a 24/7 available portable web server. In this case, however, we must understand that Raspberry Pi has hardware limitations in terms of CPU clock speed, memory, etc. As such, we want to avoid running resource-heavy software (e.g., Apache) on Raspberry Pi.
Among web server software available for Raspbian, Nginx and Lighttpd are two of the most widely used lightweight web server engines. This tutorial will describe how to install and set up Nginx or Lighttpd web server on Raspbian-powered Raspberry Pi. Choose one as you prefer.
Install and configure Nginx web server on Raspberry Pi
Update your repository and install Nginx with apt-get command.
$ sudo apt-get update
$ sudo apt-get install nginx
Change the default document root directory of Nginx from /usr/share/nginx/www to /var/www.
$ sudo mkdir /var/www
Edit the default site's configurations as follows.
$ sudo nano /etc/nginx/sites-available/default
server {
        listen 80;
        server_name $domain_name;
        root /var/www;
        index index.html index.htm;
        access_log /var/log/nginx/access.log;
        error_log /var/log/nginx/error.log;
}
Start Nginx web server.
$ sudo service nginx restart
To test if Nginx web server is working or not, put a simple index.html in /var/www, and open it with your browser.

Any web server with no server side language will not be fully functioning as it cannot serve any dynamic content. For a typical web server, PHP is used as a primary server side language. A PHP request sent by user's web browser to a web server is handed over to PHP for execution. Once PHP has completed its processing, the output is sent back to a web server, which is then finally forwarded to the browser.
With Nginx, php-fpm is used to execute PHP programs. So the next step is to install php-fpm as well as php-apc. The latter is a PHP extension for accelerating PHP performance.
Install php5-fpm and php-apc with apt-get.
$ sudo apt-get install php5-fpm php-apc
Edit the default site's configuration to add the following inside server block.
$ sudo nano /etc/nginx/sites-available/default
server {
        listen 80;
        server_name $domain_name;
        root /var/www;
        index index.html index.htm;
        access_log /var/log/nginx/access.log;
        error_log /var/log/nginx/error.log;

        location ~.php$ {
                fastcgi_pass unix:/var/run/php5-fpm.sock;
                fastcgi_split_path_info ^(.+.php)(/.*)$;
                fastcgi_index index.php;
                fastcgi_param SCRIPT_FILENAME $document_root$fastcgi_script_name;
                fastcgi_param HTTPS off;
                try_files $uri =404;
                include fastcgi_params;
        }
}
Restart Nginx web server.
$ sudo service nginx restart
As a test, create a simple PHP file in /var/www as follows.
$ sudo nano /var/www/test.php
<?php
phpinfo();
?>
Go to http://<raspberrypi-ip-address>/test.php. If you see information about your PHP setup, it means php-fpm is set up properly.

Install and configure Lighttpd web server on Raspberry Pi
Lighttpd is another speed-enhanced lightweight web server software that can run on Raspbian. Proceed as follows to install and configure Lighttpd on Raspbian.
Create and add user/group named www-data on your Raspberry Pi.
$ sudo addgroup --system www-data
$ sudo adduser www-data www-data
Update your repository, and install Lighttpd with apt-get.
$ sudo apt-get update
$ sudo apt-get install lighttpd
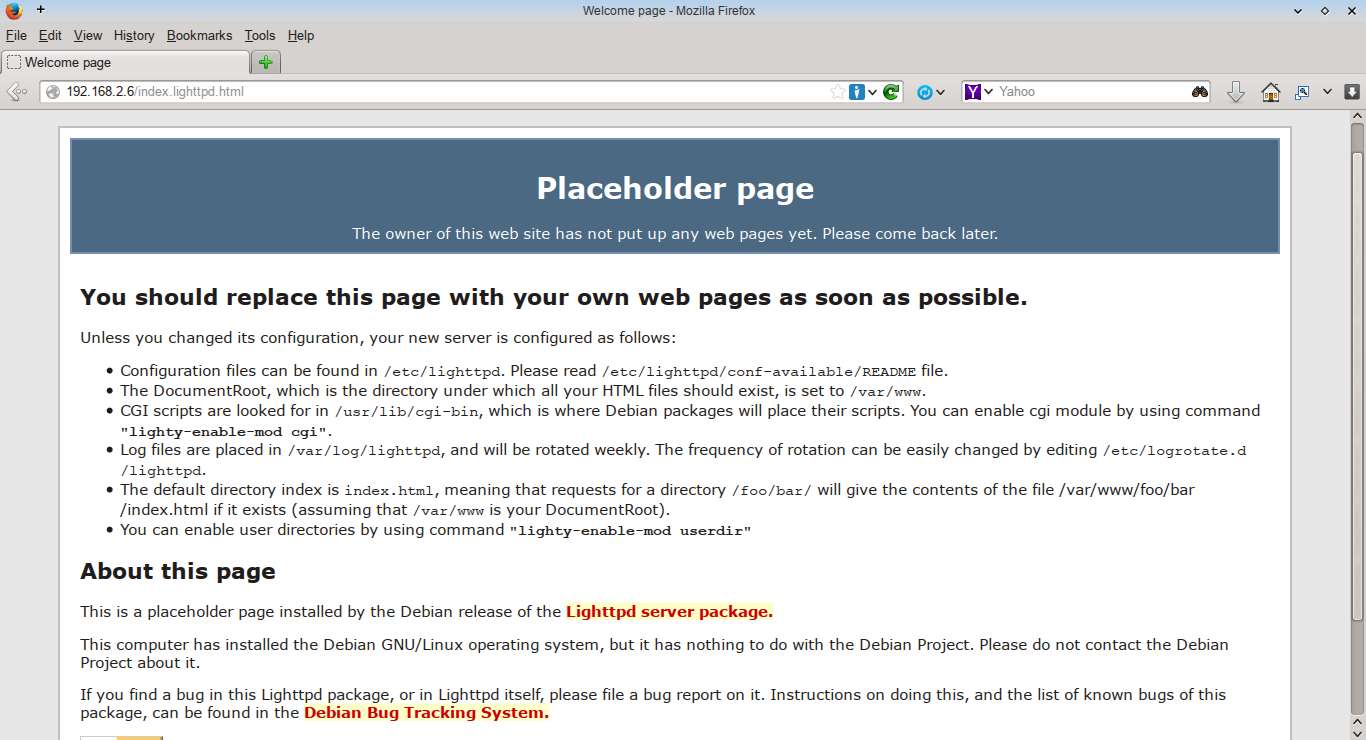
To test whether Lighttpd is working or not, go to http://<raspberrypi-ip-address>/index.lighttpd.html from your browser to verify the page is loading.

Next, install and enable php-cgi for Lighttpd web server.
$ sudo apt-get install php5-cgi
$ sudo lighty-enable-mod fastcgi-php
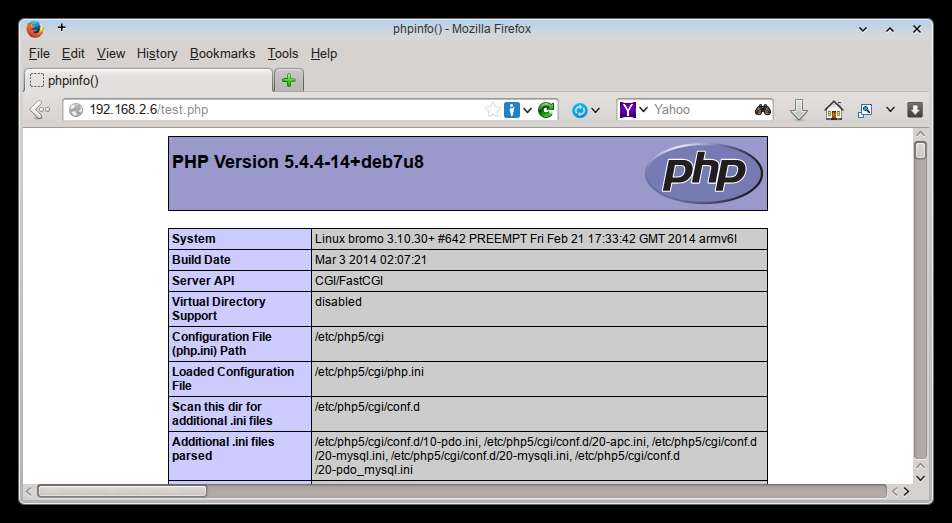
Create a simple PHP file in /var/www, and open Go to http://<raspberrypi-ip-address>/test.php through your browser. If you see the following PHP page, it means PHP has been set up successfully.
$ sudo nano /var/www/test.php
<?php
phpinfo();
?>

Configure MySQL and phpMyAdmin
In many cases, a web server is operated along with a backend database server. This part describes how to install MySQL as a database server and phpMyAdmin as the management interface for manipulating databases.
Install MySQL, phpMyAdmin, and php5-mysql.
$ sudo apt-get install mysql-server mysql-client php5-mysql phpmyadmin
During MySQL server installation process, you will be asked to configure the password for root user of MySQL. You will also be asked to choose the web server installed in the system (Apache2 or Lighttpd). In case of Nginx, you can leave the web server selection field empty.
During phpMyAdmin installation, you will be asked to configure database for phpMyAdmin. Answer yes. When asked to enter the password of the administrative user, provide the password.
Make a link of phpMyAdmin from /usr/share/phpmyadmin to /var/www/phpmyadmin.
$ sudo ln -s /usr/share/phpmyadmin /var/www/phpmyadmin
Open phpMyAdmin from your browser by going to http://<raspberrypi-ip-address>/phpmyadmin, and log in as root using the administrative password that you have set earlier.


Support Xmodulo
This website is made possible by minimal ads and your gracious donation via PayPal or credit card
Please note that this article is published by Xmodulo.com under a Creative Commons Attribution-ShareAlike 3.0 Unported License. If you would like to use the whole or any part of this article, you need to cite this web page at Xmodulo.com as the original source.
Xmodulo © 2021 ‒ About ‒ Write for Us ‒ Feed ‒ Powered by DigitalOcean

