How to create and manage LXC containers on Ubuntu
Last updated on November 28, 2020 by Dan Nanni
While the concept of containers was introduced more than a decade ago to manage shared hosting environments securely (e.g., FreeBSD jails), Linux containers such as LXC or Docker have gone mainstream only recently with the rising need to deploy applications for the cloud. While Docker is getting all the media spotlight these days with strong backing from major cloud providers (e.g., Amazon AWS, Microsoft Azure) and distro providers (e.g., Red Hat, Ubuntu), LXC is in fact one of the earlier container technologies developed for Linux platforms.
If you are an average Linux user, what good does Docker/LXC bring to you? Well, containers are actually a great means to switch between distros literally instantly. Suppose your current desktop is Debian. You want Debian's stability. At the same time, you also want to play the latest Ubuntu games. Then instead of bothering to dual boot into a Ubuntu partition, or boot up a heavyweight Ubuntu VM, simply spin off a Ubuntu container on the spot, and you are done.
Even without all the goodies of Docker, what I like about LXC containers is the fact that LXC can be managed by libvirt interface, which is not the case for Docker. If you have been using libvirt-based management tools (e.g., virt-manager or virsh), you can use those same tools to manage LXC containers.
In this tutorial, I focus on the command-line usage of standard LXC container tools, and demonstrate how to create and manage LXC containers from the command line on Ubuntu.
Install LXC on Ubuntu
To use LXC on Ubuntu, install LXC user-space tools as follows.
$ sudo apt-get install lxc
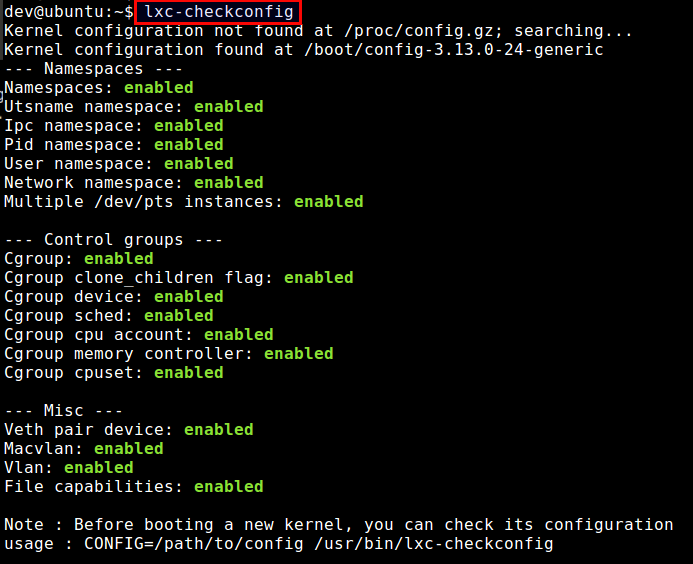
After that, check the current Linux kernel for LXC support by running lxc-checkconifg tool. If everything is enabled, kernel's LXC support is ready.
$ lxc-checkconfig
After installing LXC tools, you will find that an LXC's default bridge interface (lxcbr0) is automatically created (as configured in /etc/lxc/default.conf).
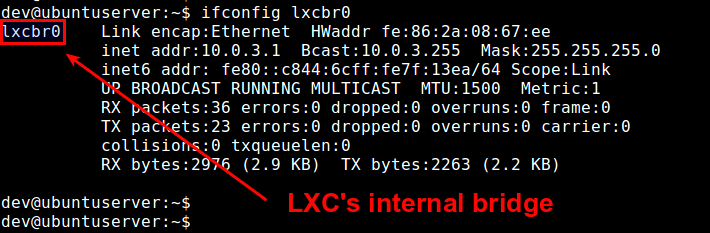
When you create an LXC container, the container's interface will automatically be attached to this bridge, so the container can communicate with the world.
Create an LXC Container
To be able to create an LXC container of a particular target environment (e.g., Debian Wheezy 64bit), you need a corresponding LXC template. Fortunately, LXC user space tools on Ubuntu come with a collection of ready-made LXC templates. You can find available LXC templates in /usr/share/lxc/templates directory.
$ ls /usr/share/lxc/templates

An LXC template is nothing more than a script which builds a container for a particular Linux environment. When you create an LXC container, you need to use one of these templates.
To create a Ubuntu container, for example, use the following command-line:
$ sudo lxc-create -n <container-name> -t ubuntu
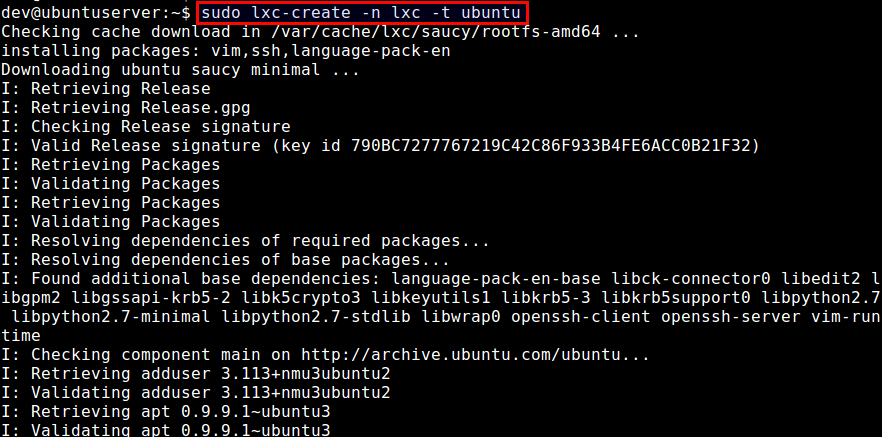
By default, it will create a minimal Ubuntu install of the same release version and architecture as the local host, in this case Saucy Salamander (13.10) 64-bit.
If you want, you can create Ubuntu containers of any arbitrary version by passing the release parameter. For example, to create a Ubuntu 14.10 container:
$ sudo lxc-create -n <container-name> -t ubuntu -- --release utopic
It will download and validate all the packages needed by a target container environment. The whole process can take a couple of minutes or more depending on the type of container. So be patient.
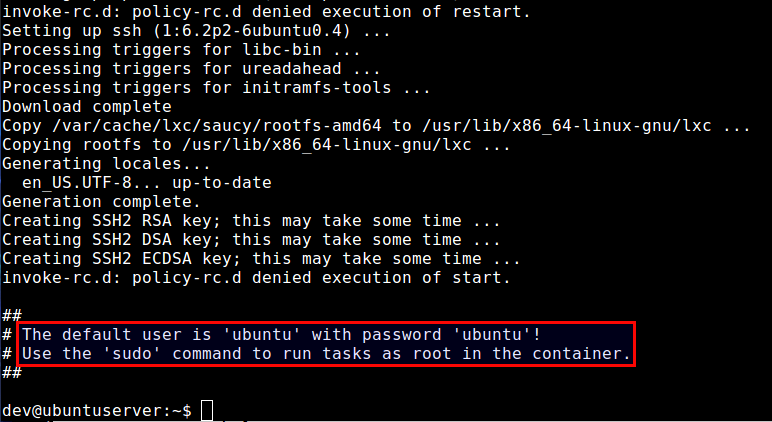
After a series of package downloads and validation, an LXC container image are finally created, and you will see a default login credential to use. The container is stored in /var/lib/lxc/<container-name>. Its root filesystem is found in /var/lib/lxc/<container-name>/rootfs.
All the packages downloaded during LXC creation get cached in /var/cache/lxc, so that creating additional containers with the same LXC template will take no time.
Let's see a list of LXC containers on the host:
$ sudo lxc-ls --fancy
NAME  STATE    IPV4  IPV6  AUTOSTART
------------------------------------
test-lxc   STOPPED  -     -     NO
To boot up a container, use the command below. The -d option launches the container as a daemon. Without this option, you will directly be attached to console right after you launch the container.
$ sudo lxc-start -n <container-name> -d
After launching the container, let's check the state of the container again:
$ sudo lxc-ls --fancy
NAME  STATE    IPV4       IPV6  AUTOSTART
-----------------------------------------
lxc   RUNNING  10.0.3.55  -     NO
You will see that the container is in RUNNING state with an IP address assigned to it.
You can also verify that the container's interface (e.g., vethJ06SFL) is automatically attached to LXC's internal bridge (lxcbr0) as follows.
$ brctl show lxcbr0

Manage an LXC Container
Now that we know how to create and start an LXC container, let's see what we can do with a running container.
First of all, we want to access the container's console. For this, type this command:
$ sudo lxc-console -n <container-name>

Type Ctrl+a q to exit the console.
To stop and destroy a container:
$ sudo lxc-stop -n <container-name>
$ sudo lxc-destroy -n <container-name>
To clone an existing container to another, use these commands:
$ sudo lxc-stop -n <container-name>
$ sudo lxc-clone -o <container-name> -n <new-container-name>
Troubleshooting
For those of you who encounter errors with LXC, here are some troubleshooting tips.
1. You fail to create an LXC container with the following error.
$ sudo lxc-create -n test-lxc -t ubuntu
lxc-create: symbol lookup error: /usr/lib/x86_64-linux-gnu/liblxc.so.1: undefined symbol: cgmanager_get_pid_cgroup_abs_sync
This means that you are running the latest LXC, but with an older libcgmanager. To fix this problem, you need to update libcgmanager.
$ sudo apt-get install libcgmanager0
Support Xmodulo
This website is made possible by minimal ads and your gracious donation via PayPal or credit card
Please note that this article is published by Xmodulo.com under a Creative Commons Attribution-ShareAlike 3.0 Unported License. If you would like to use the whole or any part of this article, you need to cite this web page at Xmodulo.com as the original source.

Xmodulo © 2021 ‒ About ‒ Write for Us ‒ Feed ‒ Powered by DigitalOcean