How to manage remote MySQL databases on Linux VPS using a GUI tool
Last updated on August 24, 2020 by Dan Nanni
If you need to run a MySQL server on a remote VPS instance, how will you manage databases hosted by the server remotely? Perhaps web-based database administration tools such as phpMyAdmin or Adminer will first come to mind. These web-based management tools require a backend web server and PHP engine up and running. However, if your VPS instance is used as a standalone database server (e.g., for a multi-tier app), provisioning a whole LAMP stack for occasional database management is a waste of VPS resource. Worse, the LAMP stack with an additional HTTP port can be a source of security vulnerabilities of your VPS.
Alternatively, you can turn to a native MySQL client running on a client host. Of course a pure command-line MySQL client (mysql) can be your default choice if nothing else. But the capabilities of the command-line client are limited, so it is not suitable for production-level database administration such as visual SQL development, performance tuning, schema validation, etc. If you are looking for full-blown MySQL administration features, a MySQL GUI tool will meet your requirements better.
What is MySQL Workbench?
Developed as an integrated database tool environment by Oracle, MySQL Workbench is more than a simple MySQL client. In a nutshell, Workbench is a cross-platform (e.g., Linux, MacOS X, Windows) GUI tool for database design, development and administration. The Community Edition of MySQL Workbench is available for free under the GPL. As a database administrator, you can use Workbench to configure MySQL server, manage MySQL users, perform database backup and recovery, and monitor database health, all in GUI-based user-frienly environment.
In this tutorial, let's review how to install and use MySQL Workbench on Linux.
Install MySQL Workbench on Linux
To set up remote database administration environment, grab any desktop Linux machine where you will be running MySQL Workbench. While some Linux distributions (e.g., Debian/Ubuntu) carry MySQL Workbench in their repositories, it is a good idea to install it from the official repositories, as they offer the latest version. Here is how to set up the official Workbench repository and install Workbench from it.
Debian-based Desktop (Debia, Ubuntu, Mint):
Go to the official website. Download and install the DEB file for the repository. Choose one that matches with your environment.
For example, on Ubuntu 14.10:
$ wget http://dev.mysql.com/get/mysql-apt-config_0.3.4-2ubuntu14.10_all.deb
$ sudo dpkg -i mysql-apt-config_0.3.4-2ubuntu14.10_all.deb
For Debian 7:
$ wget http://dev.mysql.com/get/mysql-apt-config_0.3.3-1debian7_all.deb
$ sudo dpkg -i mysql-apt-config_0.3.3-1debian7_all.deb
When installing the DEB file, you will see the following package configuration menu, and be asked to choose MySQL product to configure.

Choose Utilities. Once you are done with configuration, choose Apply to save it.
Finally, update package index, and install Workbench.
$ sudo apt-get update
$ sudo apt-get install mysql-workbench
Red Hat-based Desktop (CentOS, Fedora, RHEL):
Go to the official website. Download and install the RPM repository package for your Linux evironment.
For example, on CentOS 7:
$ wget http://dev.mysql.com/get/mysql-community-release-el7-5.noarch.rpm
$ sudo yum localinstall mysql-community-release-el7-5.noarch.rpm
on Fedora 21:
$ wget http://dev.mysql.com/get/mysql-community-release-fc21-6.noarch.rpm
$ sudo yum localinstall mysql-community-release-fc21-6.noarch.rpm
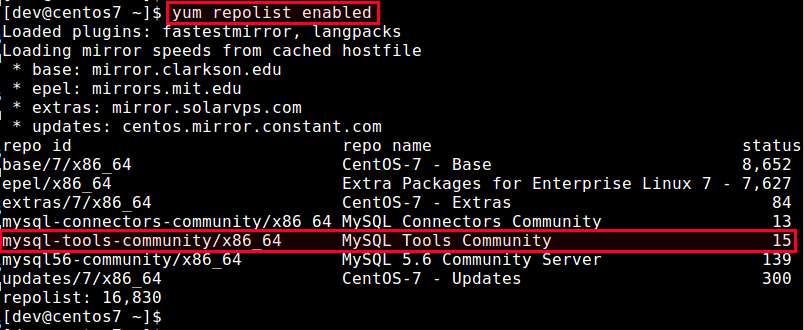
Verify that "MySQL Tools Community" repository has been set up.
$ yum repolis enabled
Go ahead and install Workbench.
$ sudo yum install mysql-workbench-community
Set up a Secure Remote Database Connection
The next step is to set up a remote connection to your MySQL server running on a VPS. Of course you can connect directly to the remote MySQL server from Workbench GUI (after enabling remote access in the database server). However, it is a huge security risk to do so, as someone can easily eavesdrop on database access traffic, and a publicly-open MySQL port can be another attack vector.
A better approach is to disable remote access of MySQL server (i.e., only allow access from local loopback interface (127.0.0.1) of a VPS). Then set up an SSH tunnel between a local client machine and a remote VPS, so that MySQL traffic can be securely relayed via their loopback interfaces. Compared to setting up SSL-based encrypted connections, configuring SSH tunneling requires little effort as it only requires SSH server, which is already deployed on most VPS instances.
Let's see how we can set up an SSH tunnel for MySQL Workbench.
In this setup, you don't need to enable remote access of a MySQL server.
On a local client host where MySQL Workbench will be running, type the following command. Replace user and remote_vps with your own info.
$ ssh user@remote_vps -L 3306:127.0.0.1:3306 -N
You will be asked to type an SSH password for your VPS. Once you successfully log in to the VPS, an SSH tunnel will be established between port 3306 of local host and port 3306 of a remote VPS. Note that you won't see any message in the foreground.
Optionally, you can set the SSH tunnel running in the background. For that, press Ctrl+Z to stop the command, type bg and press ENTER.

The SSH tunnel will now be running in the background.
Manage a Remote MySQL Server with MySQL Workbench
With an SSH tunnel established, you are ready to connect to a remote MySQL server from MySQL Workbench.
Launch Workbench by typing:
$ mysql-workbench
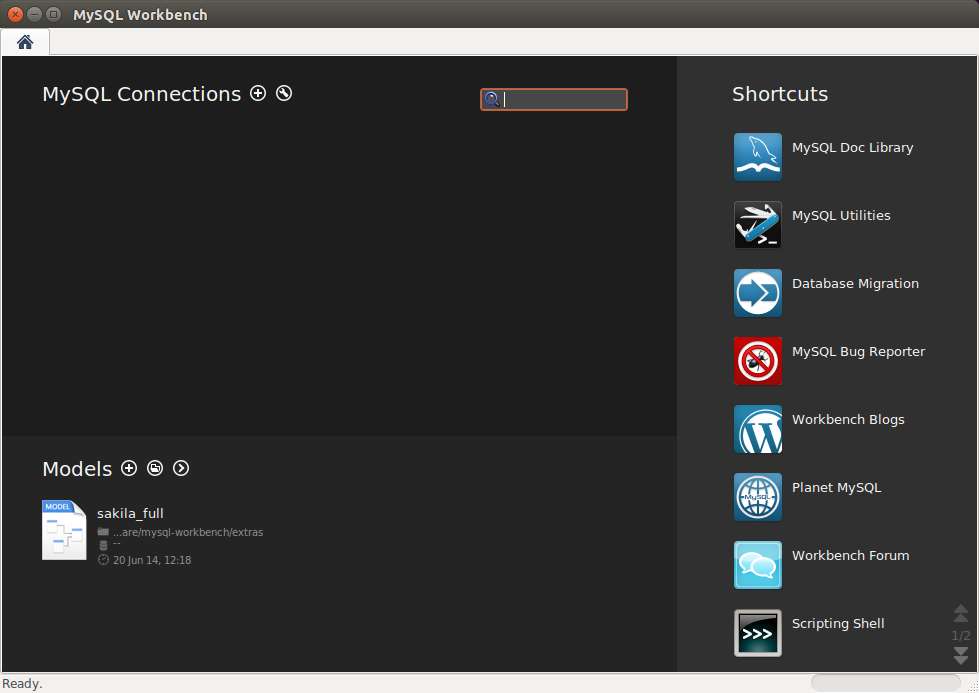
Click on the plus icon at the top of the Workbench screen to create a new database connection. Fill in connection information as follows.
- Connection Name: any description (e.g., My remote VPS database)
- Hostname:
127.0.0.1 - Port:
3306 - Username: MySQL username (e.g.,
root)

Note that since the tunnel's local endpoint is 127.0.0.1:3306, the hostname field must be 127.0.0.1, not the IP address/hostname of a remote VPS.
Once you set up a new database connection, you will see a new box for the connection appear on Workbench window. Click on the box to actually establish a connection to a remote MySQL server.
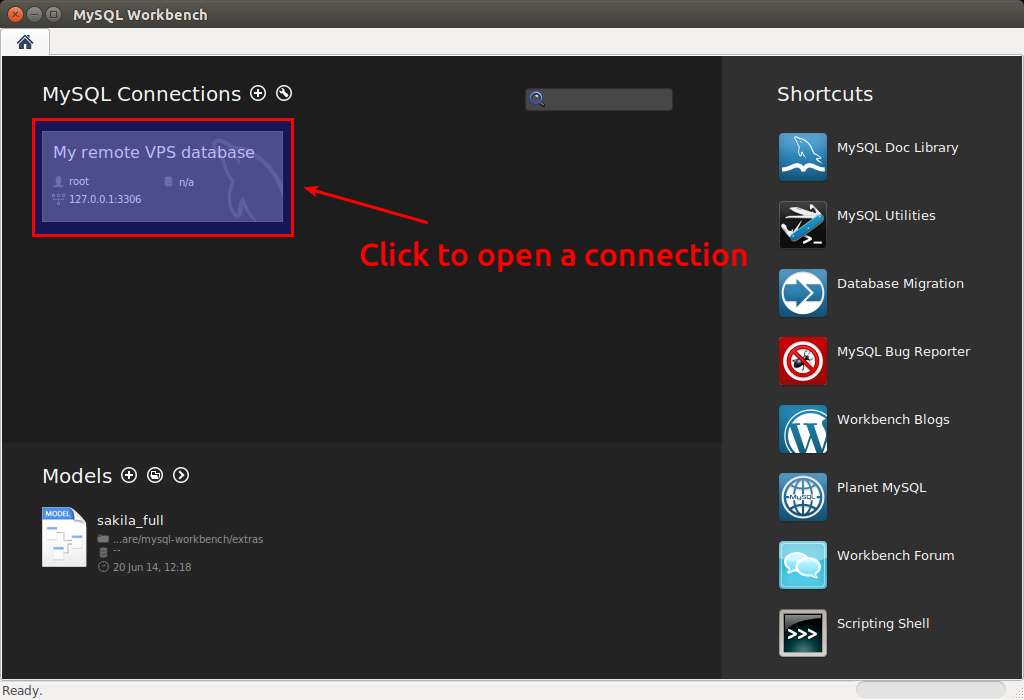
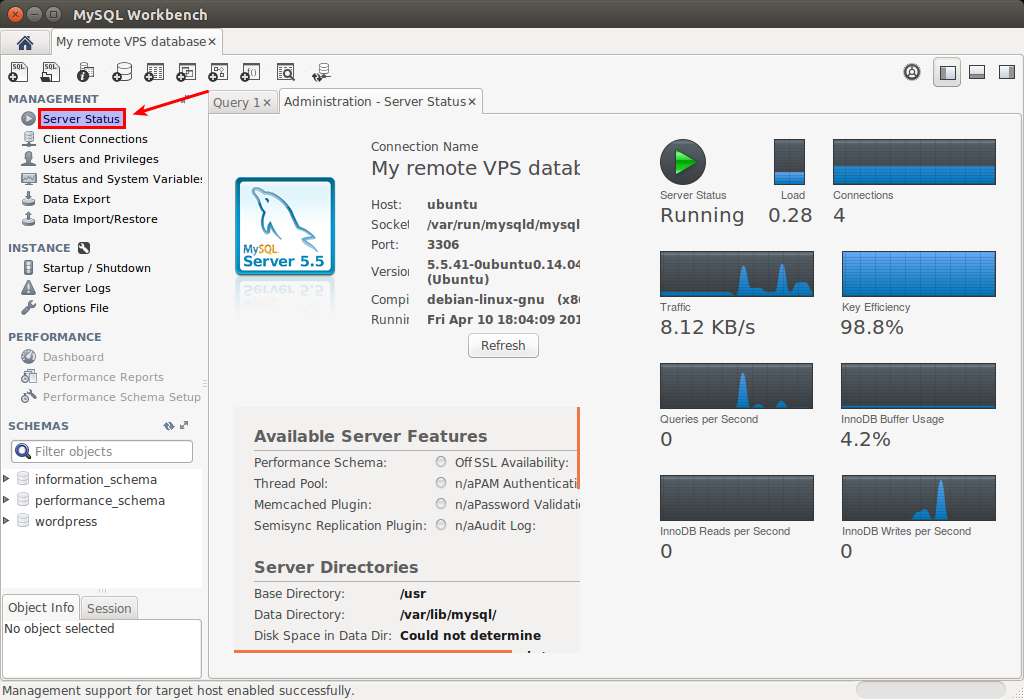
Once you are logged in to the MySQL server, you will see various administrative tasks in the left-side panel. Let's review some of common administrative tasks.
1. MySQL Server Status
This menus shows real-time dashboard of database server resource usage (e.g., traffic, connections, read/write).
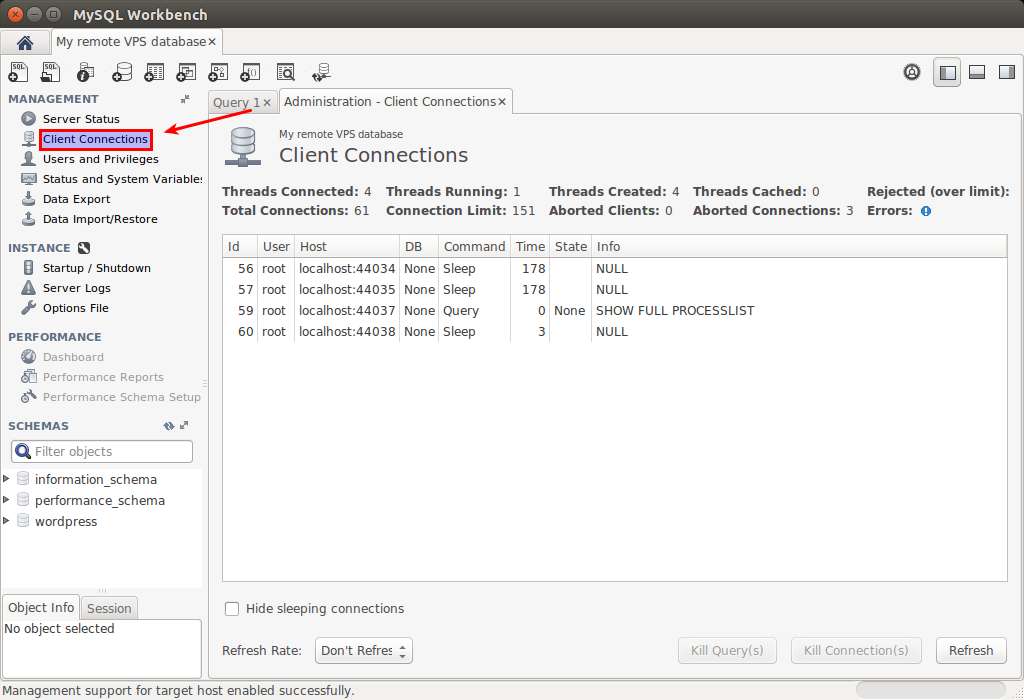
2. Client Connections
The total number of client connections is a critical resource to monitor. This menu shows detailed information of individual client connections.
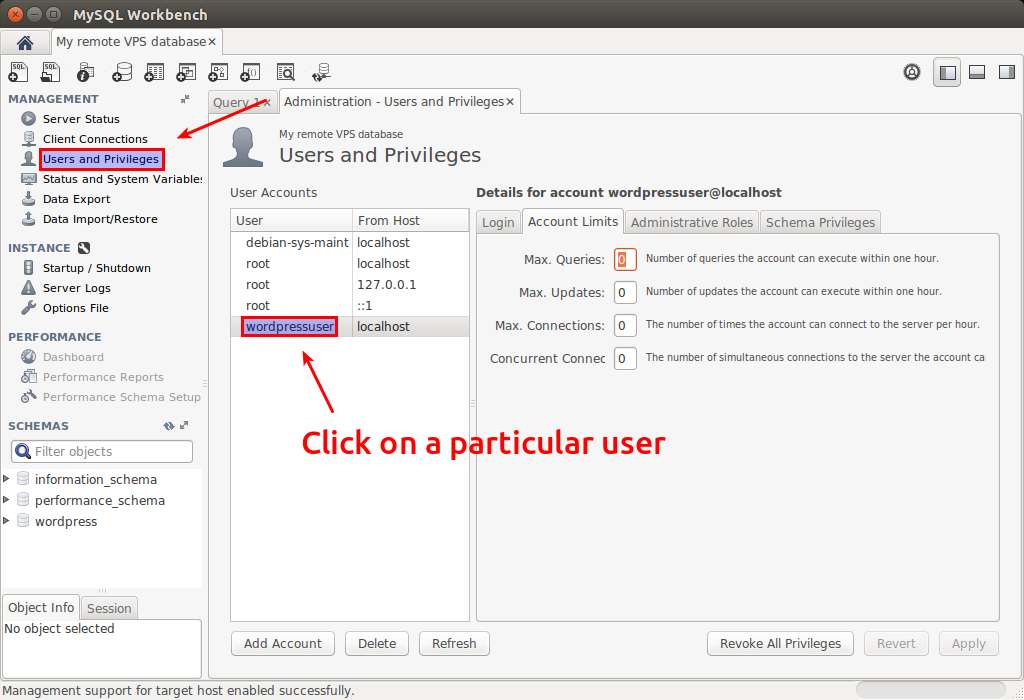
3. Users and Privileges
This menu allows you to manage MySQL users, including their resource limits and privileges.
4. MySQL Server Administration
You can start or stop a MySQL server, and examine its server logs.

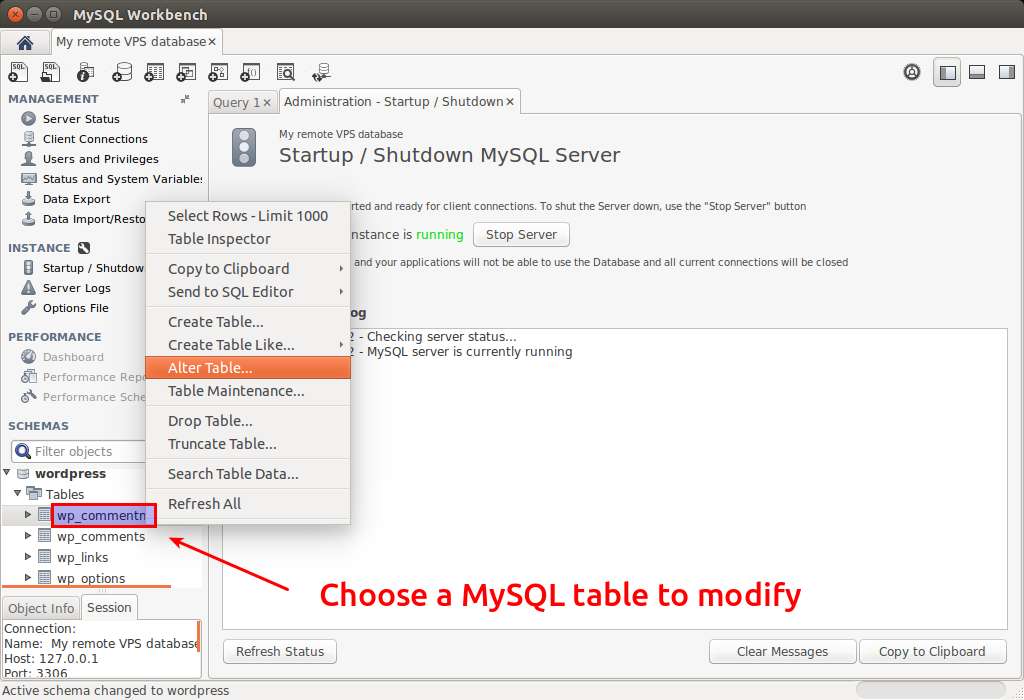
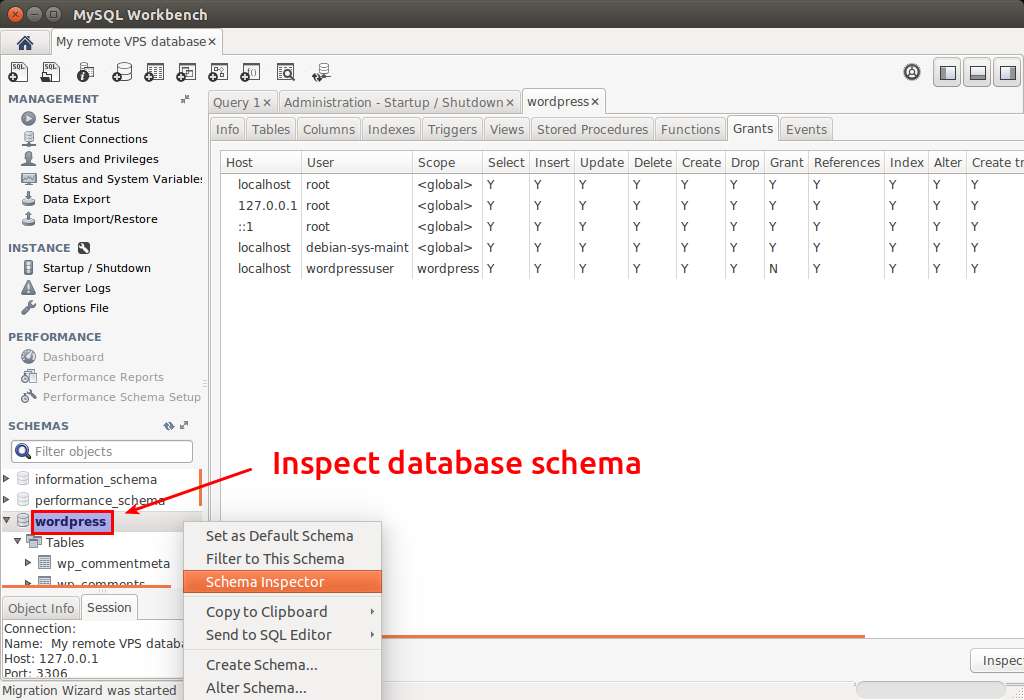
5. Database Schema Management
You can view, change or inspect database schema visually. For that, choose and right-click on any database or table under Schemas heading.
6. Database Query
You can execute any arbitrary query (as long as your login privilege allows), and inspect its result.
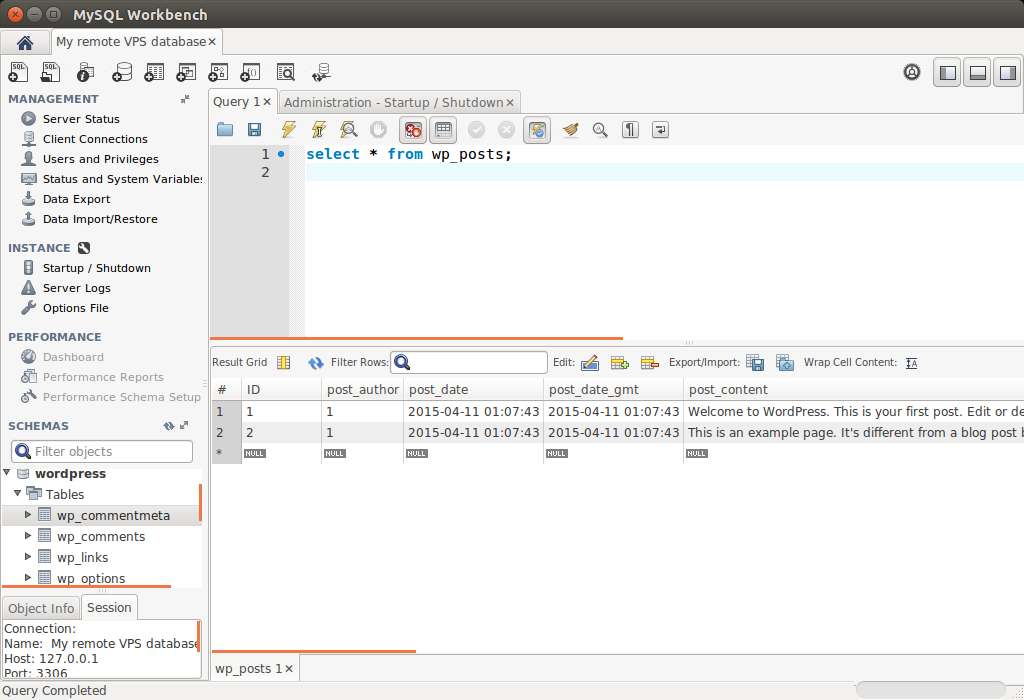
Note that performance statistics and reports are available for MySQL server 5.6 and higher. For 5.5 and lower, the performance section will be grayed out.
Conclusion
The clean and intuitive tabbed interface, comprehensive feature sets, and open-source licensing make MySQL Workbench one of the best visual database design and administration tools out there. One known downside of Workbench is its performance. I notice that Workbench sometimes gets sluggish while running queries on a busy server. Despite its less than stellar performance, I still consider MySQL Workbench an essential tool for any professional MySQL database administrator and designer.
Have you ever used Workbench in your work environment? Or do you recommend any other GUI tool? Feel free to share your experience.
Support Xmodulo
This website is made possible by minimal ads and your gracious donation via PayPal or credit card
Please note that this article is published by Xmodulo.com under a Creative Commons Attribution-ShareAlike 3.0 Unported License. If you would like to use the whole or any part of this article, you need to cite this web page at Xmodulo.com as the original source.
Xmodulo © 2021 ‒ About ‒ Write for Us ‒ Feed ‒ Powered by DigitalOcean

