How to speed up a WordPress website with Amazon AWS CDN
Last updated on August 11, 2020 by Dan Nanni
If your WordPress-powered personal blog or website is loading slowly, you are hardly alone. Rather than simply bemoaning your web hosting, you can take more proactive approaches to solve the problem, such as optimizing underlying web server stack (e.g., PageSpeed), tweaking content (e.g., minification), or even switching to a different publishing platform (e.g., Ghost or Jekyll).
All these server-focused optimizations may not be the perfect solution as your blog or website will still be serving visitors from a single physical server which can easily become the bottleneck. On top of that, some of these optimizations will not be feasible if you are on a shared hosting plan, where, unlike on a VPS instance or a dedicated server, you don't have any control over the web server stack.
A more effective and widely applicable solution to reduce WordPress load time is to turn to content distributed networks (CDNs). A typical CDN is operated by a pool of globally dispersed caching servers (so-called "edge servers") deployed to serve content close to end users. By replicating your site content to a globally distributed CDN, you allow end users to retrieve your content from geographically closeby caching servers, instead of fetching it from the (potentially congested and distant) origin server of yours.
Fortunately, integrating WordPress into a third-party CDN is relatively easy thanks to available CDN-compatible caching plugins. What these plugins do is to automatically translate WordPress URLs into CDN-hosted URLs, thereby offloading content serving to the CDN. You can apply this approach whether you are on a shared hosting plan, a VPS or a dedicated server. In this tutorial, I demonstrate how to speed up WordPress using "W3 Total Cache" plugin. As a backend CDN, I choose Amazon CloudFront.
Amazon CloudFront CDN
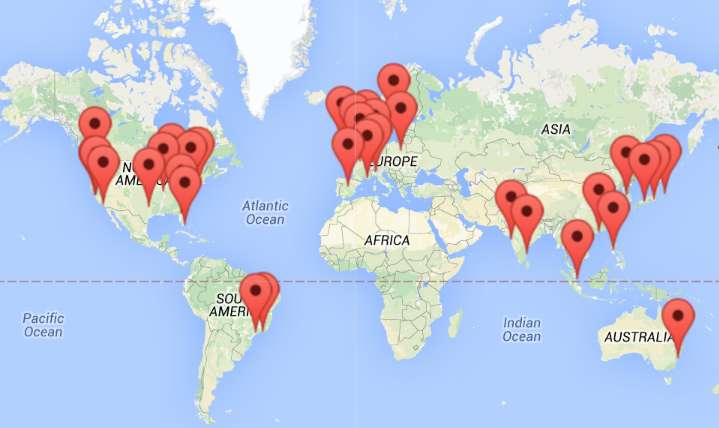
Amazon CloudFront is one of the widely used commercial CDNs with a global footprint. CloudFront's CDN boasts of more than 35 points of presence for their edge servers distributed across the US, Europe, South America, Asia and Australia. Under their on-demand per-GB pricing model, anyone can easily opt for their CDN service without any upfront fee or long-term commitment.
In the rest of this article, I will present a step-by-step procedure for integrating a WordPress site into Amazon CloudFront.
Step One: Create Security Credential for AWS
Since CloudFront is part of Amazon Web Services (AWS), you need to create an AWS access key to authorize W3 Total Cache plugin to access your AWS account. Refer to this guideline to create a new access key ID and secret key. If you already have one, skip this step.
Step Two: Create a Web Distribution in CloudFront
Sign in to your AWS account, and go to CloudFront console. Create a new web distribution for your WordPress site.

The most important information to fill in is the origin settings, in particular, the following two:
- Origin Domain Name: <your domain name> (e.g.,
xmodulo.com) - Origin ID: <unique identifier> (e.g.,
xmodulo.com)
Type in the domain name of your WordPress site in the origin domain name, and any unique identifier (e.g., your domain name as well) in the origin ID.
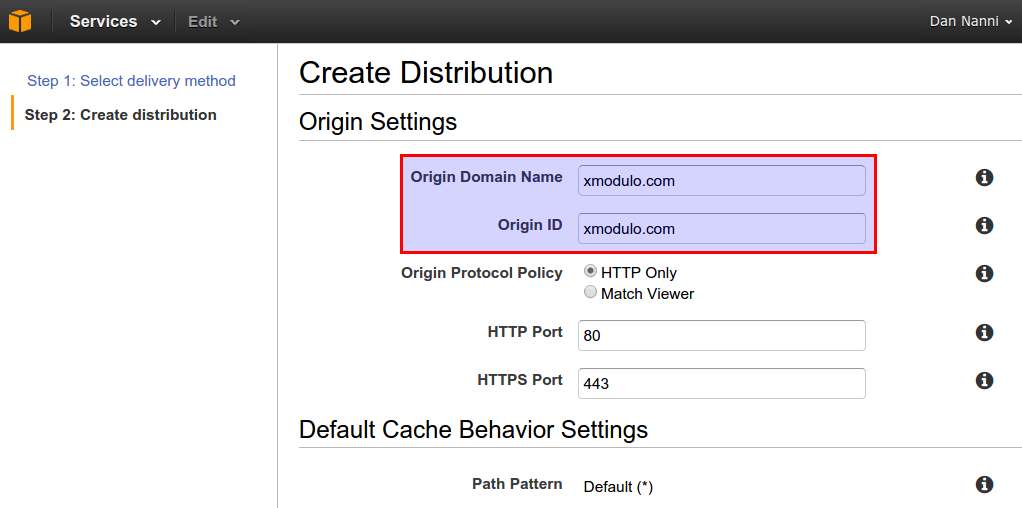
If you want, you can customize the default cache behavior settings and distribtion settings. Click on "i" icon for more information about each setting. These extra settings can remain default if you are not sure.

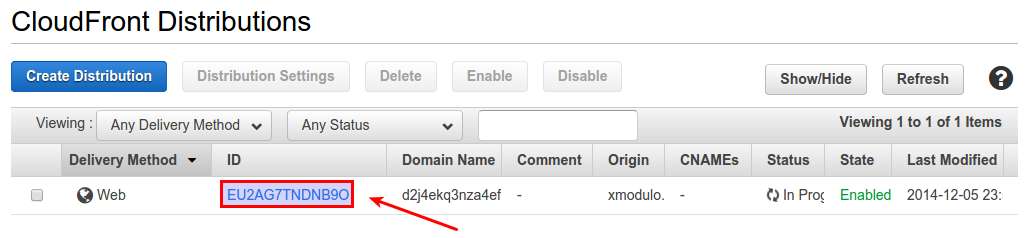
Once you click on "Create Distribution" button, the new distribution will remain in "In Progress" status for a couple of minutes. During this time, your distribution will be provisioned across all edge servers in the CDN. Click on ID of the disribution for more detail of the distribution.
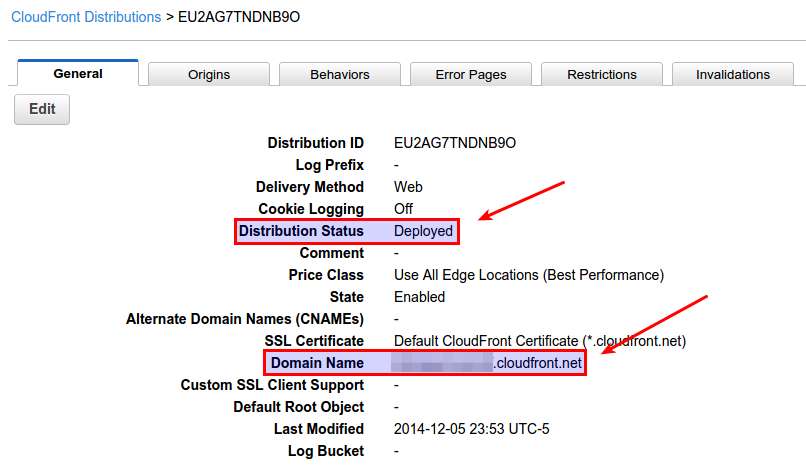
Once the distribution is successfully provisioned, you will see Deployed in the distribution status. Make a note of "Domain Name" of your distribution, which will be needed in the next step.
Step Three: Install and Configure W3 Total Cache
Download W3 Total Cache (WTC). Install and activate the plugin on your WordPress site.
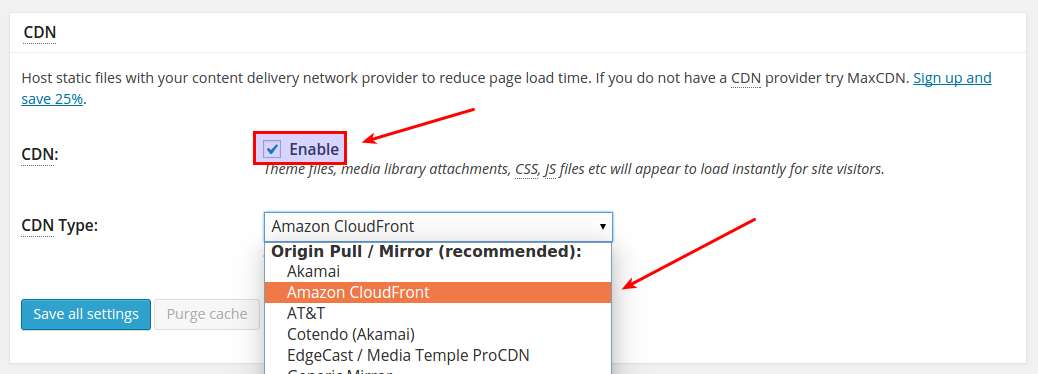
In WTC settings, go to "CDN" section.

Click on Enable checkbox, and choose "Amazon CloudFront" under "Origin Pull" among available CDN types. Save the change.
Move to the CDN configuration menu. Fill in three highlighted fields as shown below: (1) access key ID, (2) secret key, and (3) CloudFront hostname. (1) and (2) are associated with your AWS security credential, and (3) must have been obtained when you created a CDN distribution earlier.
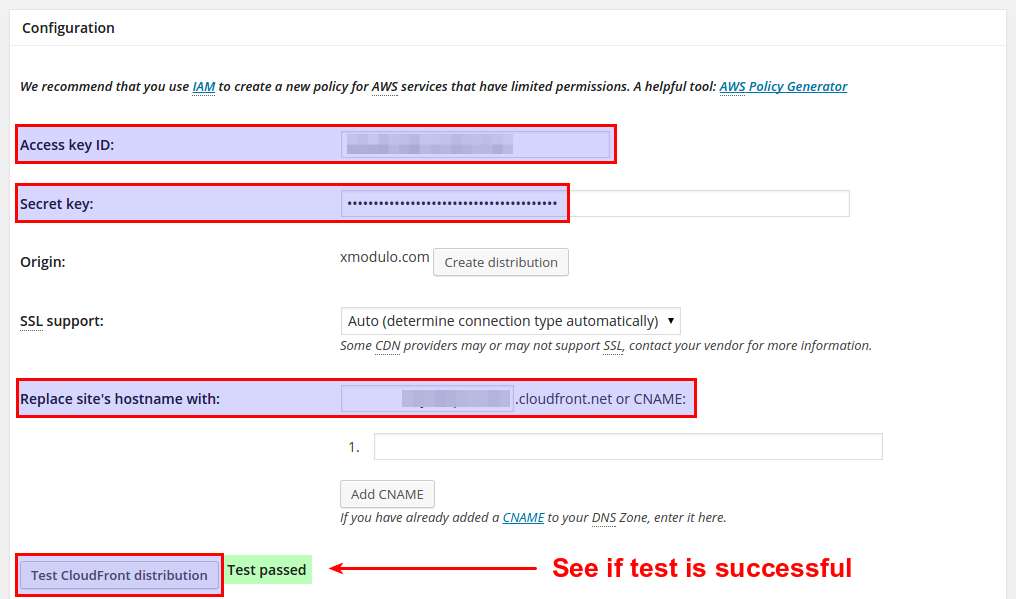
Once you fill in the information, click on "Test CloudFront distribution" button. If CloudFront CDN is configured correctly, you should see "Test passed" message. Save the settings after verifying the test result.
The final step is to empty all WTC caches to ensure that there is no previously cached data left.

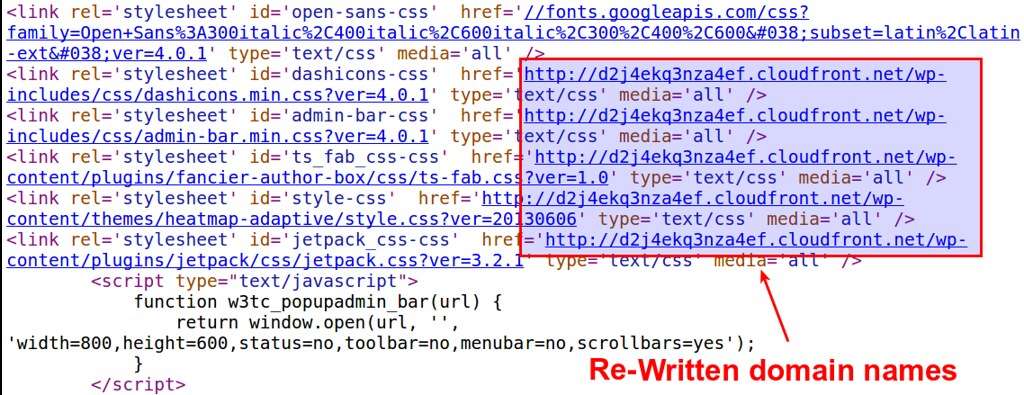
Step Four: Verify CDN Delivery
To verify CDN in action, go to any webpage of your WordPress site, and view the source of the page. From the page source, if you find that every domain name of your WordPress blog is converted to a cloudfront.net domain, that means CloudFront CDN delivered the resource on behalf of the origin server.
You can now check various CloudFront cache statistics from CloudFront console (e.g., cache hit ratio, total bytes transferred by CDN).
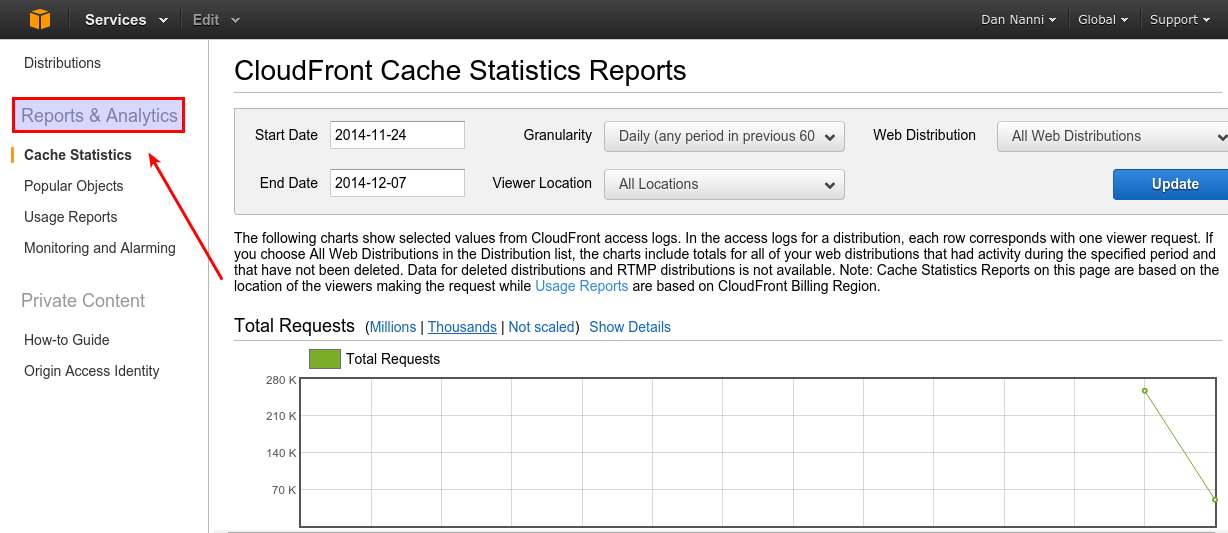
Enjoy blazingly fast WordPress! :-)
Trouleshooting
1. When you test CloudFront CDN, WTC test fails with the following message.
"Error: Unable to list distributions (S3::listDistributions(): [AccessDenied] User: arn:aws:iam::521374068044:user/Alice is not authorized to perform: cloudfront:ListDistributions)."
This error means that the AWS security credential you provided for WTC does not have full CloudFront access. Go to the AWS security credential page, and make sure to assign proper CloudFront permissions to the AWS user who owns the credential.

Support Xmodulo
This website is made possible by minimal ads and your gracious donation via PayPal or credit card
Please note that this article is published by Xmodulo.com under a Creative Commons Attribution-ShareAlike 3.0 Unported License. If you would like to use the whole or any part of this article, you need to cite this web page at Xmodulo.com as the original source.

Xmodulo © 2021 ‒ About ‒ Write for Us ‒ Feed ‒ Powered by DigitalOcean