How to set up a USB network printer and scanner server on Debian
Last updated on November 4, 2020 by Gabriel Cánepa
Suppose you want to set up a Linux print server in your home/office network, but you only have USB printers available (as they are much cheaper than printers that have a built-in Ethernet jack or wireless ones). In addition, what if one of those devices is an AIO (All In One), and you also want to share its incorporated scanner over the network? In this article, I'll show you how to install and share a USB AIO (Epson CX3900 inkjet printer and scanner), a USB laser printer (Samsung ML-1640), and a PDF printer as the "cherry on top" - all in a GNU/Linux Debian 7.2 [Wheezy] server.
Even though these printers are somewhat old (I bought the Epson AIO in 2007 and the laser printer in 2009), I believe that what I learned through the installation process can well be applied to newer models of the same brands and others: some drivers are available as precompiled .deb packages, while others can be installed directly from the repositories. After all, it's the underlying principles that matter.
Prerequisites
To setup a network printer and scanner, we will be using CUPS, which is an open-source printing system for Linux / UNIX / OSX.
Install the following packages in your Linux server: cups and cups-pdf:
# aptitude install cups cups-pdf
Troubleshooting tip: Depending on the state of your system (this issue can happen most likely after a failed manual install of a package or a misinstalled dependency), the front-end package management system may prompt you to uninstall a lot of packages in an attempt to resolve current dependencies before installing cups and cups-pdf. If this happens to be the case, you have two options:
1) Install the packages via another front-end package management system, such as apt-get. Note that this is not entirely advisable since it will not fix the current issue.
2) Run the following commands: aptitude update and aptitude upgrade. This will fix the issue and upgrade the packages to their most recent version at the same time.
Configuring CUPS
In order to be able to access the CUPS web interface, we need to do at least a minimum edit to the cupsd.conf file (server configuration file for CUPS). Before proceeding, however, let's make a backup copy of cupsd.conf:
# cp cupsd.conf cupsd.conf.bkp
and edit the original file (only the most relevant sections are shown):
- Listen: Listens to the specified address and port or domain socket path.
- Location /path: Specifies access control for the named location.
- Order: Specifies the order of HTTP access control (allow,deny or deny,allow). Order allow,deny means that the Allow rules have precedence over (are processed before) the Deny rules.
- DefaultAuthType (also valid for AuthType): Specifies the default type of authentication to use. Basic refers to the fact that the
/etc/passwdfile is used to authenticate users in CUPS. - DefaultEncryption: Specifies the type of encryption to use for authenticated requests.
- WebInterface: Specifies whether the web interface is enabled.
# Listen for connections from the local machine
Listen 192.168.0.15:631

# Restrict access to the server
<Location />
  Order allow,deny
  Allow 192.168.0.0/24
</Location>

# Default authentication type, when authentication is required
DefaultAuthType Basic
DefaultEncryption IfRequested

# Web interface setting
WebInterface Yes

# Restrict access to the admin pages
<Location /admin>
  Order allow,deny
  Allow 192.168.0.0/24
</Location>
Now let's restart CUPS to apply the changes:
# service cups restart
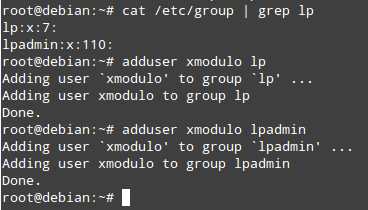
In order to allow another user (other than root) to modify printer settings, we must add him/her to the lp (grants access to printer hardware and enables the user to manage print jobs) and lpadmin (owns printing preferences) groups as follows. Disregard this step if this is not necessary or desired in your current network setup.
# adduser xmodulo lp
# adduser xmodulo lpadmin
Configuring a Network Printer via CUPS Web Interface
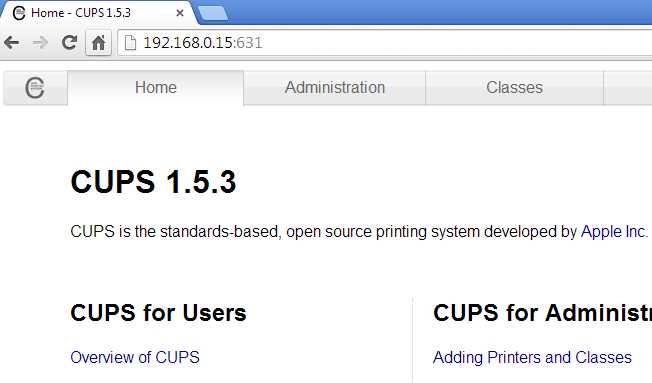
1. Launch a web browser and open the CUPS interface, available at http://<Server IP>:Port, which in our case means http://192.168.0.15:631:
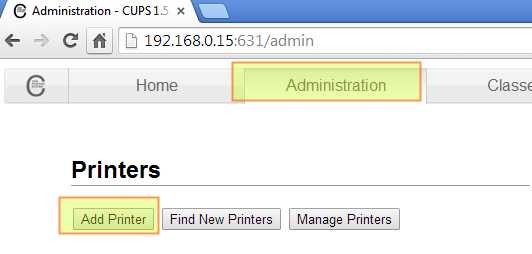
2. Go to the Administration tab and click on Add printer:
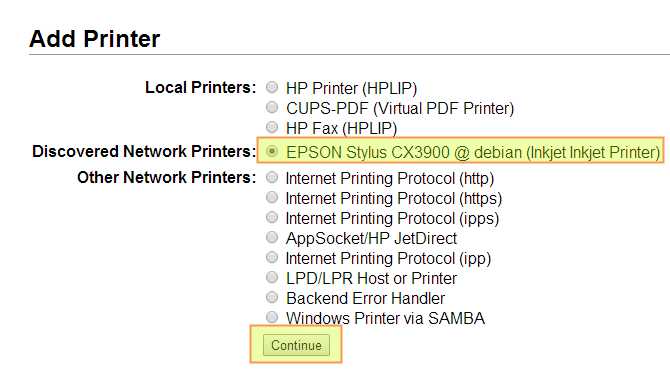
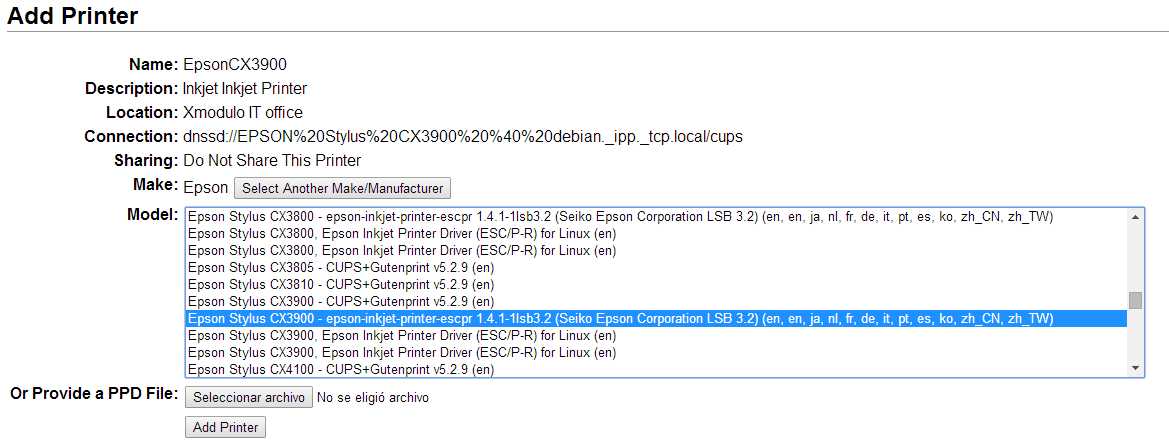
3. Choose your printer; in this case, "EPSON Stylus CX3900 @ debian (Inkjet Inkjet Printer)", and click on Continue:
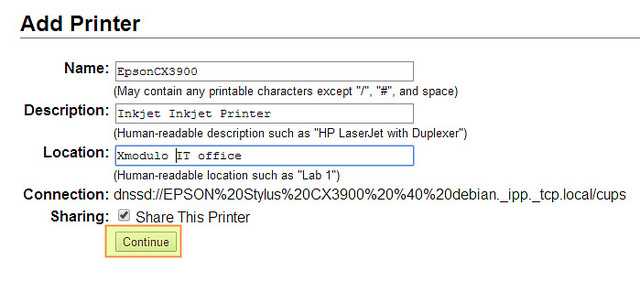
4. It's time to name the printer and indicate whether we want to share it from the current workstation or not:
5. Install the driver - Select the brand and click on Continue.

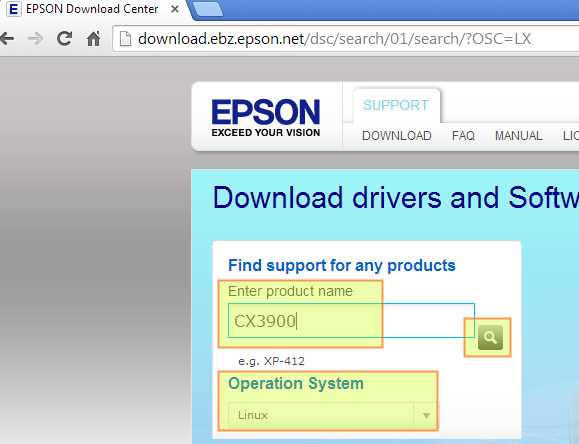
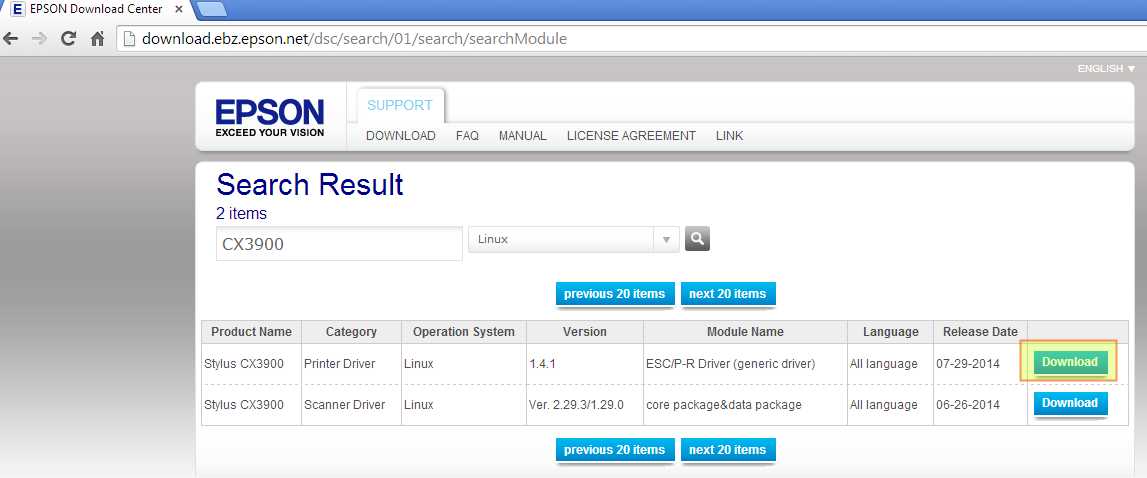
6. If the printer is not supported natively by CUPS (not listed in the next page), we will have to download the driver from the manufacturer's web site (e.g., http://download.ebz.epson.net/dsc/search/01/search/) and return to this screen later.
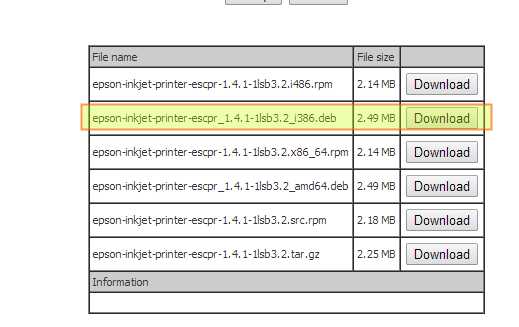
7. Note that this precompiled .deb file must be sent somehow to the printer server (for example, via sftp or scp) from the machine that we used to download it (of course this could have been easier if we had a direct link to the file instead of the download button):

8. Once we have placed the .deb file in our server, we will install it:
# dpkg -i epson-inkjet-printer-escpr_1.4.1-1lsb3.2_i386.deb
Troubleshooting tip: If the lsb package (a standard core system that third-party applications written for Linux can depend upon) is not installed, the driver installation will not succeed:
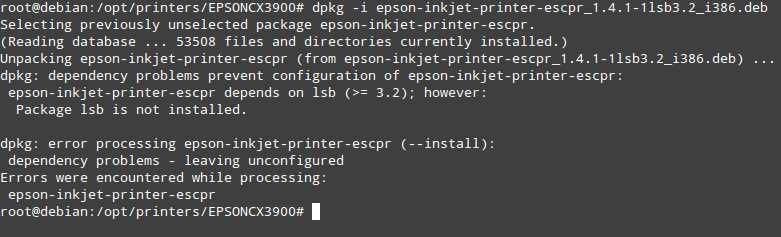
We will install lsb and then attempt to install the printer driver again:
# aptitude install lsb
# dpkg -i epson-inkjet-printer-escpr_1.4.1-1lsb3.2_i386.deb
9. Now we can return to step #5 and install the printer:
Configuring a Network Scanner
Now we will proceed to configure the printer server to share a scanner as well. First, install xsane which is a frontend for SANE: Scanner Access Now Easy.
# aptitude install xsane
Next, let's enable the saned service by editing the /etc/default/saned file:
# Set to yes to start saned
RUN=yes
Finally, we will check whether saned is already running (most likely not ‒ then we'll start the service and check again):
# ps -ef | grep saned | grep -v grep
# service saned start
Configuring a Second Network Printer
With CUPS, you can configure multiple network printers. Let's configure an additional printer via CUPS: Samsung ML-1640, which is a USB laser printer.
The splix package contains the drivers for monochrome (ML-15xx, ML-16xx, ML-17xx, ML-2xxx) and color (CLP-5xx, CLP-6xx) Samsung printers. In addition, the detailed information about the package (available via aptitude show splix) indicates that some rebranded Samsungs like the Xerox Phaser 6100 work with this driver.
# aptitude install splix
Then we will install the printer itself using the CUPS web interface, as explained earlier:

Installing the PDF Printer
Next, let's configure PDF printer on the printer server, so that you can convert documents into PDF format from client computers.
Since we already installed the cups-pdf package, the PDF printer was installed automatically, which can be verified through the web interface:
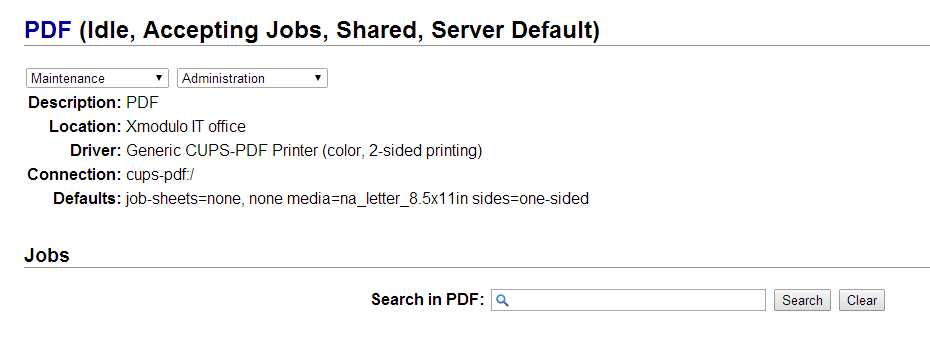
When the PDF printer is selected, documents will be written to a configurable directory (by default to ~/PDF), or can be further manipulated by a post-processing command.
In the next article, we'll configure a Ubuntu desktop client to access these printers and scanner over the network.
Support Xmodulo
This website is made possible by minimal ads and your gracious donation via PayPal or credit card
Please note that this article is published by Xmodulo.com under a Creative Commons Attribution-ShareAlike 3.0 Unported License. If you would like to use the whole or any part of this article, you need to cite this web page at Xmodulo.com as the original source.

Xmodulo © 2021 ‒ About ‒ Write for Us ‒ Feed ‒ Powered by DigitalOcean